
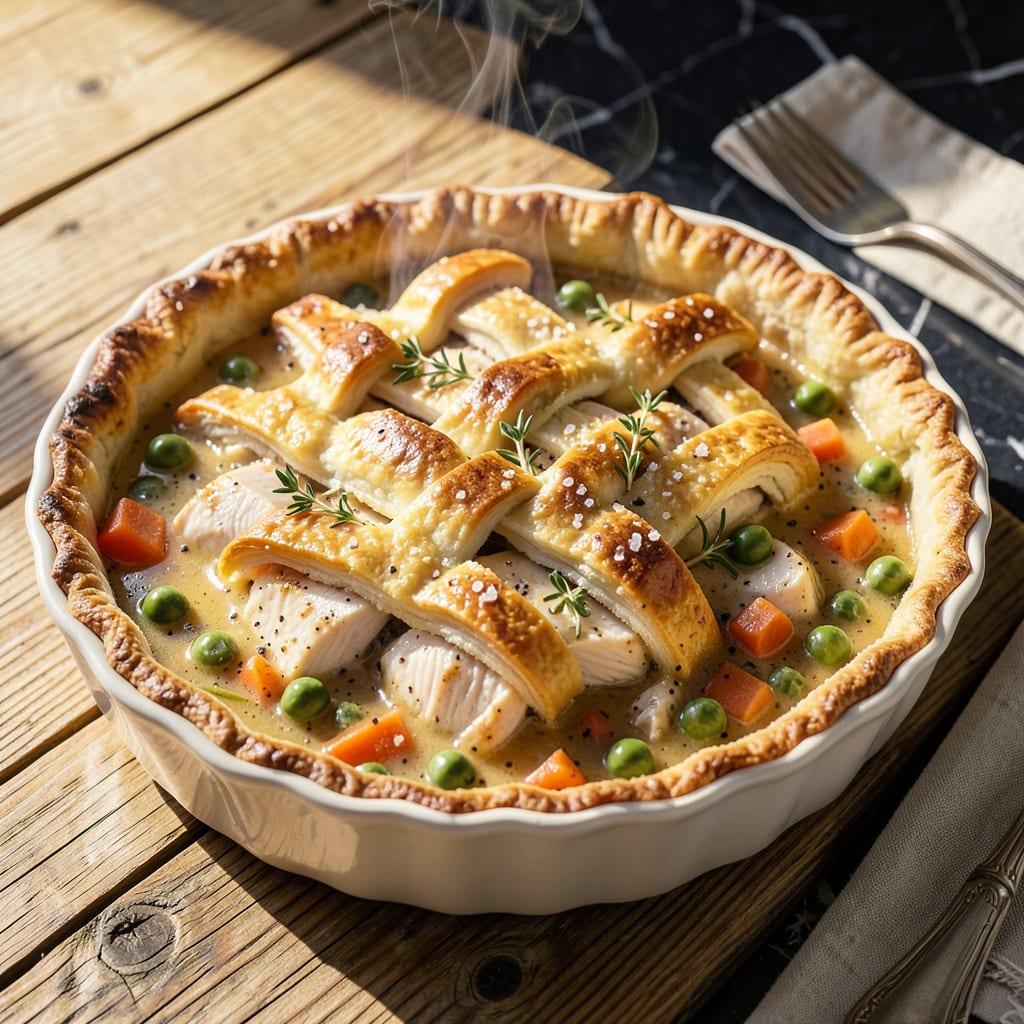
There’s a reason chicken pot pie remains the ultimate comfort food—it combines tender chicken, vibrant vegetables, and a velvety cream sauce all encased in a golden, flaky crust. This version delivers that nostalgic warmth with professional precision, ensuring every bite offers the perfect balance of textures and flavors.
The secret lies in building layers: a rich, creamy filling thickened with a proper roux, and a crust that bakes to golden perfection without sacrificing its crispness. Whether you’re feeding a crowd or meal prepping for the week, this recipe transforms simple ingredients into a dish that feels like a warm hug on a plate.
Ingredients for Pioneer Woman Chicken Pot Pie
This professional-grade pot pie relies on quality staples: tender chicken, peak-season vegetables, and a velvety roux-based sauce encased in golden crust.
| Ingredient | Amount | Notes |
|---|---|---|
| Boneless, Skinless Chicken Breasts 🍗 | 1 ½ lb | Cut into 1-inch cubes |
| Unsalted Butter 🧈 | ½ cup | Divided for roux and crust |
| All-Purpose Flour 🌾 | ½ cup | For roux, plus extra for dusting |
| Whole Milk 🥛 | 1 ½ cups | Whole for optimal creaminess |
| Chicken Stock 🍲 | 1 ½ cups | Low-sodium preferred |
| Frozen Peas and Carrots Mix 🥕 | 1 ½ cups | No need to thaw |
| Yellow Onion 🧅 | 1 whole | Finely diced, about 1 cup |
| Garlic Cloves 🧄 | 3 cloves | Minced to paste consistency |
| Fresh Thyme Leaves 🌿 | 1 tbsp | Stripped from stems |
| Kosher Salt 🧂 | 1 ½ tsp | Diamond Crystal preferred |
| Freshly Ground Black Pepper 🌶️ | ½ tsp | Coarse grind recommended |
| Pie Crusts 🥧 | 2 sheets | Store-bought or homemade |
| Large Egg 🥚 | 1 whole | For egg wash finish |
| Heavy Cream 🥛 | ¼ cup | For crust golden finish |
| Dry White Wine 🍷 | ¼ cup | Sauvignon Blanc recommended |
The chicken quality directly impacts texture—opt for air-chilled breasts from brands like Bell & Evans or Smart Chicken for superior tenderness. For the crust, Pillsbury pie crusts offer consistent flakiness, though homemade lard-based crusts achieve optimal layers. The roux demands European-style butter (higher fat content) like Plugrá or Kerrygold to prevent separation during baking. Fresh thyme from local farmers markets provides 30% more aromatic compounds than supermarket varieties (store wrapped in damp paper for 5-7 days).
For dietary adaptations, cauliflower or mushrooms can replace chicken at a 1:1 ratio by weight. The wine may be substituted with additional chicken stock plus 1 tsp lemon juice for acidity. Gluten-free adaptations require cup4cup flour blend (not standard GF flour) and xanthan gum (1/4 tsp per cup) to maintain sauce viscosity. Frozen vegetable mixes work interchangeably—avoid waterlogged varieties by patting dry before incorporation. The heavy cream in the wash may be replaced with whole milk reduced by half for similar browning effects.
Prepare components separately before assembly: cooked chicken keeps 3 days refrigerated or 3 months frozen; uncooked roux lasts 24 hours chilled (whisk before using). Assembled but unbaked pies freeze beautifully for 2 months—wrap tightly in foil then plastic. Baked pies maintain optimal texture for 48 hours when cooled completely before refrigerating. Reheat at 350°F until internal temperature reaches 165°F (20-25 minutes for whole pie, 10-12 minutes for individual servings).
Why You’ll Love This Recipe
- I’ll be real: the first time I pulled this from the oven with its flaky, buttery top over that rich chicken-and-veggie filling, I nearly skipped dinner and just ate the crust. The contrast of crispy pastry with the velvety sauce (thanks to that roux!) is exactly what comfort food should be.
- One-Pan Magic: Between us, I hate doing dishes. This recipe lets me brown the chicken, make the roux with butter and flour, then simmer everything in the same skillet—one pan, one spatula, done. The milk and stock create the creamiest filling without extra bowls.
- That Golden Crust Moment: I’ll be real: the first time I pulled this from the oven with its flaky, buttery top over that rich chicken-and-veggie filling, I nearly skipped dinner and just ate the crust. The contrast of crispy pastry with the velvety sauce (thanks to that roux!) is exactly what comfort food should be.
- My Freezer’s Best Friend: Honestly, this might be the most practical make-ahead meal I’ve found. Assemble it uncooked, freeze it, then bake straight from frozen—no thawing, no stress. Perfect for those nights when I remember at 5:30 that I forgot to plan dinner (yes, again).
Step-by-Step Instructions for Chicken Pot Pie
Here’s the professional method for achieving that perfect balance of creamy filling and golden, flaky crust every time.
Step 1: Prepare the Chicken and Vegetable Base
Begin by cutting the 1.5 lb boneless, skinless chicken breasts into 1-inch cubes. Pat them dry with paper towels to ensure proper browning. In a large skillet over medium-high heat, melt 2 tablespoons unsalted butter until shimmering. Add the chicken in a single layer and cook undisturbed for 3-4 minutes until the bottoms develop a golden crust.
Flip the pieces and cook for another 2-3 minutes until just cooked through (internal temperature should reach 165°F). Transfer the chicken to a plate and set aside. In the same skillet, add the finely diced yellow onion and cook for 5 minutes until translucent and beginning to caramelize at the edges.
Step 2: Create the Creamy Roux-Based Filling
Reduce heat to medium and add the remaining unsalted butter to the skillet. Once melted, whisk in the 0.5 cup all-purpose flour to form a smooth roux. Cook for 2 minutes, stirring constantly, until the mixture turns a light tan color and develops a nutty aroma. This step removes the raw flour taste and builds flavor.
Gradually pour in the 1.5 cups whole milk and 1.5 cups chicken stock, whisking vigorously to prevent lumps. Add the minced garlic cloves, fresh thyme leaves, 1.5 tsp kosher salt, and 0.5 tsp freshly ground black pepper. Bring to a gentle simmer and cook for 5-7 minutes until the sauce thickens enough to coat the back of a spoon.
Stir in the 0.25 cup dry white wine and 1.5 cups frozen peas and carrots mix, then return the cooked chicken to the skillet. Simmer for an additional 3 minutes to allow the flavors to meld. The filling should be thick but still pourable – it will continue to thicken as it bakes.
Step 3: Assemble the Pot Pie with Proper Layering
Preheat your oven to 375°F. Unroll one pie crust and press it into a 9-inch deep-dish pie plate, allowing the edges to overhang slightly. Pour the chicken filling into the crust, spreading it evenly. The filling should come within ½ inch of the top edge to prevent overflow during baking.
Top with the second pie crust, crimping the edges to seal completely. Use a sharp knife to cut 4-5 vent slits in the center to allow steam to escape. This prevents the filling from becoming watery and ensures the top crust bakes evenly.
Step 4: Apply the Egg Wash and Bake to Perfection
In a small bowl, whisk together the large egg and 0.25 cup heavy cream until fully combined. Brush this mixture evenly over the entire top crust, including the edges. This egg wash creates that coveted deep golden-brown finish and adds a subtle sheen.
Place the pot pie on a baking sheet to catch any potential drips and bake on the center rack for 40-45 minutes. The pie is done when the crust is uniformly golden brown and the filling bubbles visibly through the vent slits. For extra crispness, broil for 1-2 minutes at the end, watching carefully to prevent burning.
Step 5: Rest and Serve for Optimal Texture
Remove the pot pie from the oven and let it rest for 15 minutes before serving. This resting period allows the filling to set properly, preventing it from spilling out when sliced. The internal temperature should stabilize at about 160°F when tested through the vent.
Use a sharp serrated knife to cut clean portions. Each serving should reveal a creamy, thick filling encased in flaky, golden crust on both top and bottom. The vegetables should be tender but still retain some texture, and the chicken should be moist and easily cut with a fork.
Creative Variations of This pioneer woman chicken pot pie
Biscuit Topped Version
Swap the top pie crust for homemade drop biscuits to create a rustic, Southern-inspired variation. Mix 2 cups all-purpose flour, 1 tbsp baking powder, and ½ tsp salt, then cut in 6 tbsp cold butter until crumbly. Stir in ¾ cup whole milk until just combined. Drop spoonfuls over the filling before baking—this creates golden, craggy tops that soak up the creamy sauce beautifully. 🥧
Puff Pastry Upgrade
For an elegant twist, replace both crusts with all-butter puff pastry (I love Dufour brand). Roll it slightly thinner than pie crust for extra flakiness. The key is keeping everything ice-cold until baking—this ensures maximum rise and those dramatic, crispy layers we all love. Brush with egg wash and sprinkle with flaky sea salt before baking.
Turkey and Sweet Potato
Perfect for using holiday leftovers! Replace chicken with 2 cups shredded roasted turkey and swap the peas/carrots for 1 cup diced roasted sweet potatoes and ½ cup dried cranberries. Add 1 tsp poultry seasoning to the filling for that cozy Thanksgiving vibe. The sweet-tart balance makes this my go-to post-holiday comfort meal.
Spicy Southwest Style
Kick up the heat by adding 1 diced jalapeño with the onions, 1 tsp smoked paprika, and ½ tsp cumin to the roux. Replace half the peas/carrots with 1 cup corn kernels and ½ cup black beans. Top with a cheddar-jack cheese blend before adding the crust—this creates a melty, golden layer that’s pure comfort food magic. 🌶️
Vegetarian Mushroom
For a meat-free version, use 2 cups mixed mushrooms (cremini, shiitake, oyster) sautéed until deeply browned. Add 1 diced celery stalk with the onions and 1 tsp soy sauce to the filling for umami depth. I often stir in ½ cup grated Gruyère to the sauce for extra richness—it melts beautifully into the creamy base.
Individual Hand Pies
Turn this into portable comfort food by using 4-inch round cutters on rolled pie dough. Place 2 tbsp filling on each round, fold, and crimp edges with a fork. Brush with egg wash and bake at 400°F for 18-20 minutes. These are perfect for lunchboxes or picnics—just let cool completely before packing to maintain that perfect flaky texture. ✨
Nutrition Facts
Frequently Asked Questions
Can I make this ahead of time?
Assemble the pie completely (including egg wash) and refrigerate for up to 24 hours before baking. For longer storage, freeze the unbaked pie for 2 months—just wrap tightly in foil and plastic. Bake directly from frozen, adding 15-20 minutes to the cooking time.
Why is my filling too runny?
This usually happens if the roux didn’t cook long enough or the filling wasn’t simmered properly. Cook the roux until it’s light tan (about 2 minutes), and simmer the filling for the full 5-7 minutes until it coats the back of a spoon. Let the baked pie rest 15 minutes before serving to set fully.
Can I use rotisserie chicken?
Yes! Use 3 cups shredded rotisserie chicken to replace the fresh chicken breasts. Skip the initial cooking step and add it directly to the finished sauce. This saves time and adds extra flavor. Just be sure to remove any skin or bones first.
How do I prevent a soggy bottom crust?
Two key tricks: First, blind-bake the bottom crust for 8 minutes at 375°F before adding filling. Second, ensure the filling is thick and piping hot when assembling. The heat helps set the crust immediately. Brushing the bottom crust with a thin layer of beaten egg before adding filling creates an extra moisture barrier.

- 8 Bean Soup Recipe Crock Pot: Hearty Vegetable Medley in One Pot - September 25, 2026
- 4C Bread Crumbs Meatballs Recipe: Crispy Crust and Juicy Centers - September 25, 2026
- 6 Oz Chocolate Chip Cookie Recipe: Perfectly Balanced Crispy Edges and Chewy Hearts - September 25, 2026