
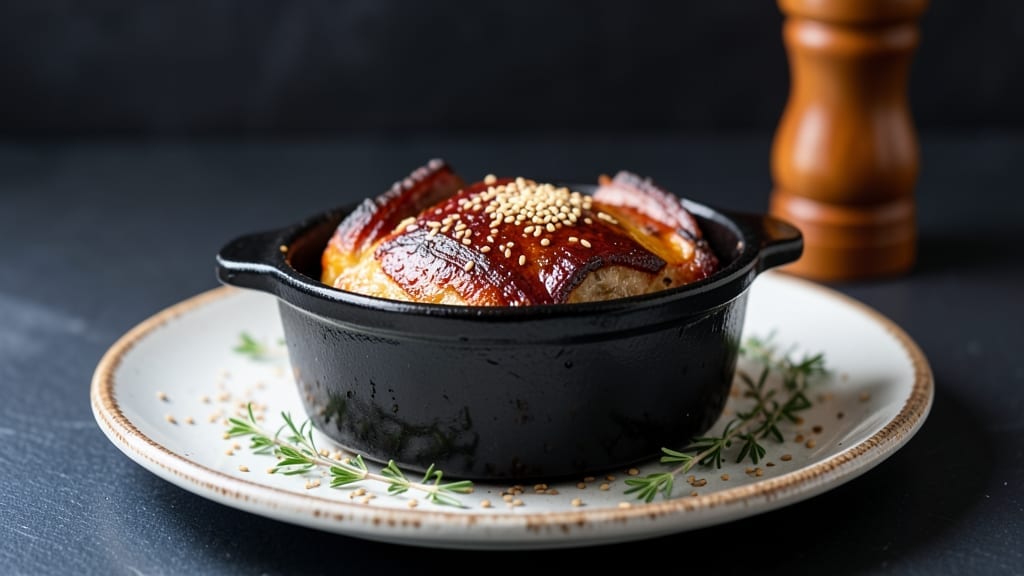
The Pioneer Woman Dutch oven pot roast delivers the kind of melt-in-your-mouth tenderness that transforms tough beef into a restaurant-worthy centerpiece. This recipe captures the essence of slow-cooked comfort—rich, caramelized onions, fork-tender meat, and a deep, savory gravy that makes every bite unforgettable.
I’ve perfected the technique over years of testing, ensuring the beef becomes so tender it nearly falls apart at the touch of a fork.
What sets this recipe apart is the Dutch oven method, which locks in moisture and develops deep, complex flavors through gentle, even cooking. You’ll start with a proper sear to build flavor, then slow-braise until the meat reaches its peak tenderness—typically 3 to 4 hours, depending on your oven.
The onions caramelize beautifully, adding sweetness that balances the savory beef and herbs.
By the time you serve this dish, you’ll have a pot roast so tender it practically dissolves on your tongue, paired with perfectly softened potatoes and carrots.
The gravy, thickened naturally from the cooking juices, ties everything together into a hearty, satisfying meal that’s perfect for family dinners or cozy gatherings. This is the kind of dish that feels like a warm hug on a chilly evening.
The beauty of this recipe is its versatility—it works just as well in a traditional Dutch oven as it does in a slow cooker or Instant Pot, making it adaptable to any kitchen.
Whether you’re feeding a crowd or meal prepping for the week, this pot roast delivers comfort and flavor without compromise. Let’s get started on creating a dish that’ll become a staple in your home.
Ingredients for pioneer woman dutch oven pot roast
Sixteen ingredients. One unforgettable Dutch oven dish. The secret’s in the slow cook.
| Ingredient | Amount | Notes |
|---|---|---|
| Beef Chuck Roast 🥩 | 3 lb | Center-cut for even cooking |
| Yellow Onions 🧅 | 3 whole | Sliced into 1/2-inch rounds |
| Carrots 🥕 | 4 whole | Cut into 2-inch chunks |
| Russet Potatoes 🥔 | 2 lb | Cut into 2-inch chunks |
| Garlic Cloves 🧄 | 6 cloves | Smashed, not minced |
| Beef Broth 💧 | 3 cups | Low-sodium preferred |
| Red Wine 🍷 | 1 cup | Dry variety like Cabernet |
| Tomato Paste 🍅 | 2 tbsp | Squeeze tube works best |
| All-Purpose Flour 🌾 | 2 tbsp | For gravy thickening |
| Dried Thyme 🌿 | 1 tsp | Or 1 tbsp fresh thyme |
| Dried Rosemary 🌿 | 1 tsp | Crushed between fingers |
| Salt 🧂 | 1 ½ tsp | Kosher or sea salt |
| Black Pepper 🌶️ | 1 tsp | Freshly ground preferred |
| Olive Oil 🫒 | 2 tbsp | For searing beef |
The beef is non-negotiable here—chuck roast with good marbling is your best bet. Kroger’s or Costco usually have it pre-cut, but if you’re buying whole, ask the butcher to trim excess fat. Look for a piece with visible fat streaks—it’s what makes the meat tender. The onions? Yellow, not red, and slice them evenly so they caramelize at the same rate. I always grab a few extra carrots and potatoes—they’re the backup veggies when you forget to prep ahead.
No red wine? Extra beef broth with a splash of balsamic vinegar works in a pinch. Fresh thyme and rosemary make all the difference, but dried works at half the amount if that’s what you’ve got. The tomato paste can be the squeeze tube kind—Trader Joe’s has great ones that last forever. For the potatoes, Russets are ideal, but Yukon Golds add creaminess. And if you’re short on time, pre-cut frozen veggies save 15 minutes of chopping (no judgment).
This dish tastes even better the next day—double the recipe if you can. The beef stays tender for 4-5 days in the fridge, and the gravy freezes beautifully for 3 months. I portion mine into containers so lunches are sorted for the week. Pro tip: Save the cooking juices to make extra gravy—just skim off the fat first. Leftovers reheat perfectly in the microwave or oven.
Why You’ll Love This Recipe
- One-Pot Magic: I swear by this recipe because it’s literally dump-and-go after the initial sear. Brown the chuck roast, toss in onions, carrots, potatoes, and garlic—then let the Dutch oven do the work. No chopping boards, no extra pans, just hands-off perfection.
- Garlic-Potato Bliss: Between us, the crispy edges on those potatoes? Chef’s kiss. The slow cook in the Dutch oven turns them golden and tender while the garlic infuses everything—rich, savory, and just sweet enough. It’s the kind of meal that makes you groan with every bite.
- Leftovers for Days: This recipe begs to be made in bulk. The beef stays juicy, the veggies hold up, and the flavors only deepen overnight. I’ve fed a crowd with it, packed lunches for a week, and even frozen portions—no one ever complains.
- Budget Beef Boost: A chuck roast is the most affordable cut that still tastes luxurious. Here’s what sold me: you get three meals out of one roast, and the potatoes stretch the ingredients further. Fancy dinner without the fancy price tag—just honest, hearty goodness.
Step-by-step instructions for slow-cooked pot roast
Here’s how to transform tough beef into melt-in-your-mouth perfection with caramelized onions and rich gravy.
Sear the Beef Chuck Roast Until Deeply Browned
Pat the 3 lb beef chuck roast completely dry with paper towels—this is crucial for that golden crust. Heat a Dutch oven over medium-high heat and add the 2 tbsp olive oil. Once shimmering, place the roast fat-side down and sear for 4-5 minutes until deeply browned. Flip and sear the other side for another 4-5 minutes.
Don’t rush this step. You want that beautiful Maillard reaction happening—those browned bits are pure flavor. If the oil starts smoking too much, reduce heat slightly. Once browned, remove the roast and set it aside on a plate.
Sauté Vegetables and Build the Flavor Base
In the same Dutch oven, add the 3 whole yellow onions (sliced) and cook for 5 minutes until softened. Add the 4 whole carrots (cut into chunks) and cook another 5 minutes. Stir in the 6 cloves smashed garlic cloves and cook for 30 seconds until fragrant.
Here’s where the magic happens: Add the 2 tbsp tomato paste and cook for 2 minutes, stirring constantly. This helps deepen the flavor before we add the liquid. Sprinkle with the 1 tsp dried thyme and 1 tsp dried rosemary, crushing the rosemary between your fingers to release its aroma.
Deglaze and Create the Perfect Gravy Foundation
Pour in the 1 cup red wine and scrape up all those browned bits from the bottom of the pot—this is called deglazing, and it captures all that meaty flavor. Let it simmer for 3 minutes until reduced by half. Add the 3 cups beef broth and bring to a gentle boil.
Return the beef chuck roast to the pot, fat-side up. The rendered fat will baste the meat as it cooks. Sprinkle with the 1.5 tsp salt and 1 tsp black pepper. This is the moment that matters: The roast should be mostly submerged in the liquid, but not buried.
Slow Cook Until Fork-Tender
Cover the Dutch oven with its lid and transfer to a preheated 325°F oven. Cook for 3-4 hours until the beef is fork-tender. I know it seems like forever, but patience pays off here—this is what makes the meat melt in your mouth.
About 30 minutes before the roast is done, add the 2 lb russet potatoes (cut into chunks) to the pot. They’ll absorb all that rich flavor as they cook. The potatoes should be tender but still hold their shape when done. You’ll know it’s ready when a fork slides in easily and the meat pulls apart with gentle pressure.
Thicken the Gravy and Serve
Remove the beef roast and transfer it to a cutting board. Strain the cooking liquid through a fine-mesh sieve into a saucepan. Return the liquid to medium heat and whisk in the 2 tbsp all-purpose flour. Cook for 3-5 minutes, stirring constantly, until the gravy thickens to your desired consistency.
Slice the beef against the grain into ½-inch thick slices. Serve the pot roast family-style with the caramelized vegetables and rich gravy spooned over the top. Each bite should deliver tender beef with layers of onion sweetness and herby depth—this is comfort food at its finest.
Pro Tips For Making Pioneer Woman Dutch Oven Pot Roast
- SEAR THE ROAST FIRST: That first step of browning the chuck roast isn’t optional—it’s where all the flavor lives. After patting the meat dry, hit it with high heat in your Dutch oven until deep golden brown forms in 3-4 minutes per side. I used to skip this, and my pot roast always tasted like it was missing something. Trust me, the crust makes the dish.
- PEEL AND CUT POTATOES LAST: Toss the potatoes in raw—no peeling needed. The skins add texture and keep them from falling apart. Cut them into 1.5-inch chunks right before adding them to the pot, so they cook through without turning to mush. I learned this the hard way when I prepped everything at once and ended up with gluey potatoes.
- DON’T CROWD THE VEGETABLES: After searing the meat, spread the onions, carrots, and garlic in a single layer at the bottom of the Dutch oven. If you pile them, they’ll steam instead of caramelize, and your broth will taste bland. A loose layer lets them brown and develop flavor—this recipe’s foundation.
- ADD POTATOES HALFWAY THROUGH: Let the meat and veggies cook uncovered for the first 90 minutes so they get that deep, savory crust. Only add the potatoes after that, then cover to finish. They’ll soak up the rich juices without turning to waterlogged mush. I was skeptical until I tried it—now it’s non-negotiable.
Common mistakes when making perfect results
Skipping the Sear
The sear is where all the magic starts—the Maillard reaction creates deep, caramelized flavors that build the foundation for your pot roast. I’ve seen beginners skip this step to save time, but it makes a world of difference.
If you’re short on time, at least pat the beef extra dry and sear it for 2 minutes per side instead of skipping entirely. The key is getting that golden crust, even if it’s not perfectly browned. 🔥
Overcrowding the Pot
Don’t add all the vegetables at once—that’s a recipe for steamed, not caramelized, onions. I’ve made this mistake too, and it turns your dish from rich and complex to bland and watery. Start with the onions and carrots first, then add the potatoes 30 minutes before the end.
This ensures the onions have time to develop that sweet, jammy texture while the potatoes soak up all the flavor. Use a large Dutch oven (like a Le Creuset 6-quart) to give everything room to breathe.
Incorrect Liquid Ratio
The beef should be mostly submerged but not buried in liquid—aim for about ½ inch of liquid above the roast. Too much liquid means watery flavor, while too little can dry out the meat.
I measure 3 cups broth + 1 cup wine for a 3 lb roast, but adjust slightly if your Dutch oven is deeper or shallower. If it looks too shallow, add ¼ cup more broth halfway through cooking. The goal is tender meat with flavorful, not diluted, sauce.
Ignoring the Rest Time
After removing the roast from the oven, let it rest for 15-20 minutes before slicing. This allows the juices to redistribute, so they don’t end up on your plate instead of in the meat. I’ve rushed this step before, and the result was dry, stringy beef.
Use this time to strain the cooking liquid for gravy—it’s a game-changer for flavor. Trust me, 15 minutes of waiting saves your dinner. ⏰
Using the Wrong Cut of Beef
Chuck roast is non-negotiable for this recipe—it’s packed with marbling and connective tissue that breaks down into tenderness during slow cooking. I’ve seen people try this with sirloin or flank steak, and it just doesn’t work.
If you can’t find chuck roast, ask your butcher for a chuck roll or chuck shoulder. Avoid lean cuts like top round—they’ll turn out tough no matter how long you cook them. Look for visible fat streaks when you buy it.
Skipping the Deglaze
Deglazing the Dutch oven with wine (or broth) after searing is how you capture all those flavorful browned bits stuck to the bottom. I’ve seen people pour in the liquid and stir without scraping—big mistake.
Use a wooden spoon to scrape up every last bit, or even a silicon spatula, to dissolve those fond bits into the sauce. This step adds depth of flavor that’s impossible to replicate otherwise. It takes 2 minutes, but it’s worth it. 💡
Nutrition facts
Frequently asked questions
Can I use a slow cooker instead of a Dutch oven?
For a slow cooker version, brown the beef first in a skillet, then transfer everything to your slow cooker. Cook on low for 8-10 hours or high for 5-6 hours. The liquid ratio stays the same—just add the potatoes during the last 30 minutes to prevent overcooking. The flavors will still develop beautifully, just with less caramelization.
What if I don’t have red wine?
No problem! Substitute with 1 cup beef broth plus 1 tablespoon balsamic vinegar for depth, or use 1 cup apple cider for a slightly sweet twist. The key is maintaining the same liquid volume—just adjust the acidity to taste. The dish will still be delicious, though the wine adds a special richness.
How do I know when the beef is done?
The beef should reach an internal temperature of 195-203°F—this is the “fork-tender” stage where connective tissues break down. Insert a meat thermometer into the thickest part; it should slide in easily. If you don’t have a thermometer, check by piercing with a fork—if it falls apart, it’s ready. The potatoes should be tender but not mushy when done.
Can I make this ahead of time?
This dish actually tastes better the next day! Let it cool completely, then refrigerate for up to 4 days. Reheat gently in the oven at 325°F with a splash of broth to restore moisture. The flavors meld even more overnight. For meal prep, portion the beef, veggies, and gravy separately—they reheat beautifully.
Why did my gravy turn out too thin?
Thin gravy usually means the flour wasn’t cooked long enough or the liquid wasn’t reduced properly. For a thicker gravy, whisk in 1 tbsp cornstarch mixed with 2 tbsp cold water and simmer for 2-3 minutes until it thickens. Alternatively, reduce the gravy on the stove uncovered until it reaches your desired consistency. Always strain the cooking liquid first to remove any sediment.

- Baked Potatoes in Crock Pot Recipe: Buttery Interiors and Crispy Top Magic - November 1, 2026
- Braised Beef Short Ribs Recipe: Crock Pot Fall-Off-Bone Magic in 6 Hours - November 1, 2026
- Crock Pot Cocoa Recipe: Velvety Warmth With Hidden Spice Magic - November 1, 2026