
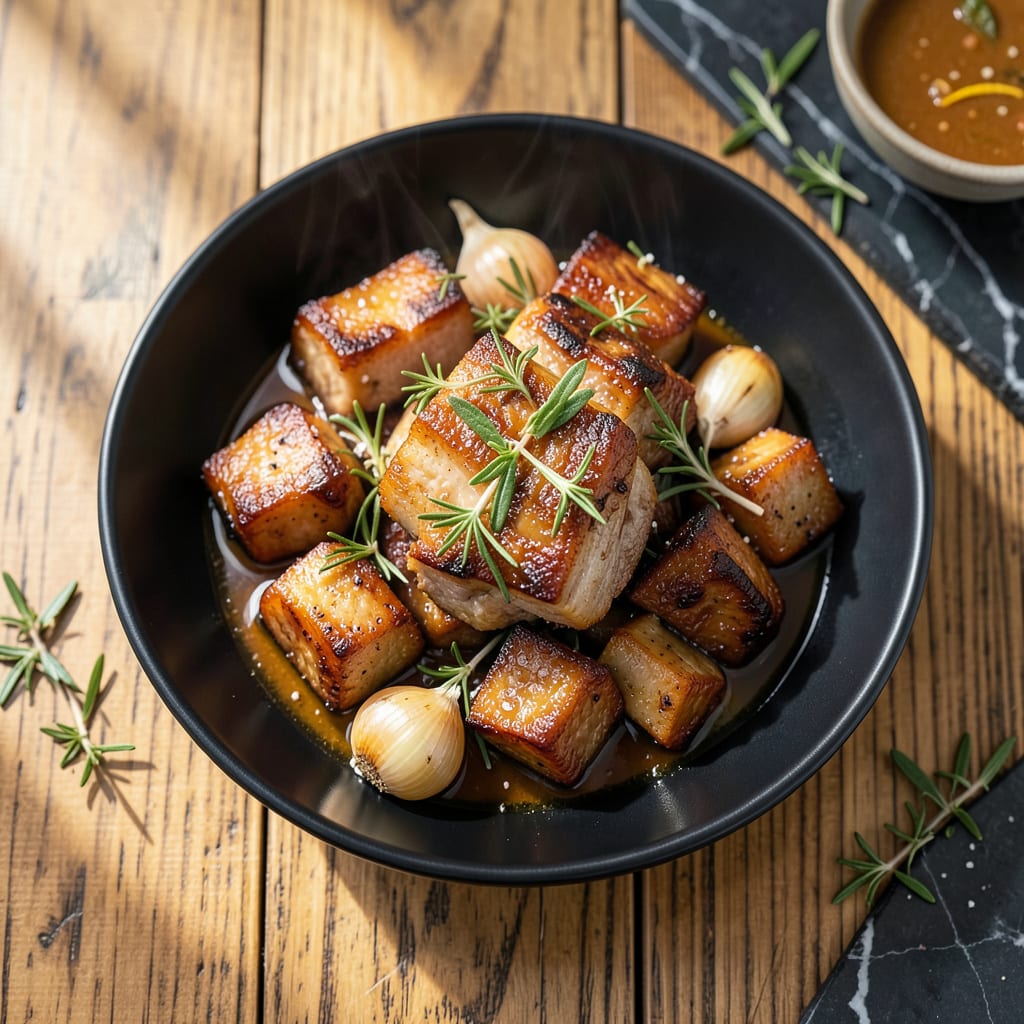
Rendering pork belly fat transforms it into a crispy, golden ingredient that elevates any dish with its rich, unctuous flavor.
This method uses low heat to slowly render the fat, creating a perfect texture that’s both tender and crispy when finished.
Ingredients for Pork Belly Fat
Transform pork belly into golden, crispy richness with these essential ingredients for rendering perfection.
| Ingredient | Amount | Notes |
|---|---|---|
| Pork Belly 🥓 | 2 lb | Skin-on, cut into 1-inch cubes |
| Kosher Salt 🧂 | 1 ½ tsp | Diamond Crystal preferred for even seasoning |
| Freshly Ground Black Pepper 🌶️ | 1 tsp | Coarse grind for texture |
| Garlic Cloves 🧄 | 6 cloves | Smashed, peeled, left whole |
| Fresh Thyme Sprigs 🌿 | 4 sprigs | Whole sprigs for infusing |
| Fresh Rosemary Sprigs 🍃 | 2 sprigs | Whole sprigs for infusing |
| Bay Leaves 🌿 | 2 whole | Dried, for depth of flavor |
| Water 💧 | ½ cup | For initial rendering process |
| White Wine Vinegar 🍷 | 2 tbsp | For brightness and balance |
| Extra-Virgin Olive Oil 🫒 | 1 tbsp | For finishing, optional |
[recipeingredientscaler]
The pork belly quality is paramount for optimal rendering. Source skin-on pork belly from a trusted butcher or specialty grocer like Whole Foods. Look for even marbling and a good fat-to-meat ratio—this ensures the best texture. Diamond Crystal kosher salt is the professional choice for its clean flavor and even distribution. Fresh herbs should be vibrant and aromatic (the wilted ones at the back of the fridge won’t cut it).
No fresh thyme or rosemary? Dried herbs at one-third the amount will work, though the flavor profile will be slightly muted. White wine vinegar can be swapped with apple cider vinegar or lemon juice for acidity. If you’re out of pork belly, pancetta or fatty bacon can be rendered instead, though the texture will differ. The water helps prevent burning—don’t skip it even if it seems counterintuitive.
Rendered pork belly fat keeps in an airtight container in the fridge for 1 month or can be frozen for 6 months. Strain and store the crispy bits separately—they’re perfect for garnishing. Reheat gently to maintain the crispy texture (microwaving will make them soggy).
Why You’ll Love This Recipe
- Set and Forget: I rub the pork belly with salt, pepper, garlic, and thyme, then let the oven do the work.
- Crispy, Herby Bites: That combo of crispy fat, garlic punch, and earthy thyme? Ridiculously good.
- Feeds a Hungry Table: One slab serves a crowd, whether it’s a lazy Sunday or game day with friends.
- Stretches Far: Leftovers crisp up in a pan the next day for a quick, indulgent breakfast.
Step-by-Step Instructions for Crispy Pork Belly Fat
This professional method ensures perfectly rendered pork belly fat with ideal texture and flavor extraction.
Step 1: Season and Cure the Pork Belly
Pat the 2 lb Pork Belly cubes completely dry with paper towels to remove excess moisture. This critical step ensures even rendering and crispy results. In a large bowl, toss the pork belly with 1.5 tsp Kosher Salt and 1 tsp Freshly Ground Black Pepper until every piece is evenly coated.
The salt draws out moisture while the coarse pepper adds subtle texture. Let the seasoned pork belly sit at room temperature for 20 minutes to allow the salt to begin penetrating the meat. This preliminary curing enhances flavor development during rendering.
Step 2: Begin the Rendering Process
Place the seasoned pork belly in a heavy-bottomed pot or Dutch oven. Add the 6 cloves Garlic Cloves, 4 sprigs Fresh Thyme Sprigs, 2 sprigs Fresh Rosemary Sprigs, and 2 whole Bay Leaves to the pot. These aromatics will infuse the fat as it renders.
Pour in the 0.5 cup Water—this creates steam initially, which helps render the fat more efficiently. Place the pot over medium-low heat and bring to a gentle simmer. The water should just barely bubble, not boil vigorously.
Step 3: Slow-Render to Crispy Perfection
After the water has evaporated (about 30 minutes), the pork belly will begin to fry in its own fat. Reduce the heat to low and continue cooking, stirring occasionally to prevent sticking. The fat is fully rendered when the pork belly pieces are deep golden brown and crispy.
This process typically takes an additional 45-60 minutes. Watch for the fat to become translucent with a golden hue and for the pork bits to develop a crisp exterior. The aromatics should be deeply fragrant, signaling their flavors have fully infused the fat.
Step 4: Finish and Strain the Rendered Fat
Once the pork belly is crispy and the fat has rendered, remove the pot from heat. Stir in the 2 tbsp White Wine Vinegar—this adds brightness and cuts through the richness of the fat. The vinegar will sizzle as it hits the hot fat, releasing its aromatic compounds.
Let the mixture cool slightly for 5 minutes, then strain through a fine-mesh sieve into a clean container. Discard the solids or reserve the crispy pork bits for another use. For finishing, you may stir in the 1 tbsp Extra-Virgin Olive Oil if desired, though this is optional.
The strained fat will solidify as it cools, yielding a smooth, spreadable lard with complex herbal notes. Store in an airtight container in the refrigerator for up to 2 weeks.
Pro Tips For Making Pork Belly Fat
- Score the Skin: Use a sharp knife to make shallow, crosshatch cuts in the pork belly skin—about 1/4 inch apart. This renders the fat evenly and gives you that crispy crackling everyone fights over.
- Salt Overnight: Dry-brine the pork belly with kosher salt at least 12 hours before cooking. I learned this the hard way—skipping it leaves the meat bland, even if you season later.
- Low and Slow: Start at 300°F for the first hour, then drop to 275°F until tender. After burning two batches at high heat, I finally figured out pork belly needs patience, not speed.
- Crush the Garlic: Smash the garlic cloves with the side of your knife before scattering them around the pork. Sounds weird, but it works—the crushed cloves infuse the fat with flavor without burning.
Dietary Considerations for This Dish
Keto-Friendly Option
This creation is naturally zero-carb and perfect for keto diets, as pork fat contains no carbohydrates. The rendered fat provides excellent energy while maintaining ketosis. I use it daily for cooking and frying. 💪
Gluten-Free Status
All ingredients here are inherently gluten-free, with no wheat, barley, or rye involved. Just ensure your spices are pure—some pre-mixed seasonings contain hidden gluten. I always check labels carefully.
Dairy-Free and Nut-Free
This recipe contains no dairy or nuts, making it safe for those with allergies. The only ingredients are pork, salt, pepper, herbs, and vinegar—all common allergy-safe foods.
Low-Calorie Considerations
While pork belly fat is calorie-dense (about 120 calories per tablespoon), it’s nutrient-rich. Use it sparingly for flavor without excess calories. A little goes a long way.
Sodium Awareness
For those watching sodium, reduce the 1.5 tsp Kosher Salt by half or use a low-sodium alternative. The fat itself is naturally low in sodium, so seasoning can be adjusted to taste.
Paleo Compliance
This fits perfectly into paleo diets, as it uses whole, unprocessed animal fat with natural herbs. No grains, legumes, or processed ingredients are involved. 🔥
Nutrition Facts
Frequently Asked Questions
Do I need to remove the skin before rendering?
No, the skin can stay on during rendering. In fact, it helps create extra crispy texture. The skin will soften and crisp up beautifully during the process.
Can I use this fat for baking?
The rendered fat works wonderfully in baking, adding rich flavor to pastries, breads, or pie crusts. It creates a flaky texture that’s hard to beat.
Why add water at the beginning?
The initial 0.5 cup Water prevents the pork from burning while the fat starts to render. It creates steam that gently cooks the meat before frying begins.
How do I prevent the fat from going rancid?
Store the strained fat in an airtight container in the fridge for up to 2 weeks. For longer storage, freeze it for up to 6 months.

- 8 Bean Soup Recipe Crock Pot: Hearty Vegetable Medley in One Pot - September 25, 2026
- 4C Bread Crumbs Meatballs Recipe: Crispy Crust and Juicy Centers - September 25, 2026
- 6 Oz Chocolate Chip Cookie Recipe: Perfectly Balanced Crispy Edges and Chewy Hearts - September 25, 2026