
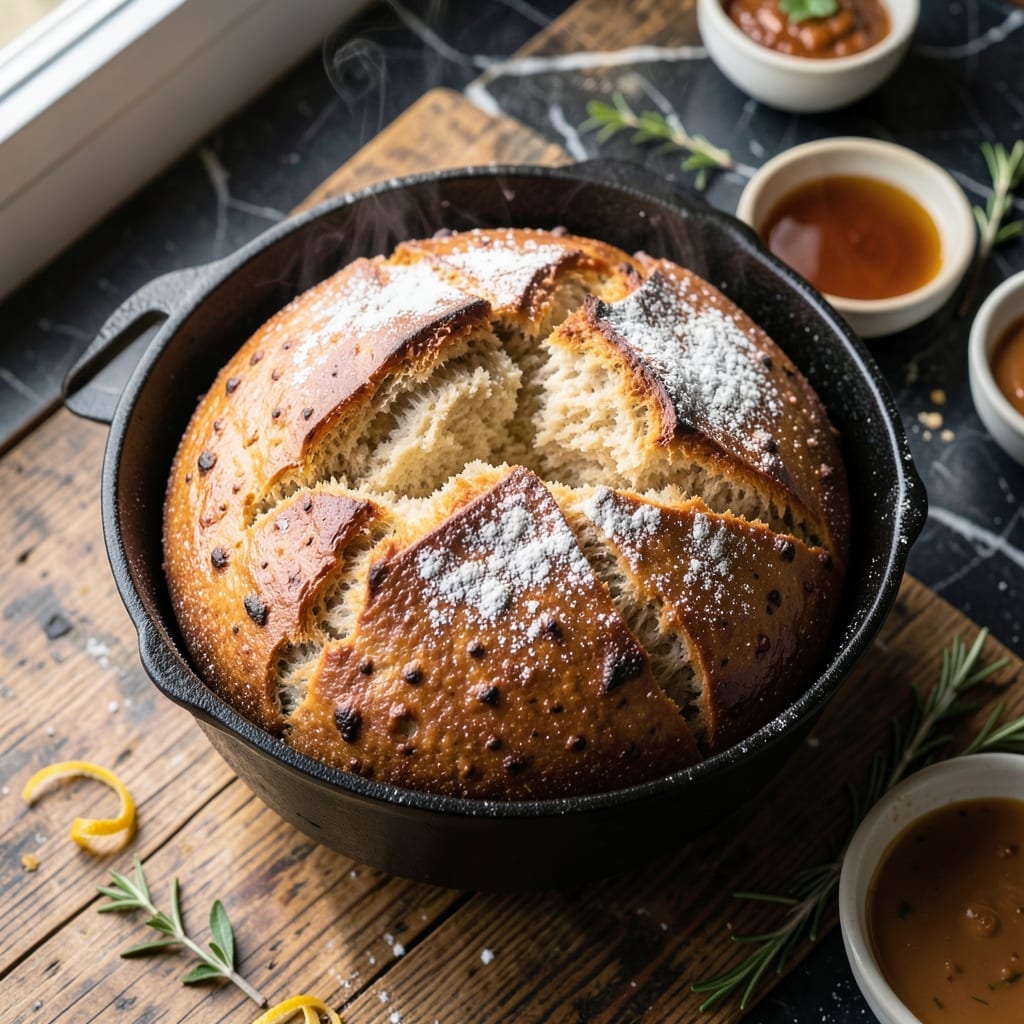
There’s something deeply satisfying about baking bread in a cast iron pot—the way it transforms simple ingredients into a rustic, golden-brown loaf with a crisp crust. This method leverages the pot’s heat retention to create professional bakery results at home.
No fancy equipment is needed, just a heavy cast iron pot and a few basic ingredients. The pot traps steam, which helps the dough rise and develop a crispy exterior while keeping the inside soft and airy. It’s a foolproof way to achieve artisanal bread.
What emerges is a loaf with a thick, crusty shell and a tender, open crumb. The cast iron ensures even baking, so every slice is consistent. The process is simple, but the results are anything but.
Perfect for beginners, this method delivers bakery-style bread with minimal effort. Here’s how to make it.
Ingredients for Pot Bread Recipe Cast Iron Pot
Nine simple ingredients transform into a rustic, golden-brown loaf with minimal effort.
| Ingredient | Amount | Notes |
|---|---|---|
| Bread Flour 🌾 | 3 ½ cups | High-protein for structure |
| Active Dry Yeast 🍞 | 2 ¼ tsp | Or one packet, proofed in warm water |
| Sea Salt 🧂 | 2 tsp | Fine grain preferred |
| Warm Water 💧 | 1 ½ cups | 110-115°F, not hot |
| Honey 🍯 | 1 tbsp | Or granulated sugar |
| Olive Oil 🫒 | 2 tbsp | For greasing and dough |
| Cornmeal 🌽 | ¼ cup | For dusting pot |
| All-Purpose Flour 🌾 | ½ cup | For dusting surface |
| Ice Cubes ❄️ | 2 whole | For steam in pot |
The flour is critical here. King Arthur Bread Flour is my go-to for its consistent protein content—it gives you that open crumb structure. Active dry yeast from SAF or Fleischmann’s works reliably, but check the expiration date (old yeast = flat bread). For the water, use filtered if your tap has a strong taste. The honey isn’t just for sweetness—it feeds the yeast for a better rise.
No bread flour? All-purpose in a pinch, but add 1 tbsp vital wheat gluten per cup to compensate. Out of honey? Maple syrup or agave at the same amount. Skip the cornmeal? Semolina or extra flour works for dusting. The olive oil can be any neutral oil, but avoid strongly flavored ones. Ice cubes are non-negotiable—they create the steam that gives you that crisp crust.
Dry ingredients keep in airtight containers for 6-12 months. Yeast lasts 1 year unopened, 3 months once opened (store in freezer). The dough rises best at 75-80°F, so find a warm spot. Baked loaf stays fresh wrapped in cloth for 2 days.
Why You’ll Love This Recipe
- One Bowl Wonder: I mix everything right in the cast iron—no extra bowls, no fuss. The dough comes together in minutes.
- Crispy Golden Crust: That honey-kissed edge gets impossibly crispy while the inside stays soft and pillowy.
- Feeds a Crowd: One loaf, eight hungry people, zero leftovers. Honestly, it disappears faster than I can slice it.
- Budget Stretch: Bread flour, yeast, and pantry staples make this my cheapest crowd-pleaser. I’ll be real: it costs less than a store-bought loaf.
Step-by-Step Instructions for Pot Bread in Cast Iron
Here is the method I use to achieve that signature crust and steam-perfect crumb.
Step 1: Activate Yeast and Mix Dough
In a large mixing bowl, whisk together the 1.5 cups Warm Water, 1 tbsp Honey, and 2.25 tsp Active Dry Yeast. The water should be 110-115°F—any hotter and you’ll kill the yeast, any cooler and it won’t activate properly. Let it sit for 5-10 minutes until the surface becomes frothy and bubbly.
Add the 3.5 cups Bread Flour and 2 tsp Sea Salt to the yeast mixture. Stir with a wooden spoon until a shaggy dough forms. The bread flour’s high protein content is essential for the proper gluten development that gives this bread its structure.
Step 2: Knead and First Rise
Turn the dough onto a surface lightly dusted with the 0.5 cup All-Purpose Flour. Knead for 8-10 minutes until smooth and elastic. The dough should be slightly tacky but not sticky—add a sprinkle more all-purpose flour if needed, but avoid over-flouring.
Transfer the dough to a clean bowl lightly greased with 1 tbsp Olive Oil. Cover with a damp towel and let rise in a warm place for 1-2 hours or until doubled in volume. This first rise develops the gluten and flavor.
Step 3: Shape and Second Rise
Punch down the risen dough to release air. Shape into a round loaf and place it on a piece of parchment paper. Let it rise again for 30-45 minutes until puffy. While it rises, preheat your oven to 450°F with the cast iron pot inside.
After the second rise, carefully remove the hot pot from the oven. Dust the bottom with the 0.25 cup Cornmeal to prevent sticking and add a rustic texture to the crust. The cornmeal creates that characteristic crunch and visual appeal.
Step 4: Bake with Steam
Transfer the dough (still on parchment) into the hot cast iron pot. Use the remaining 1 tbsp Olive Oil to brush the top of the dough. This creates a beautiful golden crust. Toss the 2 whole Ice Cubes into the pot alongside the dough—they’ll create steam that prevents the crust from forming too quickly.
Bake covered for 30 minutes, then remove the lid and bake for another 15-20 minutes until the bread is deep golden brown and sounds hollow when tapped. The steam from the ice cubes is crucial for that perfect oven-spring and open crumb structure.
Step 5: Cool Before Slicing
Remove the bread from the pot and let it cool on a wire rack for at least 1 hour. I know the aroma is tempting, but slicing too soon will result in a gummy texture. The cooling period allows the internal structure to set completely.
The finished loaf should have a thick, crispy crust with a rustic appearance from the cornmeal, and an airy, open crumb inside. The cast iron pot creates the ideal baking environment for this artisan-style bread.
Pro Tips For Making Pot Bread Recipe Cast Iron Pot
- Preheat the Pot: Place your cast iron pot in the oven while it preheats to 450°F—this guarantees a crisp crust and prevents the dough from sticking. I learned this the hard way after pulling apart half my first loaf.
- Use Room-Temp Water: Warm water should feel like bathwater, around 110°F, or you’ll kill the yeast. Too hot and it dies, too cold and it won’t rise—both lead to dense, sad bread.
- Score the Dough: Right before baking, slash the top with a sharp knife or razor. It’s not just for looks—it lets the bread expand properly and keeps the crust from cracking wildly.
- Add Honey Last: Mix the honey into the warm water before adding yeast, but don’t let it sit too long—sugar can overfeed the yeast and make your bread taste bitter. Stir it in just before combining with flour.
Regional Styles of These Flavors
Dutch Oven Tradition
The Dutch oven method, popularized in the US, creates a crusty exterior with a soft interior. I preheat my Lodge 5-quart to 450°F for even heat distribution. This technique mimics professional bread ovens at home. 🔥
French Boule Style
In France, this is called pain de fer (iron bread). They use a round cocotte and often add 1 tsp diastatic malt powder for extra browning. The result is a loaf with a thick, caramelized crust and complex flavor.
Moroccan Khobz
North African bakers use a similar method but add 1 tbsp semolina to the dough and 1 tsp cumin seeds for aroma. The pot is often buried in hot sand for even cooking. This version pairs perfectly with tagines.
Scandinavian Rugbrød
Danish cooks make a denser version with 1 cup rye flour and ½ cup whole wheat mixed in. They bake at 400°F for 45 minutes covered, then 20 minutes uncovered. The result is hearty and perfect for smørrebrød.
Australian Damper
Outback cooks traditionally made this in a campfire pot with just flour, water, and 1 tsp baking powder. Modern versions add ½ cup milk powder for richness. It’s baked covered with coals on the lid for 30-40 minutes.
Nutrition Facts
Frequently Asked Questions
Why use a cast iron pot for bread?
The heavy pot retains heat and traps steam, creating a crisp crust and airy interior like professional ovens. It mimics the conditions of a bakery hearth.
What if my dough doesn’t rise?
Check your yeast expiration date and water temperature. It should be 110-115°F. If the room is cold, place the bowl near a warm spot (but not too hot).
Can I skip the ice cubes?
Don’t skip them! The ice cubes create essential steam for a proper rise and crust formation during the first 30 minutes of baking.
How do I know when it’s done?
The bread should be deep golden brown and sound hollow when tapped on the bottom. An internal temperature of 200-210°F confirms doneness.

- 4C Bread Crumbs Meatballs Recipe: Crispy Crust and Juicy Centers - September 25, 2026
- 6 Oz Chocolate Chip Cookie Recipe: Perfectly Balanced Crispy Edges and Chewy Hearts - September 25, 2026
- 6-Inch Coffee Cake Recipe: Vanilla Bean Swirls and Buttery Streusel Topping - September 25, 2026