
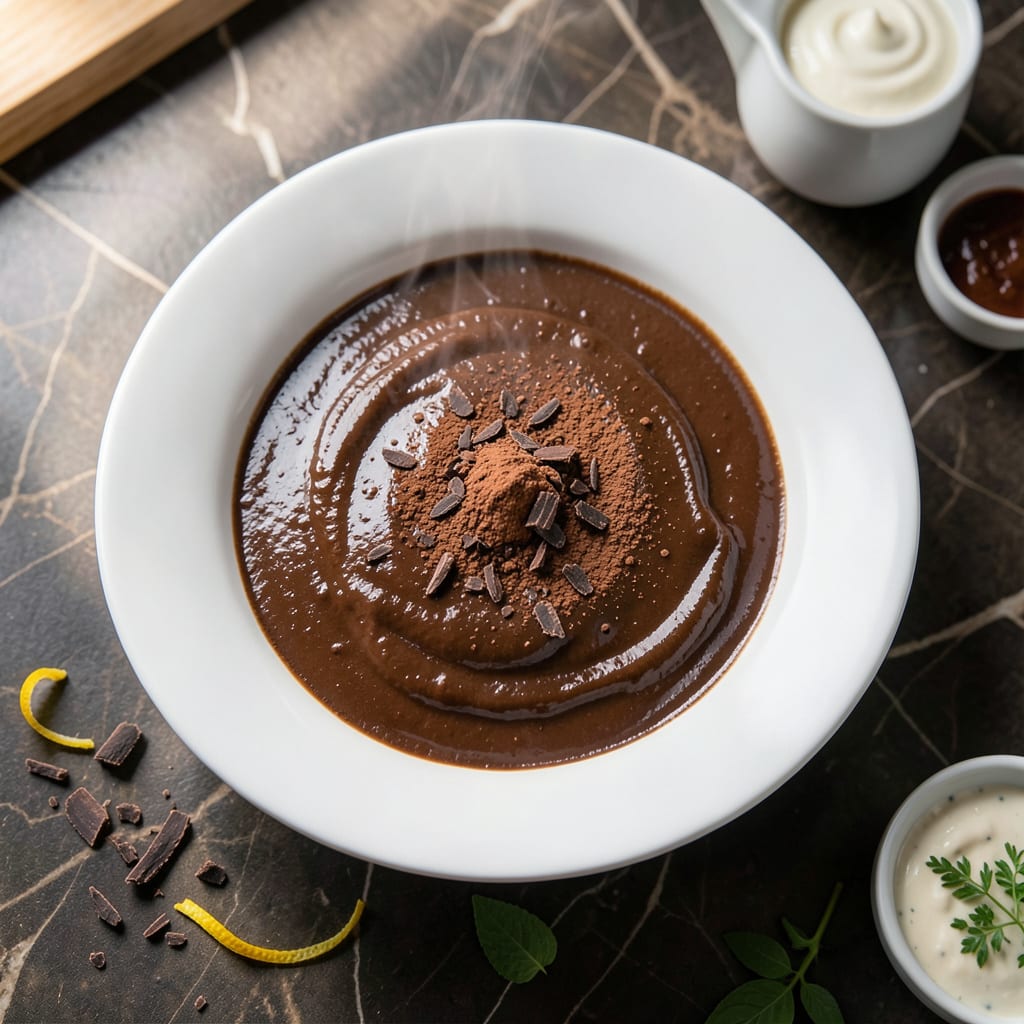
This Spanish chocolate pot delivers a silky texture that melts in your mouth. I’ve refined the technique to ensure it’s rich without being heavy.
The secret lies in slow cooking and high-quality chocolate. It comes together in minutes and serves as the perfect end to any meal.
Ingredients for Pot De Chocolate
Quality chocolate and a few pantry staples create this luxurious Spanish dessert in no time.
| Ingredient | Amount | Notes |
|---|---|---|
| Dark Chocolate 🍫 | 8 oz | 70% cocoa minimum, finely chopped |
| Whole Milk 🥛 | 2 cups | Full-fat for creaminess |
| Heavy Cream 🥣 | ½ cup | Cold, for whipping |
| Granulated Sugar 🍚 | ¼ cup | Adjust to taste preference |
| Cornstarch 🌾 | 1 tbsp | For thickening consistency |
| Vanilla Extract 🌿 | 1 tsp | Pure, not imitation |
| Ground Cinnamon 🌶️ | ¼ tsp | Spanish variety preferred |
| Espresso Powder ☕ | ½ tsp | Enhances chocolate depth |
| Sea Salt 🧂 | 0.125 tsp | Fine grain for even distribution |
| Orange Zest 🍊 | 1 tsp | Finely grated, optional garnish |
| Large Egg Yolks 🥚 | 4 whole | Room temperature for emulsification |
| Unsalted Butter 🧈 | 2 tbsp | For finishing and shine |
For the chocolate, Valrhona or Callebaut are professional standards—70% cocoa gives that deep, complex flavor without bitterness. Whole Foods or Sur La Table carry excellent options. The milk should be full-fat (whole milk) for the silkiest texture; low-fat versions can make the final product grainy. Cornstarch is the thickener here, so ensure it’s fresh (old cornstarch loses potency).
No dark chocolate? Bittersweet at 60% cocoa works, but reduce sugar slightly. Skip the espresso powder if you must, but it really amplifies the chocolate. For a dairy-free version, coconut milk and vegan chocolate substitute well. The cinnamon is traditional for Spanish chocolate pots—Ceylon cinnamon has a sweeter profile. Egg yolks are non-negotiable for the velvety mouthfeel.
This keeps 3-4 days refrigerated in an airtight container. Reheat gently in a double boiler, stirring constantly. For best results, serve warm the same day it’s made. The orange zest brightens the richness—add just before serving.
Why You’ll Love This Recipe
- Five Ingredients Only: I love that this comes together with just dark chocolate, milk, cream, sugar, and cornstarch—no fuss, no special trips to the store.
- Velvety Smooth: The combination of whole milk and heavy cream creates this ridiculously rich, silky texture that’s pure comfort in a cup.
- Dessert for Any Night: I’ll make this for a fancy dinner party or just because it’s Tuesday and I need something sweet.
- Keeps Well: Honestly, it tastes even better the next day, so I’ll often double the batch for easy leftovers.
Step-by-Step Instructions for Pot De Chocolate
Master this Spanish classic with precise technique for an unforgettable velvety texture.
Step 1: Melt and Infuse the Chocolate Base
In a medium saucepan, combine the 8 oz Dark Chocolate with 2 cups Whole Milk and 0.5 cup Heavy Cream over medium-low heat. Stir constantly with a silicone spatula until the chocolate melts completely and the mixture becomes smooth—this should take about 5-7 minutes.
Add the 0.25 tsp Ground Cinnamon, 0.5 tsp Espresso Powder, and 1 tsp Orange Zest to the warm mixture. These ingredients deepen the chocolate’s complexity. Maintain gentle heat to avoid scorching; you want the mixture to be just steaming hot, not boiling.
Step 2: Temper the Egg Yolks for Silky Texture
In a separate bowl, whisk the 4 whole Large Egg Yolks with the 0.25 cup Granulated Sugar and 1 tbsp Cornstarch until pale and slightly thickened, about 2-3 minutes of vigorous whisking. This ribbon-like consistency ensures proper emulsification.
Slowly ladle about 1 cup of the warm chocolate mixture into the egg yolk mixture while whisking constantly. This tempering step prevents the eggs from curdling. Once fully incorporated, pour the tempered egg mixture back into the saucepan with the remaining chocolate mixture.
Step 3: Thicken to Perfect Consistency
Return the saucepan to medium-low heat and cook, stirring constantly with a wooden spoon, for 6-8 minutes. The mixture will begin to thicken noticeably. Watch for it to coat the back of your spoon with a glossy sheen—this is your visual cue that it’s ready.
At this point, the custard should be thick enough to leave a clear trail when you run your finger through it on the spoon. Remove from heat immediately to prevent overcooking. Stir in the 1 tsp Vanilla Extract and 0.125 tsp Sea Salt for balanced flavor.
Step 4: Finish with Butter for Luxurious Shine
Add the 2 tbsp Unsalted Butter, one tablespoon at a time, whisking until each addition is fully melted and incorporated. This final step adds a glossy finish and rich mouthfeel that defines authentic pot de chocolate.
Pour the mixture into serving cups or ramekins. The surface should be smooth as glass with a slight sheen. Let it cool to room temperature, then refrigerate for at least 2 hours to set completely—the texture will transform from liquid to a firm yet spoonable consistency.
Pro Tips For Making Pot De Chocolate
- Temper the Chocolate: Chop the dark chocolate finely and let it sit at room temperature for 10 minutes before melting—this prevents seizing when it hits the warm milk and cream.
- Whisk Cornstarch First: Mix the cornstarch with a little cold milk before adding it to the pot to avoid lumps, and make sure the liquid is just simmering, not boiling, when you stir it in.
- Skip Low-Fat Swaps: I learned this the hard way—whole milk and heavy cream are non-negotiable here; lower-fat versions thin out the texture and dull the richness.
- Rest Before Serving: Let the pot de chocolate sit for 15 minutes off the heat before serving—it thickens up beautifully and the flavors deepen.
Troubleshooting Great pot de chocolate
Grainy Texture
If your pot de chocolate turns out grainy, the chocolate likely seized during melting. Always use low heat and stir constantly with a silicone spatula. I also recommend using finely chopped chocolate rather than chips for smoother melting. 💡
Lumpy Custard
Lumps usually mean the eggs curdled during tempering. To prevent this, add the warm chocolate mixture to the yolks very slowly while whisking constantly. If it happens, strain through a fine-mesh sieve before chilling.
Too Thin
If the mixture doesn’t thicken, your cornstarch may have been old or not fully activated. Cook for an additional 2-3 minutes at medium-low heat while stirring. If still thin, a slurry of ½ tsp cornstarch mixed with 1 tbsp cold milk can save it.
Skin Formation
To avoid a skin forming on top, press plastic wrap directly onto the surface before refrigerating. Alternatively, a light dusting of cocoa powder creates a protective layer while adding visual appeal.
Overcooked Eggs
Scrambled eggs in your chocolate mean the mixture got too hot. Remove from heat immediately when it coats the spoon. The residual heat will continue cooking it. I use a thermometer to keep it below 170°F. 🔥
Separation
If the mixture separates, it likely cooled too quickly. Gently reheat while whisking constantly over low heat until smooth again. Adding 1 tsp hot water at a time can help re-emulsify it.
Nutrition Facts
Frequently Asked Questions
Can I use milk chocolate instead?
Yes, but reduce sugar by 2 tablespoons since milk chocolate is sweeter. The flavor will be milder and less complex than with dark chocolate.
How do I know when it’s thick enough?
It should coat the back of a spoon with a glossy sheen. When you run your finger through it, the trail should hold its shape for 2-3 seconds.
Can I make this ahead of time?
It keeps well for up to 3 days refrigerated. Press plastic wrap directly on the surface to prevent a skin from forming.
Why did my mixture curdle?
This happens if the eggs get too hot during tempering. Always add the warm chocolate mixture to the yolks very slowly while whisking constantly.

- 4C Bread Crumbs Meatballs Recipe: Crispy Crust and Juicy Centers - September 25, 2026
- 6 Oz Chocolate Chip Cookie Recipe: Perfectly Balanced Crispy Edges and Chewy Hearts - September 25, 2026
- 6-Inch Coffee Cake Recipe: Vanilla Bean Swirls and Buttery Streusel Topping - September 25, 2026