
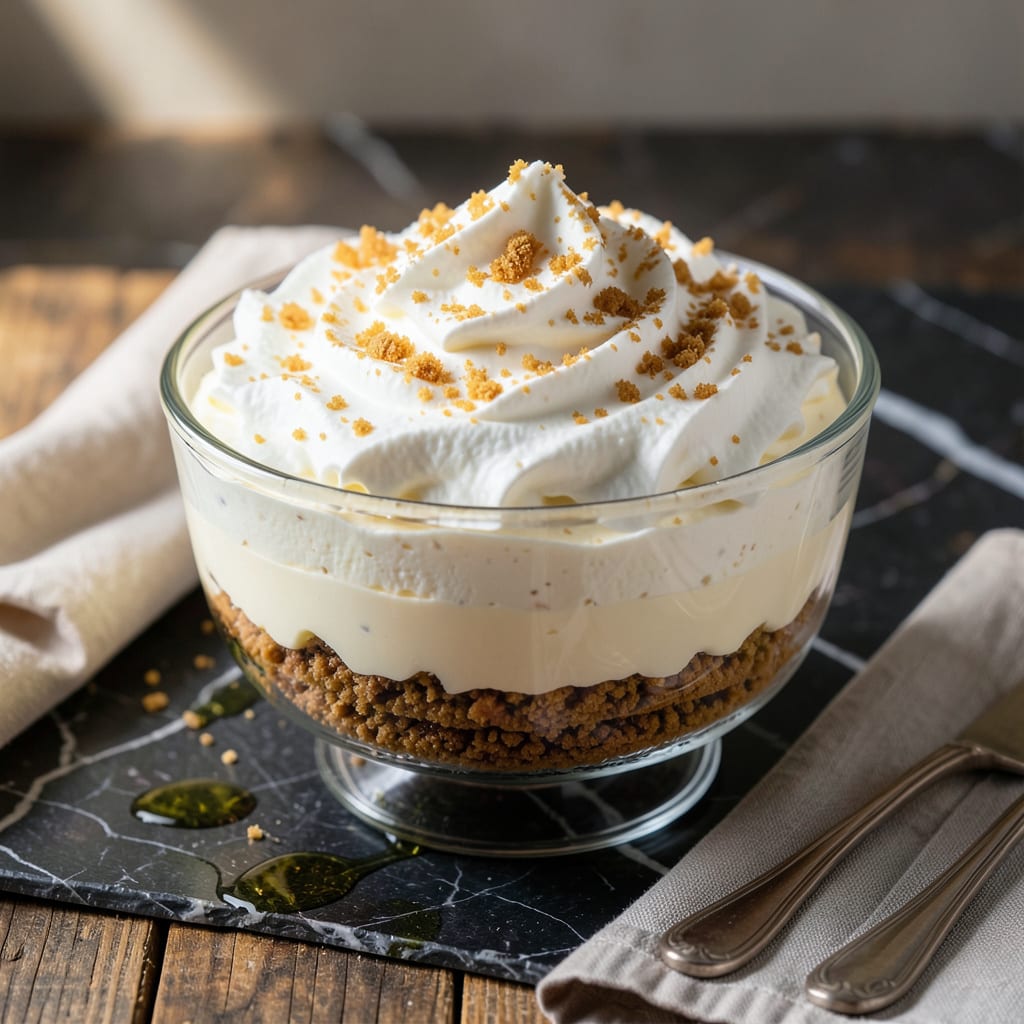
This Irish-inspired dessert brings cheerful layers of color and flavor to your table. A buttery base supports vibrant rainbow strides of fruit, cream, and cake.
Perfect for St. Patrick’s Day or any celebration, this creation delivers restaurant-quality presentation with simple, foolproof steps. Every bite offers a sweet surprise.
Ingredients for Pot O Gold
Pantry staples plus fresh berries create this vibrant, layered dessert masterpiece.
| Ingredient | Amount | Notes |
|---|---|---|
| All-Purpose Flour 🌾 | 1 ½ cups | Sifted for even texture |
| Granulated Sugar 🍚 | ¾ cup | Fine white sugar preferred |
| Unsalted Butter 🧈 | ½ cup | Cold, cubed for base |
| Vanilla Extract 💧 | 1 tsp | Pure for best flavor |
| Large Eggs 🥚 | 2 whole | Room temperature for blending |
| Heavy Whipping Cream 🥛 | 1 ½ cups | Full-fat for richness |
| Cream Cheese 🧀 | 8 oz | Softened to room temperature |
| Powdered Sugar 🍚 | ½ cup | Confectioners sugar for cream |
| Mixed Fresh Berries 🍓 | 2 cups | Strawberries, blueberries, raspberries |
| Rainbow Sprinkles 🎨 | ¼ cup | For colorful layers |
| Vanilla Wafer Cookies 🍪 | 20 pieces | Crushed for base layer |
| Lemon Juice 🍋 | 1 tbsp | Freshly squeezed for brightness |
| Salt 🧂 | ¼ tsp | Fine sea salt preferred |
The butter matters here—use a high-fat European style like Plugrá or Kerrygold for that rich, flaky base. I grab mine from Whole Foods when they’re running a sale, but any supermarket brand works fine. The cream cheese needs to be full-fat (trust me on the full-fat version) and softened properly—no shortcuts here. Vanilla wafers from Nabisco or Keebler are my go-to for the base.
Swap the berries for whatever’s in season—mango or kiwi add a fun twist. No rainbow sprinkles? Crushed freeze-dried fruit gives color and crunch. The whipped cream can be CocoWhip for a dairy-free version (though the flavor changes slightly). Fresh lemon juice is worth the squeeze, but bottled works in a pinch.
This keeps 3-4 days in the fridge—cover tightly with plastic wrap. The base softens over time, so eat within 2 days for the best texture. Freezing isn’t ideal (the cream layers separate), but it’s fine for up to 1 month if needed.
Why You’ll Love This Recipe
- I’ll be real: they taste even better the next day, and the batch lasts us all week without going stale.
- One Bowl Wonder: I love that I can mix the flour, sugar, butter, and eggs in a single bowl—no fancy equipment, just a spoon and 10 minutes of effort.
- Buttery Vanilla Magic: The combo of rich butter and real vanilla makes these taste like bakery treats, not something I threw together at home.
- Party or Lunchbox: Honestly, these work for St. Patrick’s Day desserts just as well as they do for my kid’s school snack.
Step-by-Step Instructions for Irish-Inspired Rainbow Dessert Delight
This layered treat comes together in stages—each one builds on the last for a showstopper finish.
Step 1: Create the Vanilla Wafer Crust Base
Crush all 20 pieces vanilla wafer cookies into fine crumbs using a food processor or rolling pin. I find that pulsing in a processor gives the most even texture without overworking the cookies.
Melt the 0.5 cup unsalted butter and mix it thoroughly with the cookie crumbs and 0.25 tsp salt. The mixture should resemble wet sand and hold together when pressed. Press this firmly into the bottom of a 9-inch springform pan to create an even base layer.
Use a measuring cup to compact the crust well, especially at the edges where the pan curves. Chill in the refrigerator while you prepare the next layer—this prevents the butter from softening and helps the crust set properly.
Step 2: Prepare the Cream Cheese Layer
Beat the 8 oz cream cheese with 0.5 cup powdered sugar and 1 tsp vanilla extract until completely smooth. I always start with room temperature cream cheese to avoid lumps—cold cream cheese won’t blend evenly, no matter how long you mix it.
Add 1.5 cups heavy whipping cream gradually, mixing on low speed until incorporated, then increase to high and whip until stiff peaks form. Watch for the moment when the beaters leave distinct trails in the mixture—that’s your visual cue it’s ready.
Fold in 0.25 cup rainbow sprinkles by hand to maintain the color distribution. Spread this layer evenly over the chilled crust. The contrast between the white cream layer and colorful sprinkles creates that pot-of-gold effect we’re after.
Step 3: Add the Berry Topping Layer
Gently toss the 2 cups mixed fresh berries with 0.75 cup granulated sugar and 1 tbsp lemon juice. The sugar will draw out the natural juices from the berries, creating a beautiful syrup that soaks into the dessert.
Let this mixture sit for 15-20 minutes to macerate. You’ll see the berries start to release their juices and the sugar begins to dissolve—that’s when you know it’s ready. Spoon this fruit mixture evenly over the cream cheese layer, distributing the berries and their juices.
The acid from the lemon juice balances the sweetness and keeps the berries vibrant. Press down lightly so the juices seep into the cream layer for full flavor integration.
Step 4: Finish with the Flour-Stabilized Topping
In a separate bowl, whisk together the 2 whole large eggs with 1.5 cups all-purpose flour until smooth. This creates a thin batter that will firm up as it bakes, forming a delicate top layer that holds everything together.
Pour this mixture evenly over the berry layer, using a spatula to spread it to the edges. The batter should just cover the berries—you’ll see it start to set within the first 10 minutes of baking.
Bake at 350°F for 25-30 minutes until the top is light golden brown and a toothpick inserted comes out clean. Let it cool completely in the pan before releasing the springform—this prevents cracking and helps the layers set properly.
Pro Tips For Making Pot O Gold
- Cream Butter First: Beat the unsalted butter and sugar together for a full 3-4 minutes until pale and fluffy—I learned this the hard way after my first few dense, flat results.
- Room Temp Eggs: Take the eggs out of the fridge 30 minutes beforehand, or soak them in warm water for 10 minutes; cold eggs can cause the butter to seize up.
- Don’t Overmix Flour: Fold in the flour just until it disappears, or you’ll end up with tough cookies instead of tender ones—my grandmother swore by this, and she was right.
- Use Real Vanilla: Skip the imitation stuff; a good splash of pure vanilla extract actually changes the outcome in ways you’ll notice.
Make-Ahead Tips for This Recipe
Prep the Crust
Make the vanilla wafer crust base a day ahead for stress-free assembly. Press the mixture into your 9-inch springform pan as directed, then wrap tightly with plastic and refrigerate overnight. This gives the butter time to fully solidify, creating a firmer foundation. 💡
Cream Layer Timing
Whip the cream cheese mixture up to 2 hours before assembly. Store it in an airtight container in the fridge. When ready to use, give it a quick re-whip for 30 seconds to restore its fluffy texture before spreading.
Berry Prep
Macerate the berries with sugar and lemon juice the morning of serving. Keep them covered in the fridge until assembly. Drain excess liquid before layering to prevent a soggy dessert. The flavors deepen beautifully over 4-6 hours of chilling.
Assembly Strategy
Build the entire dessert in the springform pan up to 8 hours before baking. Cover with plastic wrap and refrigerate. This lets the layers meld together. Bake just before serving for that fresh-from-the-oven warmth.
Baking Day Shortcut
If short on time, prepare all components separately the night before. Store crust, cream layer, and berries in separate containers. Assemble and bake in the morning. The crust may soften slightly but still holds together well.
Serving Tip
For clean slices, use a hot knife dipped in warm water and wiped dry between cuts. This prevents dragging the colorful layers. Serve chilled or at room temperature within 2 hours of baking. ✨
Nutrition Facts
Frequently Asked Questions
Can I use store-bought cookie crumbs?
Yes, substitute 2 cups of pre-crushed vanilla wafer crumbs. Reduce butter to 6 tablespoons since store-bought crumbs are often finer. Press firmly into the pan for an even base.
How do I prevent a soggy crust?
Bake the crust alone at 350°F for 8-10 minutes before adding layers. Let it cool completely. Also, drain macerated berries well before adding to avoid excess liquid.
Can I make this gluten-free?
Swap vanilla wafers for gluten-free graham crackers and use 1:1 gluten-free flour. Ensure all ingredients are certified gluten-free. The texture remains similar with these changes.
How long does this keep in the fridge?
Store covered for up to 3-4 days. For best texture, enjoy within 48 hours. The crust softens over time but flavors continue to meld beautifully.

- 4C Bread Crumbs Meatballs Recipe: Crispy Crust and Juicy Centers - September 25, 2026
- 6 Oz Chocolate Chip Cookie Recipe: Perfectly Balanced Crispy Edges and Chewy Hearts - September 25, 2026
- 6-Inch Coffee Cake Recipe: Vanilla Bean Swirls and Buttery Streusel Topping - September 25, 2026