
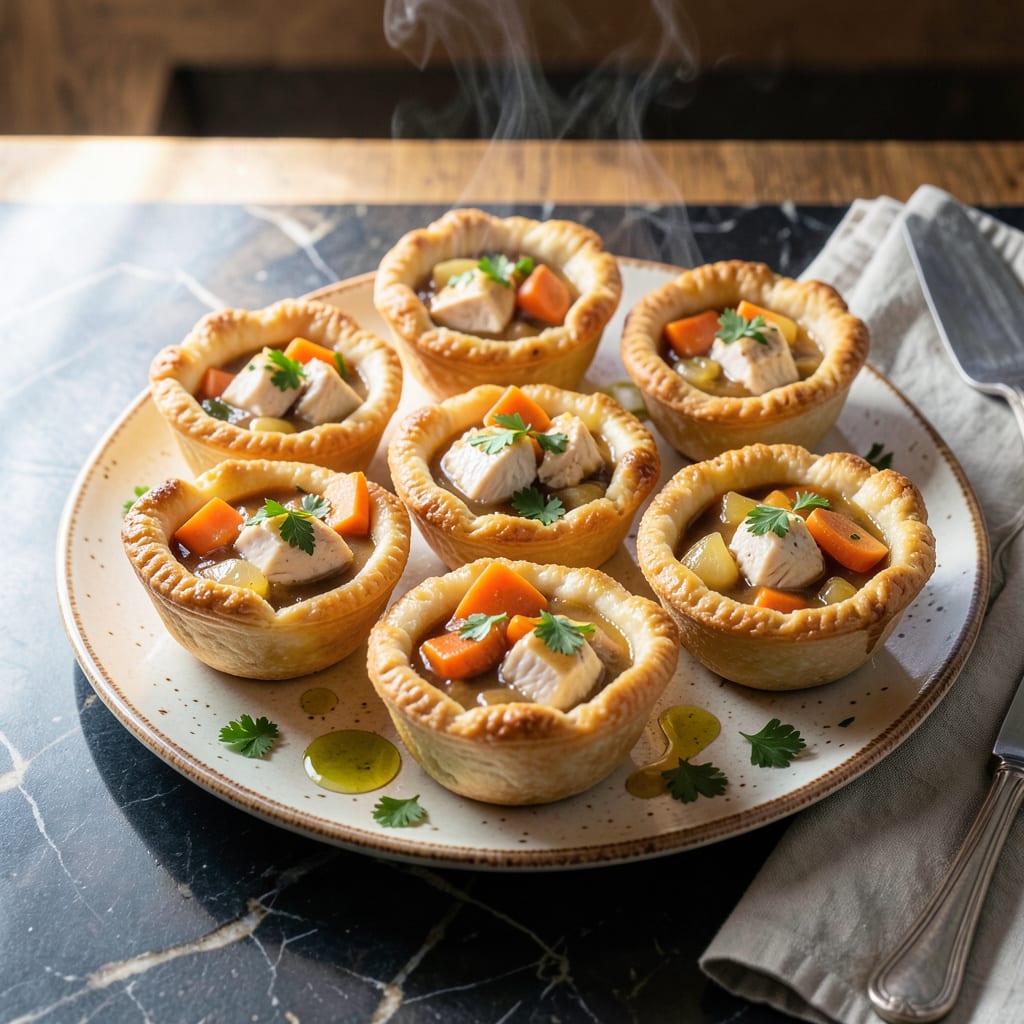
I’ve transformed classic pot pie into flaky, individual portions that deliver all the comfort of the original. These bite-sized cups feature golden pastry shells filled with creamy chicken and vegetables.
Perfect for gatherings or cozy nights in, they bake in 20 minutes with a crisp crust and hearty filling. Each bite offers the same satisfying flavors as traditional pot pie, just in a convenient handheld form.
Ingredients for Pot Pie Cups
Flaky crusts meet creamy chicken and veggies in these handheld comfort bites.
| Ingredient | Amount | Notes |
|---|---|---|
| Refrigerated Pie Crust 🥧 | 2 sheets | Thawed according to package |
| Boneless Skinless Chicken Breast 🍗 | 1 lb | Diced into small cubes |
| Unsalted Butter 🧈 | 4 tbsp | Divided for cooking and roux |
| All-Purpose Flour 🌾 | 3 tbsp | For thickening the filling |
| Yellow Onion 🧅 | ½ whole | Finely diced |
| Carrots 🥕 | 2 whole | Peeled and finely diced |
| Celery Stalks 🌿 | 2 whole | Finely diced |
| Frozen Peas 🌱 | ½ cup | No need to thaw |
| Chicken Broth 💧 | 1 cup | Low-sodium preferred |
| Whole Milk 🥛 | ½ cup | For creamy filling |
| Garlic Cloves 🧄 | 2 cloves | Minced |
| Dried Thyme 🍃 | ½ tsp | Or 1 tsp fresh thyme |
| Salt 🧂 | ½ tsp | Adjust to taste |
| Black Pepper 🌶️ | ¼ tsp | Freshly ground preferred |
| Large Egg 🥚 | 1 whole | For egg wash on crust |
[recipeingredientscaler]
The crust is everything here. Pillsbury refrigerated pie crusts are my go-to—consistently flaky and save a ton of time. For the chicken, boneless, skinless breasts stay tender in the filling. I grab mine from Costco when I’m making a double batch. The veggies should be finely diced so they cook quickly and fit neatly into those cute little cups.
No thyme? Poultry seasoning at half the amount works in a pinch. Short on carrots? Swap in diced bell peppers for color. The milk can be whole or 2%—just avoid skim (it won’t give you that creamy richness). If you’re out of peas, diced corn or green beans add a nice texture. And if you’ve got fresh herbs, toss in a tablespoon of chopped parsley at the end.
Assemble these right before baking—no need to prep ahead. Leftovers keep in the fridge for 3-4 days (reheat in the oven to crisp the crust). The uncooked cups can be frozen for up to 1 month (bake straight from frozen, add 5 minutes).
Why You’ll Love This Recipe
- No-Fuss Assembly: The refrigerated pie crust does all the heavy lifting—just press, fill, and bake.
- Buttery Comfort: That rich, velvety sauce from butter and flour hugs the chicken and onions in every bite.
- Portable Feast: I pack these for lunches or serve them at potlucks—no plates needed.
- Leftovers? None: Honestly, they disappear faster than I can make them, but they reheat beautifully if any survive.
Step-by-Step Instructions for Pot Pie Cups
Here’s how I make these handheld comfort bites with perfect flaky crusts every time.
Step 1: Prepare and Cook the Chicken
Start by dicing the 1 lb Boneless Skinless Chicken Breast into small, even cubes—about ½-inch pieces. This size ensures they cook quickly and fit neatly into the cups. Heat 1 tbsp Unsalted Butter in a large skillet over medium-high heat until it shimmers.
Add the chicken in a single layer and cook for 5-6 minutes, stirring occasionally, until it’s no longer pink inside and the pieces are lightly golden. Transfer the cooked chicken to a plate and set aside. Don’t wipe the skillet clean—those browned bits add depth to the filling.
Step 2: Build the Creamy Vegetable Filling
In the same skillet, melt the remaining 3 tbsp Unsalted Butter over medium heat. Add the finely diced 0.5 whole Yellow Onion, peeled and finely diced 2 whole Carrots, and finely diced 2 whole Celery Stalks. Cook for 5 minutes until the vegetables soften and the onion turns translucent.
Stir in the minced 2 cloves Garlic Cloves and cook for 30 seconds until fragrant. Sprinkle the 3 tbsp All-Purpose Flour over the vegetables and stir to coat. This creates a roux that will thicken the filling beautifully.
Slowly pour in the 1 cup Chicken Broth and 0.5 cup Whole Milk, whisking constantly to avoid lumps. Add the 0.5 cup Frozen Peas, 0.5 tsp Dried Thyme, 0.5 tsp Salt, and 0.25 tsp Black Pepper. Simmer for 3-4 minutes until the sauce thickens enough to coat the back of a spoon.
Return the cooked chicken to the skillet and stir to combine. Remove from heat and let the filling cool slightly—it should be thick but still pourable.
Step 3: Assemble and Bake the Pot Pie Cups
Preheat your oven to 375°F. Unroll the 2 sheets Refrigerated Pie Crust and use a 3-4 inch round cutter to cut out circles—you’ll need 12 circles total (6 per sheet). Press each circle into the cups of a standard muffin tin, creating a crust that covers the bottom and sides.
Spoon the filling into each crust, dividing it evenly—it should mound slightly above the rim. In a small bowl, whisk the 1 whole Large Egg with 1 tbsp water to create an egg wash. Brush the edges of the crusts generously with the wash for that golden, flaky finish.
Step 4: Bake to Golden Perfection
Bake for 20-25 minutes until the crusts are deep golden brown and the filling is bubbling. Rotate the pan halfway through baking to ensure even browning. The crust should be crisp and flaky, with no soggy spots.
Let the pot pie cups cool in the pan for 5 minutes before gently removing them with a small offset spatula. Serve warm—the filling will be creamy and thick, with tender chicken and vegetables in every bite. These are best enjoyed fresh, but they reheat beautifully in a 350°F oven for 10 minutes.
Pro Tips For Making Pot Pie Cups
- Pre-Cook the Chicken: Poach or sauté the chicken breast before mixing it into the filling—raw pieces won’t cook through in the short baking time, and you’ll avoid chewy, underdone bites.
- Chill the Crust: Let the refrigerated pie crust sit out for 10-15 minutes before pressing it into the muffin tin; it softens just enough to shape without cracking but stays cold enough to hold its form.
- Sauté the Onions First: Cook the yellow onions in the butter until soft and translucent before adding flour—this builds flavor and prevents the roux from tasting raw or starchy.
- Vent the Tops: Poke a small slit in the center of each crust top before baking; it lets steam escape so the cups don’t burst open or turn soggy underneath.
Serving Suggestions for This Dish
Plating for Parties
Serve these on a wooden board with parchment paper for easy cleanup. Arrange in a circle with a small bowl of homemade gravy in the center for dipping. I love adding fresh parsley sprigs between each cup for a pop of color. 💛
Cozy Weeknight Style
Place 3 cups on a small plate with a side of buttered corn or mashed potatoes. The creamy filling pairs perfectly with starchy sides. A simple green salad with lemon dressing balances the richness.
Elegant Appetizer Display
Use a tiered serving tray to showcase the golden crusts. Garnish each with a thyme sprig or microgreens for a restaurant-worthy look. I always warm the tray in the oven for 5 minutes before serving to keep them crisp.
For the Kids
Let them dip in ketchup or honey mustard—it’s amazing how this makes veggies disappear. Serve with apple slices and carrot sticks for a balanced mini meal. I find they eat more when they can hold it in their hands.
Holiday Buffet
Double the batch and display on a chafing dish to keep warm. Label with cute tags like “Mom’s Hand Pies” for a nostalgic touch. The golden-brown crusts look stunning against holiday table settings.
Leftovers Reinvented
Crumble cooled cups over mixed greens with balsamic vinaigrette for a next-day salad topping. Or chop and mix into fried rice for an easy lunch. I always save a few to repurpose this way.
Nutrition Facts
Frequently Asked Questions
Can I use store-bought rotisserie chicken?
Shred 2 cups of cooked rotisserie chicken to save time. Just skip the cooking step and add it directly to the veggie mixture.
Why did my crust get soggy?
Overfilling or underbaking are common culprits. Use 1-2 tbsp filling per cup max and bake until deep golden brown. Let them cool 5 minutes in the pan too.
Can I make these vegetarian?
Swap chicken for 1 cup diced mushrooms and use vegetable broth. Add 1 can white beans for protein. The baking time and method stay the same.
How do I prevent the filling from spilling?
Don’t overfill—leave ¼-inch at the top. Press crust firmly into the muffin tin and chill 10 minutes before baking to help it hold shape.

- 4C Bread Crumbs Meatballs Recipe: Crispy Crust and Juicy Centers - September 25, 2026
- 6 Oz Chocolate Chip Cookie Recipe: Perfectly Balanced Crispy Edges and Chewy Hearts - September 25, 2026
- 6-Inch Coffee Cake Recipe: Vanilla Bean Swirls and Buttery Streusel Topping - September 25, 2026