
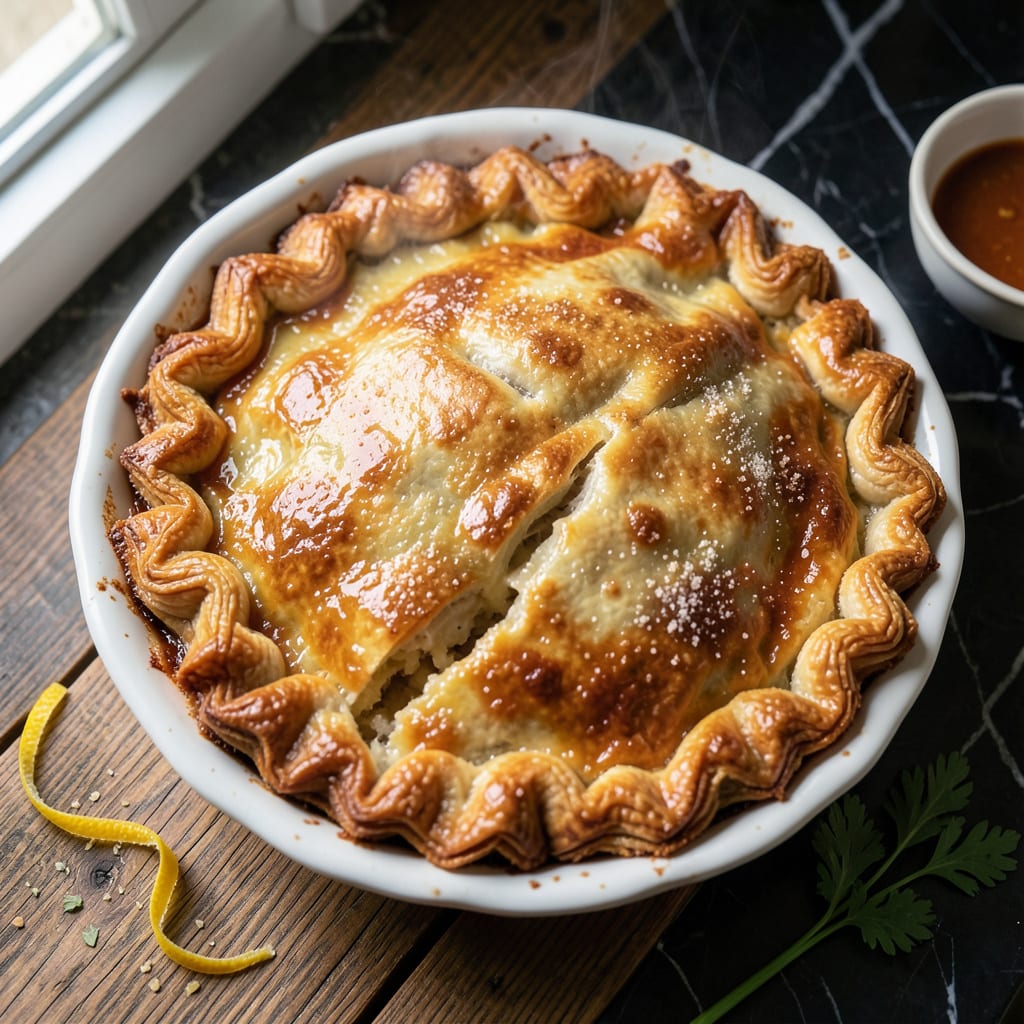
Creating a flaky pot pie shell from scratch transforms any savory filling into a showstopping meal. The secret lies in cold ingredients and precise handling to maintain those buttery layers.
This method delivers restaurant-quality results with a golden crust that shatters at the touch. Perfect for chicken, beef, or vegetable fillings, it elevates comfort food to new heights.
Ingredients for Pot Pie Shell
Nine essential ingredients create that coveted flaky, golden crust from scratch. Cold and precise is key.
| Ingredient | Amount | Notes |
|---|---|---|
| All-Purpose Flour 🌾 | 2 ½ cups | Unbleached preferred, plus extra for dusting |
| Unsalted Butter 🧈 | 1 cup | Cold, cut into small cubes |
| Ice Water 💧 | ½ cup | Plus 1-2 extra tbsp as needed |
| Fine Sea Salt 🧂 | 1 tsp | Diamond Crystal recommended for consistency |
| Granulated Sugar 🍚 | 1 tsp | Balances salt, enhances browning |
| Egg 🥚 | 1 whole | For egg wash, optional |
| Heavy Cream 🥛 | 1 tbsp | Or milk for egg wash |
| White Vinegar 🍶 | 1 tsp | Or apple cider vinegar |
| Cold Shortening 🧈 | ½ cup | Vegetable-based, for extra flakiness |
[recipeingredientscaler]
The butter is non-negotiable for layers. European-style with 82% fat (like Plugrá or Kerrygold) delivers superior flakiness compared to standard. Keep it ice-cold—freeze the cubes for 10 minutes before incorporating. The flour should be low-protein (all-purpose, not bread flour) to avoid toughness. For the ice water, measure first then add ice cubes to ensure it’s truly cold without diluting the dough.
No butter? Cold lard makes an excellent substitute (traditional in many pot pie recipes). Vegan? Use coconut oil or vegan butter—both solid when chilled. Short on time? Food processor cuts the butter in seconds (pulse, don’t blend). The vinegar inhibits gluten development for tenderness—don’t omit it. If using salted butter, reduce the added salt by half.
Dough keeps 3 days refrigerated or 3 months frozen (wrap tightly). For make-ahead, roll into a disk before chilling—saves rolling time later. Baked shells stay crisp 1 day at room temperature, but fillings are best added fresh. Always work on a lightly floured surface to prevent sticking.
Why You’ll Love This Recipe
- No-Fuss Dough: I mix flour, cold butter, and ice water in one bowl—no fancy tools, just my hands and 10 minutes of effort.
- Buttery Perfection: That flaky, golden crust from the butter and a pinch of sugar? It’s the reason my family lingers at the table.
- Freezer Friendly: I make a double batch, freeze the extras, and pull one out whenever I need a quick pot pie fix.
- Pantry Staples: Flour, butter, salt, sugar—ingredients I always have on hand, so dinner’s never more than a roll-and-bake away.
Step-by-Step Instructions for Pot Pie Shell
Achieve perfectly flaky layers with this professional method for a golden, buttery crust.
Step 1: Combine Dry Ingredients and Cold Fats
In a large bowl, whisk together the 2.5 cups All-Purpose Flour, 1 tsp Fine Sea Salt, and 1 tsp Granulated Sugar until evenly distributed. This creates the structural base for your crust. The sugar enhances browning and balances the salt, giving you that classic golden appearance.
Add the 1 cup Unsalted Butter (cold and cubed) and 0.5 cup Cold Shortening to the flour mixture. Using a pastry cutter or your fingertips, work the fats into the flour until the mixture resembles coarse crumbs with pea-sized pieces of fat visible. This uneven texture is crucial—it creates the flaky layers as the fat melts during baking.
Step 2: Incorporate the Liquid Components
Measure out the 0.5 cup Ice Water and add the 1 tsp White Vinegar to it. The vinegar tenderizes the gluten slightly, contributing to a more delicate crust. Create a well in the center of your flour-fat mixture and pour in about ½ cup of the ice water-vinegar mixture.
Using a fork, gently toss the flour mixture with the liquid until it just begins to come together. Add more ice water 1 tablespoon at a time until the dough holds its shape when pressed but isn’t sticky. The total amount needed may vary slightly based on humidity, but you likely won’t need all the water. Stop mixing as soon as the dough forms—overworking develops gluten and results in a tough crust.
Step 3: Chill and Roll the Dough
Divide the dough into two equal portions, flatten each into a disc, and wrap them tightly in plastic wrap. Refrigerate for at least 1 hour (or up to 2 days). Chilling relaxes the gluten and solidifies the fat, making the dough easier to roll and preventing shrinkage during baking.
On a lightly floured surface, roll one disc of dough to a ⅛-inch thickness (about 12 inches in diameter for a standard pie dish). For the best flakiness, roll from the center outward in all directions, rotating the dough occasionally to maintain an even thickness. Avoid pressing down too hard with the rolling pin—let the weight of the pin do the work.
Step 4: Prepare for Baking with Egg Wash
For the top crust, you may use the second dough disc as-is or create a lattice pattern. If using a full top crust, cut several 1-inch slits in the center to allow steam to escape. This prevents the filling from creating a soggy bottom crust.
Whisk together the 1 whole Egg and 1 tbsp Heavy Cream to make an egg wash. Brush this mixture evenly over the top crust just before baking. The egg wash gives the shell a beautiful, glossy golden finish and adds an extra layer of flavor. Bake as directed by your pot pie filling recipe, typically at 375-400°F until the crust is deep golden brown.
Pro Tips For Making Pot Pie Shell
- Chill the Butter: Keep your butter ice-cold until the moment you cut it into the flour—this is what creates those flaky layers. I learned this the hard way after ending up with dense, tough shells more than once.
- Measure Water Carefully: Start with 3-4 tablespoons of ice water, then add more by the teaspoon if needed. Too much water makes the dough sticky and hard to roll.
- Rest the Dough: Let the dough rest in the fridge for at least 30 minutes before rolling. Skipping this makes it shrink when baking, and nobody wants a shrunken pot pie shell.
- Use a Light Touch: Handle the dough as little as possible—overworking it develops gluten, which makes the crust tough. Press the dough into the pan, don’t stretch it.
Wine and Beer Pairings for pot pie shell
Crisp White Wines
A buttery Chardonnay from California pairs beautifully, as its creamy texture complements the flaky crust. I love Kendall-Jackson Vintner’s Reserve for its balanced oak and citrus notes. For something lighter, try a Sauvignon Blanc from New Zealand. 🍷
Rich Red Wines
If your filling is beef-based, a medium-bodied Pinot Noir works wonders. Meiomi offers a smooth, fruit-forward option that won’t overpower the dish. For darker fillings, a Syrah with its peppery notes adds depth.
Classic Beer Pairings
An American amber ale like Fat Tire enhances the savory notes of chicken or turkey fillings. The caramel maltiness mirrors the crust’s golden hue. For a lighter option, a crisp pilsner cleanses the palate between bites.
Craft Beer Options
A brown ale brings nutty undertones that pair well with mushroom or vegetable fillings. I recommend Newcastle for its approachable, slightly sweet profile. For a bolder choice, a porter complements hearty beef or lamb fillings.
Non-Alcoholic Choices
Sparkling apple cider offers effervescence that cuts through the richness. For something warmer, a spiced chai tea enhances the comforting nature of this dish. I always keep Martinelli’s on hand for family dinners. ✨
Nutrition Facts
Frequently Asked Questions
Can I make the dough ahead of time?
Yes! The dough keeps well wrapped in plastic for up to 3 days in the fridge or 3 months in the freezer. Thaw overnight in the refrigerator before rolling.
Why is the butter kept so cold?
Cold butter creates flaky layers as it melts during baking. If it warms up, it blends into the flour, resulting in a dense crust instead of light, airy layers.
How do I prevent a soggy bottom crust?
Cut steam vents in the top crust and preheat your baking dish. For extra crispness, brush the bottom crust with a thin layer of beaten egg white before adding the filling.
Can I use a food processor?
Pulse the cold fats into the flour in 5-10 short bursts until pea-sized crumbs form. Avoid over-processing to maintain texture.

- 4C Bread Crumbs Meatballs Recipe: Crispy Crust and Juicy Centers - September 25, 2026
- 6 Oz Chocolate Chip Cookie Recipe: Perfectly Balanced Crispy Edges and Chewy Hearts - September 25, 2026
- 6-Inch Coffee Cake Recipe: Vanilla Bean Swirls and Buttery Streusel Topping - September 25, 2026