
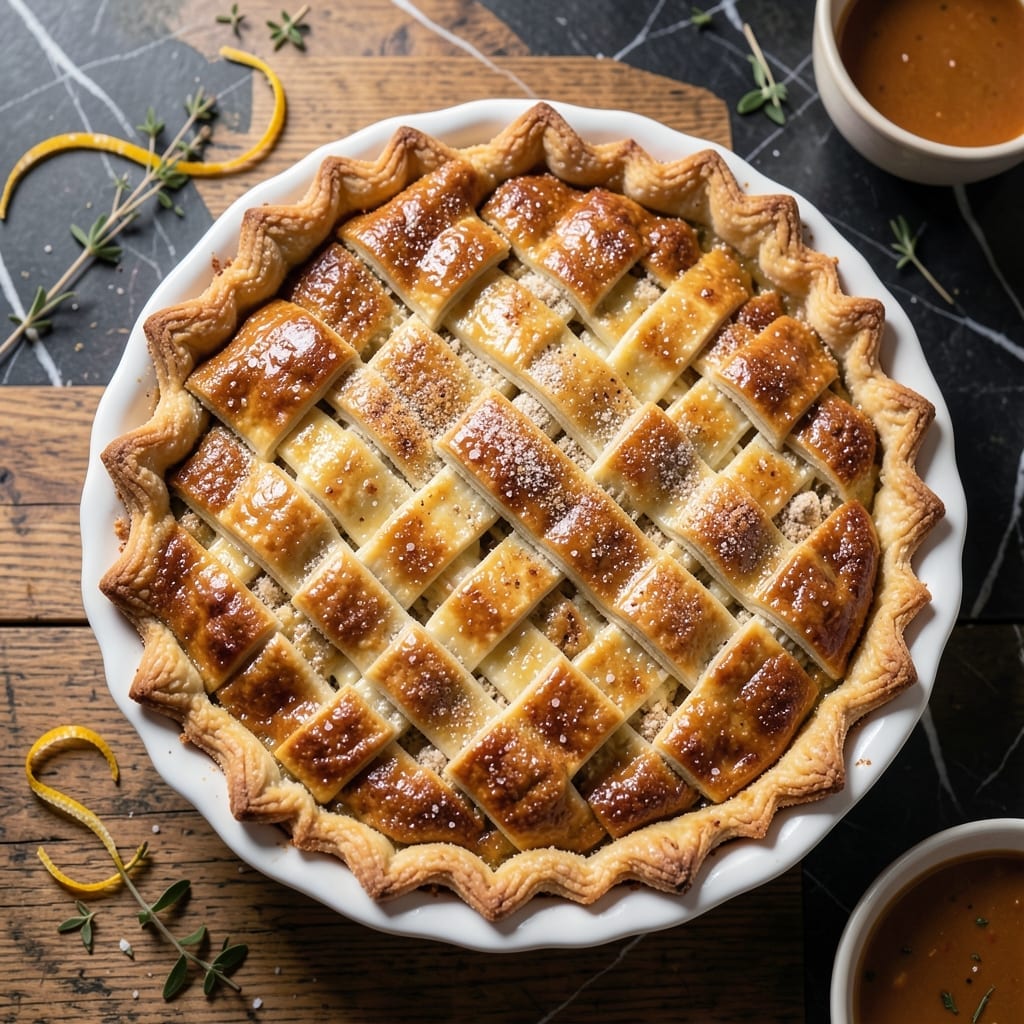
This buttery lattice crust transforms any pot pie into a showstopping meal with minimal effort. The secret lies in keeping the dough cold throughout preparation, ensuring a flaky texture that shatters with each bite.
I developed this method after years of testing, focusing on a foolproof technique that works every time. The lattice design isn’t just beautiful—it allows steam to escape, preventing a soggy bottom while maintaining that golden brown finish.
With just 30 minutes of active prep, you’ll create a topping that looks as impressive as it tastes. The buttery layers complement any savory filling, from classic chicken to hearty vegetable blends.
Pair this crust with your favorite filling for a meal that feels special enough for company but simple enough for a weeknight.
Ingredients for Pot Pie Topping
Pantry raid time. Just flour, butter, and a few basics for this showstopper.
| Ingredient | Amount | Notes |
|---|---|---|
| All-Purpose Flour 🌾 | 2 cups | Plus extra for dusting |
| Unsalted Butter 🧈 | 12 tbsp | Cold and cubed |
| Ice Water 💧 | ¼ cup | Plus 1 tbsp as needed |
| Fine Sea Salt 🧂 | ½ tsp | Diamond Crystal preferred |
| Granulated Sugar 🍚 | 1 tsp | Optional for color |
| Large Egg 🥚 | 1 whole | For egg wash finish |
| Heavy Cream 🥛 | 1 tbsp | Optional for richer wash |
| White Vinegar 💧 | 1 tsp | For tenderizing dough |
The butter is everything here. European-style is ideal for that extra flakiness (I grab Plugrá at Whole Foods), but any unsalted works. Keep it ice cold—cut into cubes, then chill those too. The flour? King Arthur if you’re splurging, store brand if not. Just don’t use self-rising or you’ll regret it.
No vinegar? Lemon juice works the same. Skip the sugar if you’re keeping it savory. For a vegan version, swap the butter for cold coconut oil and the egg wash for plant milk. The lattice design is forgiving—use a ruler for perfect stripes or eyeball it. Neither affects the flake factor.
Dough keeps in the fridge for 2 days (wrapped tight) or freezes for 3 months. Baked crust is best fresh, but leftovers reheat decently—just cover with foil to prevent over-browning.
Why You’ll Love This Recipe
- One Bowl Magic: I just dump flour, cold butter, and a pinch of sugar in a bowl—no fancy gadgets, no mess.
- Buttery Crisp: The butter layers into that flaky, golden crust that cracks just right with every bite.
- Freezer Friendly: I roll out a double batch, freeze half, and thank myself later on busy nights.
- Pantry Staples Only: All-purpose flour, butter, salt—things I already have, so no last-minute grocery runs.
Step-by-Step Instructions for Buttery Lattice Crust
This method delivers flaky, golden layers that’ll make your pot pie the star of any meal.
Step 1: Mix Dough and Chill for Flakiness
In a large bowl, whisk together the 2 cups All-Purpose Flour, 0.5 tsp Fine Sea Salt, and 1 tsp Granulated Sugar until evenly combined. I always use Diamond Crystal salt for consistent seasoning—it dissolves perfectly into the dough.
Cut in the 12 tbsp Unsalted Butter (cold and cubed) using a pastry cutter or your fingers until the mixture resembles coarse crumbs with pea-sized butter pieces visible. This creates those coveted flaky layers. Drizzle in the 0.25 cup Ice Water and 1 tsp White Vinegar while stirring gently with a fork until the dough just comes together. The vinegar tenderizes the gluten for extra flakiness.
Form the dough into a disk, wrap tightly in plastic, and refrigerate for 1 hour or up to 24 hours. Chilling prevents the butter from melting prematurely, which is the secret to that perfect layered texture. Real talk: don’t rush this step—warm dough means tough crust.
Step 2: Roll and Cut the Lattice Strips
On a lightly floured surface, roll the chilled dough into a 12×10-inch rectangle about ⅛-inch thick. Use a ruler for precision if you’re new to lattice work—I find it helps avoid uneven strips. Trim the edges neatly with a sharp knife.
Cut the dough into 10 even strips (about 1-inch wide). If the dough starts to soften while you’re working, slide the whole thing onto a baking sheet and pop it back in the fridge for 10 minutes to firm up. Cold dough is infinitely easier to handle.
Step 3: Weave and Apply the Lattice Topping
Arrange 5 strips horizontally across your pot pie filling, spacing them evenly. Fold back every other strip, then place a vertical strip perpendicular to them. Unfold the folded strips over the vertical strip. Repeat, alternating which strips you fold back for each new vertical strip, until the lattice is complete.
Press the ends of the strips gently into the edge of the pie dish to seal. Trim any excess dough hanging over the edge. Here’s the thing—if your lattice looks messy, don’t stress. Rustic imperfections actually make it look more homemade and inviting. Brush the entire lattice with a wash made from the 1 whole Large Egg and 1 tbsp Heavy Cream for a rich, golden finish.
Step 4: Bake to Golden Perfection
Place the pie on a baking sheet (to catch any drips) and bake at 375°F until the lattice is deep golden brown and the filling is bubbling underneath, about 30-35 minutes. The egg wash ensures a glossy, professional-looking crust that’s as beautiful as it is delicious.
If the lattice starts browning too quickly, tent the pie loosely with foil to prevent burning. You’ll know it’s done when the crust is firm to the touch and has that irresistible buttery aroma. Let it cool for 10 minutes before serving—the filling needs time to set slightly so it doesn’t run out when sliced.
Pro Tips For Making Pot Pie Topping
- Chill the Butter: Keep your butter ice cold until the moment you cut it into the flour—I learned this the hard way after ending up with a tough, dense crust instead of flaky layers.
- Use Ice Water: Fill a glass with water and ice cubes, then measure from that. The colder the water, the less it develops gluten, which means a more tender topping.
- Don’t Overmix: Stop mixing as soon as the dough comes together, even if it looks a little shaggy. Overworking it makes the topping chewy instead of light and crisp.
- Add a Pinch More Salt: Fine sea salt enhances the flavor, so don’t be shy—use a full teaspoon for every cup of flour, especially since unsalted butter won’t contribute any.
Pro Cooking Tips for Great pot pie topping
Butter Temperature Control
Keep your 12 tbsp Unsalted Butter ice-cold until the very last moment. I cube mine, then chill those cubes for 15 minutes before cutting into the flour. If your kitchen is warm, place the bowl of dough in the fridge between steps. 🌡️
Precision Rolling
Use a French rolling pin without handles for even pressure when rolling your 12×10-inch rectangle. Rotate the dough 90 degrees between rolls to maintain an even thickness. Dust lightly with flour to prevent sticking.
Lattice Shortcuts
For a faster lattice, cut your strips wider—1.5 inches instead of 1 inch. Fewer strips mean less weaving. I often use a pizza cutter for perfectly straight edges in seconds.
Egg Wash Magic
Whisk your 1 whole Large Egg and 1 tbsp Heavy Cream vigorously for 30 seconds until slightly frothy. This creates a glossier finish. Brush lightly—too much wash can pool and create sticky spots.
Baking Surface
Always bake on a preheated baking stone or inverted baking sheet at 375°F. The even heat prevents hot spots that can burn your lattice. I line mine with parchment for easy cleanup.
Steam Venting
If your filling is extra juicy, cut 3-4 small slits in the lattice before baking. This gives steam a dedicated escape route, preventing sogginess underneath. 💡
Nutrition Facts
Frequently Asked Questions
Can I make the lattice ahead of time?
Yes! Prepare and weave the lattice, then refrigerate uncovered for up to 2 hours before baking. For longer storage, freeze the unbaked lattice on a tray for 30 minutes, then transfer to a bag for up to 1 month.
Why did my lattice shrink during baking?
This usually happens if the dough wasn’t chilled enough before baking. Always rest it for at least 1 hour in the fridge. Also, avoid overworking the dough—handle it gently to prevent gluten development.
Is there a simpler alternative to lattice?
Roll the dough into a single sheet and cut out shapes (like leaves or circles) with cookie cutters. Arrange them decoratively on top for a similar effect with less effort.
How do I prevent the bottom crust from getting soggy?
Pre-bake your bottom crust for 10 minutes before adding the filling. Also, ensure your filling isn’t too watery. The lattice design helps by allowing steam to escape during baking.

- 4C Bread Crumbs Meatballs Recipe: Crispy Crust and Juicy Centers - September 25, 2026
- 6 Oz Chocolate Chip Cookie Recipe: Perfectly Balanced Crispy Edges and Chewy Hearts - September 25, 2026
- 6-Inch Coffee Cake Recipe: Vanilla Bean Swirls and Buttery Streusel Topping - September 25, 2026