
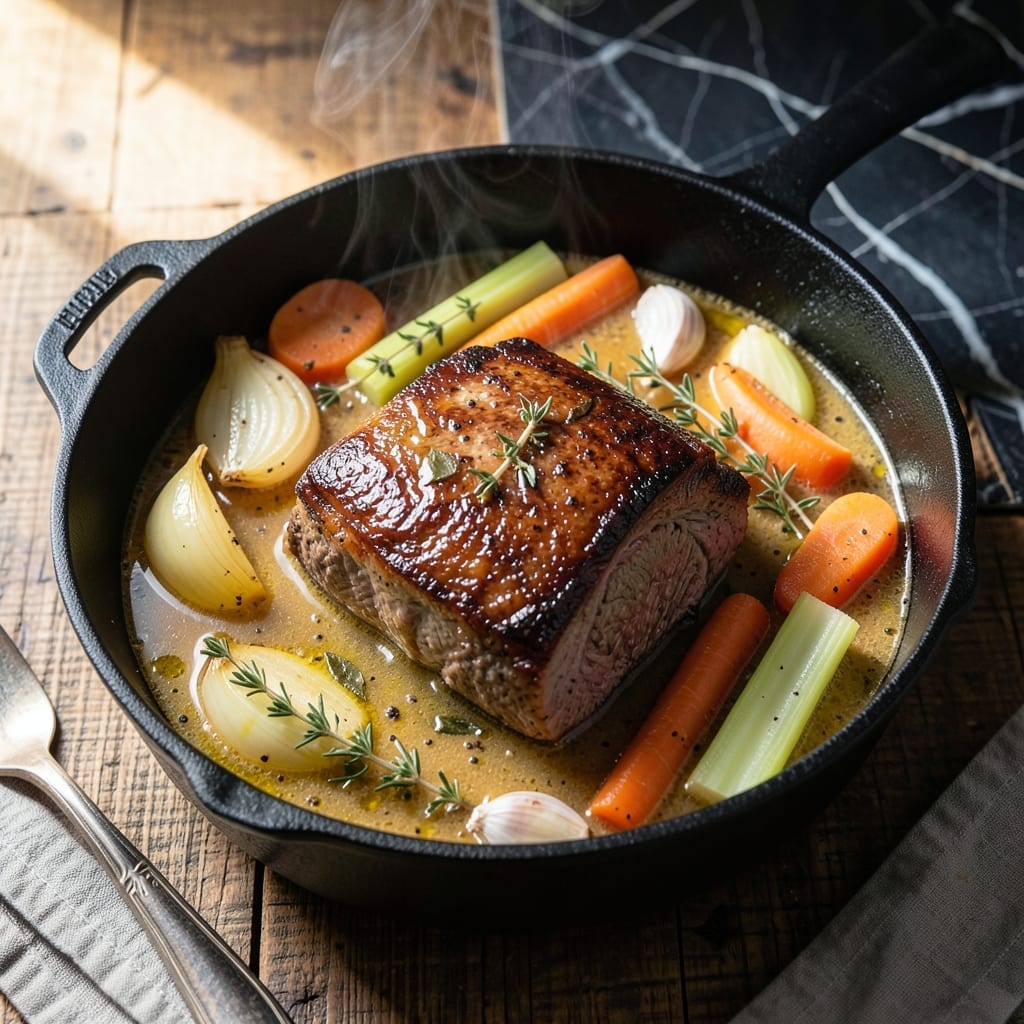
There’s nothing quite like a rich, deeply flavored broth made from a well-seasoned pot roast. This recipe transforms a simple Sunday dinner into a versatile base for countless soups and stews.
The secret lies in slow-cooking the roast with aromatic vegetables and herbs, allowing the flavors to meld into a complex, umami-packed liquid gold. Every spoonful carries the essence of tender beef and savory seasonings.
What you get is a broth that’s far superior to store-bought versions—thick, hearty, and brimming with natural gelatin from the bones. It freezes beautifully for future meals.
Use it as a foundation for French onion soup, beef stew, or simply enjoy it on its own for a comforting, nourishing bowl.
Ingredients for Pot Roast Broth
Transform leftover pot roast into liquid gold with these pantry staples and aromatics.
| Ingredient | Amount | Notes |
|---|---|---|
| Beef Chuck Roast 🥩 | 3 lb | Bone-in for gelatin richness |
| Yellow Onions 🧅 | 2 whole | Quartered, skin on |
| Carrots 🥕 | 3 whole | Cut into large chunks |
| Celery Stalks 🌿 | 3 whole | Cut into large chunks |
| Garlic Cloves 🧄 | 6 cloves | Smashed, skin on |
| Fresh Thyme Sprigs 🌿 | 4 whole | Tied with kitchen twine |
| Bay Leaves 🍃 | 2 whole | Dried, whole leaves |
| Black Peppercorns 🌶️ | 1 tbsp | Whole, not ground |
| Kosher Salt 🧂 | 1 tbsp | Diamond Crystal preferred |
| Red Wine 🍷 | 1 cup | Dry variety for depth |
| Cold Water 💧 | 8 cups | Or enough to cover roast |
| Tomato Paste 🍅 | 2 tbsp | For umami boost |
| Apple Cider Vinegar 🍏 | 1 tbsp | Balances richness |
The beef is everything here. Chuck roast with bones gives you that gelatinous body—Whole Foods or Costco have great options. Look for good marbling and skip the lean cuts (they won’t give you the same depth). I always save the bones from Sunday dinner specifically for this. The vegetables? Organic if possible—their skins add earthy notes to the broth.
No red wine? Beef broth with a splash of balsamic vinegar gets you 90% there. Swap thyme for rosemary if that’s what’s in your garden (same quantity). Out of tomato paste? A can of crushed tomatoes works in a pinch—just reduce the water slightly. The vinegar is flexible too—white wine or lemon juice can sub in.
Broth keeps in the fridge for 5 days or freezes for 6 months. Portion into quart containers (I use Ball jars) for easy soups later. Skim the fat after chilling—it’ll solidify on top. Reheat gently to preserve the collagen.
Why You’ll Love This Recipe
- Set It and Forget It: I just toss the chuck roast, onions, carrots, celery, and garlic in the pot and let the slow cooker do the work.
- Rich, Deep Flavor: The beef and garlic simmer together for hours, creating a broth so savory I could drink it straight from the pot.
- Meal Prep Magic: I make a big batch on Sunday and use it for soups, stews, and braising veggies all week long.
- Budget Stretcher: One inexpensive chuck roast gives me quarts of broth plus tender meat for sandwiches or tacos later.
Step-by-Step Instructions for Pot Roast Broth
This method extracts maximum flavor and gelatin from the beef for a rich, versatile broth.
Step 1: Sear and Develop the Beef Base
Pat the 3 lb Beef Chuck Roast dry with paper towels—this ensures a proper sear. Heat a large, heavy pot over medium-high heat until hot. Add the roast and sear on all sides for 8-10 minutes until deeply browned.
You want a dark, caramelized crust to form on every surface. This Maillard reaction creates complex flavors that form the backbone of your broth. Don’t rush this step; the fond that develops at the bottom of the pot will dissolve into the liquid later, adding incredible depth.
Once browned, remove the roast and set aside. The pot should have a thick layer of browned bits—this is exactly what you want.
Step 2: Build the Aromatic Foundation
In the same pot, add the 2 whole Yellow Onions (quartered, skin on), 3 whole Carrots (cut into large chunks), and 3 whole Celery Stalks (cut into large chunks). Sear these for 5-7 minutes until they begin to caramelize and develop color.
Add the 2 tbsp Tomato Paste and cook for 2-3 minutes, stirring constantly. The paste should darken slightly and begin to stick to the bottom of the pot. This intensifies its umami contribution to the broth.
Stir in the 6 cloves Garlic Cloves (smashed, skin on), 1 tbsp Black Peppercorns, 4 whole Fresh Thyme Sprigs (tied with kitchen twine), and 2 whole Bay Leaves. Cook for 1 minute until fragrant.
Step 3: Deglaze and Begin the Simmer
Pour in the 1 cup Red Wine and use a wooden spoon to scrape up all the browned bits from the bottom of the pot. Let the wine reduce by half, which takes about 5 minutes. This step lifts all that flavor into the liquid.
Return the beef to the pot. Add the 8 cups Cold Water (or enough to cover the roast), 1 tbsp Apple Cider Vinegar, and 1 tbsp Kosher Salt. The vinegar helps break down the connective tissue in the beef, extracting more gelatin for a richer broth.
Bring the mixture to a boil over high heat, then immediately reduce to a gentle simmer.
Step 4: Slow Simmer for Maximum Extraction
Partially cover the pot and maintain a low simmer for 4-5 hours. Skim off any foam or impurities that rise to the surface during the first hour. This keeps your broth clean and clear.
Occasionally turn the beef to ensure even cooking and extraction. The beef should be falling apart and the liquid should have taken on a deep, rich color. The Fresh Thyme Sprigs and Bay Leaves will infuse the broth with subtle herbal notes.
You’ll know it’s ready when the beef easily shreds with a fork and the broth has developed a rich, meaty aroma.
Step 5: Strain and Store the Broth
Remove the beef from the pot and set aside for another use (or discard if you only want the broth). Strain the liquid through a fine-mesh sieve into a large bowl, pressing gently on the solids to extract all the liquid.
Discard the solids and let the broth cool to room temperature. The fat will rise to the top and solidify, making it easy to remove. Store the broth in airtight containers in the refrigerator for up to 5 days or freeze for up to 3 months.
This broth will have a deep, rich flavor with a beautiful gelatinous texture when cooled, perfect for soups, stews, or braising.
Pro Tips For Making Pot Roast Broth
- Sear the Chuck: Brown the beef chuck roast in small batches—about 4-5 minutes per side in a screaming hot pan. I learned this the hard way: overcrowding steams the meat instead of searing it, and you lose that deep, caramelized flavor in your broth.
- Char the Veggies: After removing the beef, toss the onions, carrots, and celery into the same pot and let them sit until they pick up a good char, about 3-4 minutes. Sounds weird, but it works: those burned bits add a richness that simmering alone can’t.
- Skip the Peel: Leave the skins on the onions and garlic—they’ll strain out later but add a ton of color and depth to the broth while simmering. My grandmother swore by this, and she was right.
- Simmer Low and Slow: Keep the heat at a gentle simmer, not a boil—about 190-200°F if you’re using a thermometer. After burning three batches, I finally figured out that a rolling boil turns the broth cloudy and the meat tough.
Make-Ahead Tips for pot roast broth
Prep Ahead Strategy
I always start this broth the night before. Sear the 3 lb Beef Chuck Roast and build the aromatic base, then refrigerate overnight. The cold start the next morning gives you a cleaner, clearer broth with less skimming required. 💡
Freezer Portioning
Once strained, I divide the broth into 1-quart portions using Ball jars or silicone molds. This makes it easy to grab exactly what you need for future recipes. Leave 1 inch headspace for expansion during freezing.
Label Everything
Trust me, you’ll forget. Use freezer-safe labels with the date and contents. This broth keeps beautifully for 6 months in the freezer. I also note if I used red wine or a substitute for flavor reference.
Defrosting Methods
For quick use, microwave a portion on 50% power in 1-minute intervals. For best results, transfer to the fridge 24 hours before needed. The gelatin will reabsorb as it thaws, maintaining that luscious texture. ❄️
Double Batch Benefits
This recipe scales perfectly. I often make a 6-quart batch using 6 lbs beef and double the aromatics. The flavors concentrate even more with larger quantities, giving you restaurant-quality stock for months.
Reusing the Beef
Don’t discard the cooked beef! Shred it for tacos, sandwiches, or add back to soups. I store it separately in the broth for 5 days, or freeze for up to 3 months. Every bit gets used in my kitchen.
Nutrition Facts
Frequently Asked Questions
Can I use a slow cooker instead of stovetop?
Yes! Sear the beef first, then transfer everything to a slow cooker. Cook on low for 8-10 hours or high for 5-6 hours. The results will be just as rich and flavorful.
Why include vinegar in the broth?
The apple cider vinegar helps break down collagen in the beef, releasing more gelatin. This gives your broth that desirable, silky texture. Don’t worry—it won’t taste vinegary in the end.
How do I skim the fat effectively?
After cooling, the fat will solidify on top. Use a spoon to lift it off, or soak it up with a paper towel. For an ultra-clear broth, refrigerate overnight before skimming.
Can I use pre-cooked pot roast?
Use the leftover meat, bones, and any pan juices. Simmer for 3-4 hours to extract maximum flavor from the already-cooked beef.

- 6 Oz Chocolate Chip Cookie Recipe: Perfectly Balanced Crispy Edges and Chewy Hearts - September 25, 2026
- 6-Inch Coffee Cake Recipe: Vanilla Bean Swirls and Buttery Streusel Topping - September 25, 2026
- 1 Hour Soup Recipe: Velvety Richness Without the Wait - September 25, 2026