
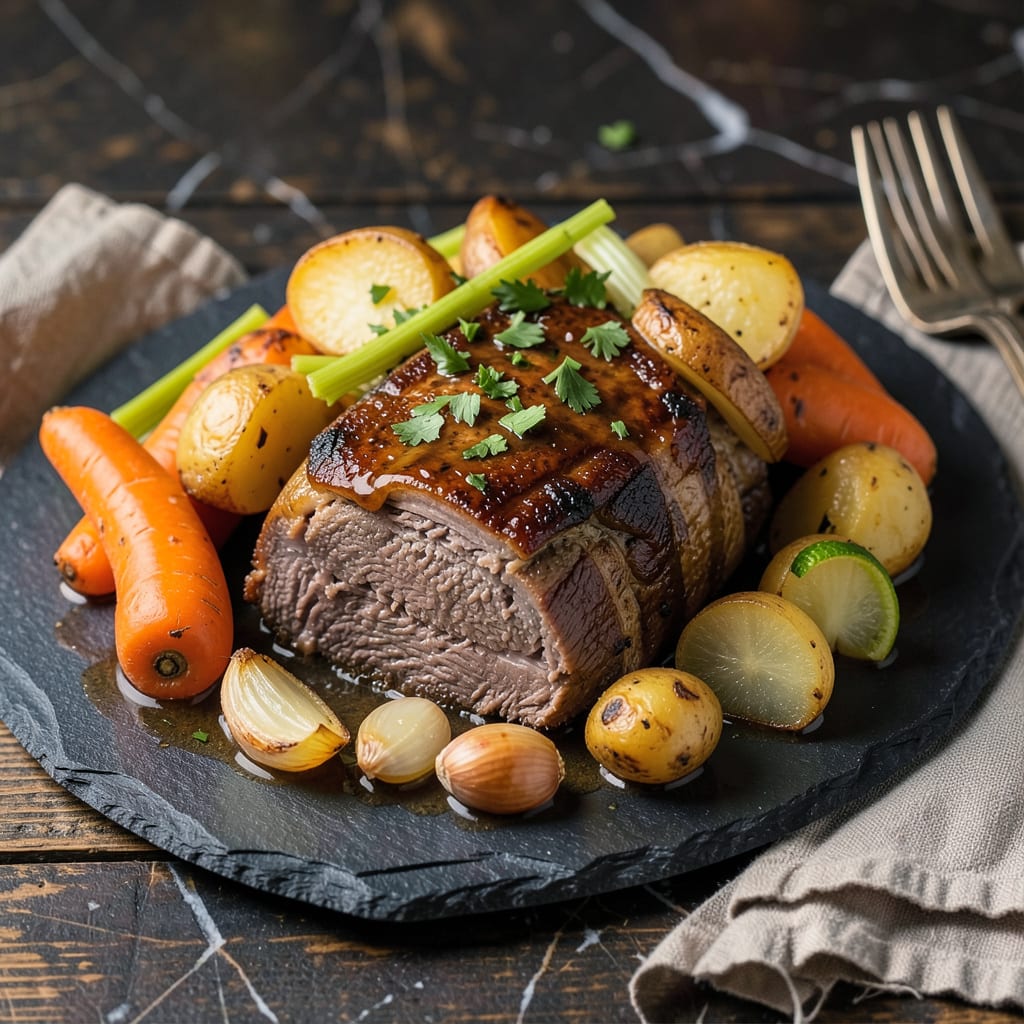
This oven bag method transforms tough cuts of beef into fall-apart tender pot roast with minimal effort and absolutely no cleanup. The sealed environment locks in moisture while allowing flavors to concentrate, creating meat that practically melts at the touch of a fork. After years of testing various techniques, this approach consistently delivers the most reliable results for home cooks.
What sets this recipe apart is its simplicity. With just 10 minutes of prep time, you’ll combine beef, vegetables, and seasonings in a heavy-duty oven bag, then let the oven do all the work. The bag contains all the juices, which means every bite stays succulent and flavorful—no dried-out roast here. Perfect for Sunday suppers or stress-free entertaining.
Ingredients for Pot Roast in a Bag
Optimal ingredients for fall-apart tenderness with minimal prep—everything combines in one bag for effortless cooking.
| Ingredient | Amount | Notes |
|---|---|---|
| Beef Chuck Roast 🥩 | 3 ½ lb | Boneless, well-marbled preferred |
| Yellow Onions 🧅 | 2 whole | Large, quartered through root |
| Carrots 🥕 | 4 whole | Peeled, cut into 2-inch chunks |
| Celery Stalks 🌿 | 3 whole | Cut into 1-inch pieces |
| Yukon Gold Potatoes 🥔 | 1 ½ lb | Halved if small, quartered if large |
| Garlic Cloves 🧄 | 6 cloves | Smashed, peeled |
| Low-Sodium Beef Broth 💧 | 2 cups | Quality brand recommended |
| Dry Red Wine 🍷 | 1 cup | Cabernet Sauvignon preferred |
| Tomato Paste 🍅 | 2 tbsp | Double-concentrated preferred |
| Worcestershire Sauce 💧 | 2 tbsp | Lea & Perrins recommended |
| Dried Thyme 🌿 | 1 tsp | Crushed between fingers |
| Dried Rosemary 🌿 | 1 tsp | Lightly crushed |
| Bay Leaves 🌿 | 2 whole | Fresh preferred |
| Kosher Salt 🧂 | 1 ½ tsp | Diamond Crystal preferred |
| Freshly Ground Black Pepper 🌶️ | 1 tsp | Coarse grind optimal |
| Heavy-Duty Oven Bag 🛍️ | 1 bag | Turkey-size recommended |
The beef selection determines final texture. Chuck roast with visible marbling (USDA Choice or higher) yields the most reliable results, as the fat renders during the long cook time. Costco offers well-marbled chuck at competitive prices, while Whole Foods provides organic options with consistent quality. For the vegetables, select firm, dense potatoes and carrots that will hold shape during extended cooking—Yukon Golds and standard orange carrots are ideal. The oven bag must be specifically labeled for roasting; Reynolds brand turkey-size bags accommodate a 3.5-pound roast with ample space for vegetables and liquid expansion.
Substitutions maintain integrity with careful adjustments. Red wine vinegar plus water (1:3 ratio) replaces wine for alcohol-free versions, while mushroom broth offers depth for vegetarian adaptations. Baby carrots may be used, though their sweeter profile alters the final flavor balance slightly. If tomato paste is unavailable, 1/4 cup tomato sauce reduced by half provides comparable intensity. For herb variations, 1 teaspoon herbes de Provence may replace the thyme and rosemary combination, though the aromatic profile will shift toward Mediterranean notes.
Storage considerations maximize convenience. The uncooked roast may be prepped in the bag (without liquid) and refrigerated for up to 24 hours before cooking. Leftover cooked roast maintains quality when refrigerated in its juices for 4-5 days or frozen for 3 months. For optimal reheating, transfer portions with juices to a covered dish and warm at 325°F until heated through (approximately 30 minutes for refrigerated, 60 minutes for frozen). The cooking liquid solidifies when chilled but reliquifies during reheating.
Why You’ll Love This Recipe
- I make two at once: one for tonight, one for later. The leftovers reheat beautifully (even the potatoes keep their shape), and honestly? It tastes even better the next day when the flavors have had time to mingle.
- No-Mess Magic: I swear by this for busy nights—just dump everything in the bag, seal it, and let the oven do the work. No splatters, no scrubbing, and the beef chuck roast comes out so tender it practically falls apart when you look at it.
- That Slow-Cooked Depth: Here’s what sold me—the onions caramelize in their own juices, the carrots get this honeyed sweetness, and the potatoes soak up all that rich beefy flavor. It’s like a cozy Sunday dinner without the all-day babysitting.
- My Freezer’s Best Friend: I make two at once: one for tonight, one for later. The leftovers reheat beautifully (even the potatoes keep their shape), and honestly? It tastes even better the next day when the flavors have had time to mingle.
Step-by-Step Instructions for Pot Roast in a Bag
This method delivers exceptionally tender beef with concentrated flavors and eliminates cleanup entirely.
Step 1: Prepare the Vegetables and Aromatics
Begin by prepping all vegetables to ensure even cooking. Quarter the 2 whole Yellow Onions through the root end, leaving some core intact to prevent separation during cooking. Peel and cut the 4 whole Carrots into uniform 2-inch chunks, and slice the 3 whole Celery Stalks into 1-inch pieces.
For the 1.5 lb Yukon Gold Potatoes, halve smaller potatoes or quarter larger ones to maintain consistent size. Smash and peel the 6 cloves Garlic Cloves—this releases more flavor during cooking. Arrange all prepped vegetables in a large bowl and set aside.
Step 2: Season and Sear the Beef Chuck Roast
Pat the 3.5 lb Beef Chuck Roast completely dry with paper towels to ensure proper browning. Season all sides aggressively with the 1.5 tsp Kosher Salt and 1 tsp Freshly Ground Black Pepper, pressing the seasoning into the meat’s surface.
Heat a large skillet over medium-high heat until very hot. Sear the roast for 3-4 minutes per side until a deep brown crust forms. This step develops fundamental flavor through the Maillard reaction. Transfer the seared roast to a plate and let rest while preparing the oven bag.
Step 3: Assemble in the Oven Bag with Liquids
Open the 1 bag Heavy-Duty Oven Bag and place it in a roasting pan or large baking dish. Add the seared roast to the bag, then arrange all prepped vegetables around it. In a separate bowl, whisk together the 2 cups Low-Sodium Beef Broth, 1 cup Dry Red Wine, 2 tbsp Tomato Paste, and 2 tbsp Worcestershire Sauce until fully combined.
Pour this liquid mixture over the roast and vegetables in the bag. Sprinkle the 1 tsp Dried Thyme, 1 tsp Dried Rosemary, and 2 whole Bay Leaves evenly over everything. The concentrated environment of the bag will intensify these aromatics during cooking.
Step 4: Cook Low and Slow for Maximum Tenderness
Close the oven bag according to package instructions, creating a tight seal. Cut six ½-inch slits in the top of the bag to allow steam to escape. Place in a preheated 325°F oven and cook for 3 to 3½ hours, or until the beef reaches an internal temperature of 200°F.
The roast is done when it yields easily to a fork and the meat begins to separate along its natural grain. The vegetables should be fork-tender and infused with the rich beef and wine flavors. The bag’s environment creates its own basting system, ensuring exceptional moisture retention.
Step 5: Rest and Serve Directly from the Bag
Carefully remove the bag from the oven and let it rest for 15 minutes before opening. This resting period allows the juices to redistribute throughout the meat. Open the bag carefully to avoid steam burns, then transfer the roast to a cutting board.
Slice the beef against the grain into thick pieces and arrange on a platter with the vegetables. Ladle some of the rich cooking liquid over everything. The concentrated juices in the bag create a natural au jus that requires no additional reduction or thickening.
Serving Suggestions for pot roast in a bag
Classic Family-Style Platter
For that comforting Sunday supper feel, arrange the sliced pot roast on a large wooden board or platter. Surround it with the cooked vegetables in their natural juices—this creates a beautiful rustic presentation. I love using a slotted spoon to transfer everything while letting excess liquid drip back into the bag. 💛
Mashed Potato Bowl
Serve generous portions of the tender beef and vegetables over creamy mashed potatoes in deep bowls. The rich cooking liquid from the bag becomes a natural gravy—just ladle it right over the top. I recommend Yukon Gold potatoes mashed with butter and sour cream for the perfect texture contrast.
Open-Faced Sandwiches
Pile the shredded beef onto toasted sourdough slices or crusty baguette halves. Top with the carrots and onions from the bag, then drizzle with the concentrated juices. This makes an incredible open-faced sandwich that’s hearty enough for lunch the next day. A sprinkle of fresh parsley adds a pop of color.
With Crusty Bread
A warm baguette or ciabatta loaf is essential for soaking up every last drop of the flavorful juices. I like to serve the bread in a linen-lined basket alongside the pot roast platter. The contrast between the tender meat and crisp bread creates the perfect bite every time.
Light Salad Pairing
Balance the richness with a simple arugula salad dressed with lemon vinaigrette. The peppery greens cut through the meat’s richness beautifully. I toss 4 cups baby arugula with 2 tbsp olive oil, 1 tbsp lemon juice, and a pinch of salt—it takes just minutes to prepare.
Wine Recommendation
The same Cabernet Sauvignon you used in cooking pairs beautifully with the finished dish. Its bold tannins stand up to the rich beef, while the fruit notes complement the caramelized vegetables. For a white option, an oaked Chardonnay offers buttery notes that harmonize with the tender meat. 🍷
Nutrition Facts
Frequently Asked Questions
What size oven bag should I use?
A turkey-size heavy-duty oven bag works best for this recipe. It provides enough space for the 3.5 lb roast and all the vegetables while allowing room for steam circulation.
Can I skip searing the meat first?
While you technically can, searing develops deep flavor through caramelization. The 3-4 minutes per side creates a crust that enhances the final dish significantly. Don’t rush this step!
How do I know when it’s done?
The roast is ready when it reaches 200°F internally and shreds easily with a fork. This typically takes 3 to 3½ hours at 325°F. The meat will pull apart effortlessly when fully tender.
What if the bag leaks during cooking?
Place the bag in a roasting pan to catch any potential leaks. If it does tear, simply transfer everything to a covered Dutch oven and continue cooking. The pan juices will still create delicious flavor.

- 8 Bean Soup Recipe Crock Pot: Hearty Vegetable Medley in One Pot - September 25, 2026
- 4C Bread Crumbs Meatballs Recipe: Crispy Crust and Juicy Centers - September 25, 2026
- 6 Oz Chocolate Chip Cookie Recipe: Perfectly Balanced Crispy Edges and Chewy Hearts - September 25, 2026