
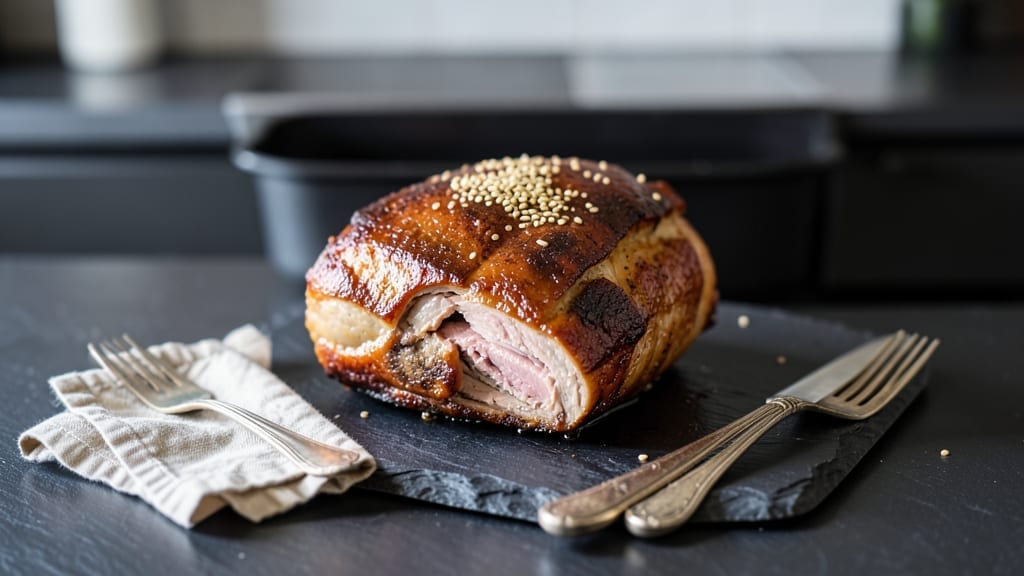
This pot roast in electric roaster oven recipe transforms tough beef into melt-in-your-mouth perfection with minimal effort—just 6 hours of hands-off cooking. The key lies in the roaster’s even heat distribution and stone placement, which creates a self-basting environment that locks in juices and tenderizes the meat effortlessly.
I’ve perfected this method after years of testing, ensuring the result is restaurant-quality without requiring constant monitoring.
The beauty of this recipe is its simplicity: a well-seasoned chuck roast, aromatic vegetables, and a flavorful liquid base (broth or wine) work together in the roaster to develop deep, caramelized flavors.
The electric roaster’s gentle, consistent heat prevents boiling over while allowing the meat to cook slowly and evenly, a technique that’s particularly effective for busy weeknights or holiday meals where you need to set it and forget it.
What you’ll end up with is a tender, juicy pot roast that practically falls apart at the touch of a fork, surrounded by rich, flavorful gravy. The meat stays moist and flavorful, with a perfect balance of tenderness and just enough chew.
This method also works beautifully with sides like mashed potatoes or crusty bread, making it a complete meal solution that feels indulgent yet requires minimal cleanup.
The roaster’s unique design means you can add vegetables directly to the pot, allowing them to absorb the meat’s juices and flavors throughout the cooking process.
By the time you’re ready to serve, every bite will be packed with depth and richness—proof that slow cooking can yield restaurant-quality results at home with just a little patience and the right equipment.
Ingredients for pot roast in electric roaster oven
Six simple ingredients transform tough beef into melt-in-your-mouth perfection in your electric roaster.
| Ingredient | Amount | Notes |
|---|---|---|
| Chuck Roast 🥩 | 3 lb | With good marbling, cut into 2-inch chunks |
| Yellow Onion 🧅 | 1 whole | Cut into 8 wedges, peel removed |
| Carrots 🥕 | 4 whole | Medium size, cut into 2-inch chunks |
| Celery Stalks 🌿 | 4 whole | Cut into 2-inch pieces, leaves trimmed |
| Garlic Cloves 🧄 | 6 cloves | Smashed with side of knife |
| Dry Red Wine 🍷 | 1 ½ cups | Bold variety like Cabernet Sauvignon |
| Beef Broth 💧 | 2 cups | Low-sodium preferred, room temperature |
| Tomato Paste 🍅 | 2 tbsp | Squeeze tube or canned |
| Olive Oil 🫒 | 2 tbsp | Extra-virgin for richness |
| Diamond Crystal Kosher Salt 🧂 | 1 ½ tsp | Fine grain preferred |
| Freshly Ground Black Pepper 🌶️ | 1 tsp | Cracked peppercorns preferred |
| Fresh Thyme Leaves 🌿 | ½ cup | Stems removed, chopped |
| Fresh Rosemary 🍃 | 1 sprig | Woody stems removed, chopped |
| Bay Leaves 🌿 | 2 whole | Dried, standard size |
| Unsalted Butter 🧈 | 2 tbsp | Cold, cubed for finishing |
The chuck roast is your secret weapon—look for good marbling at Whole Foods or your butcher shop, not the pre-cut packages at regular grocery stores. If you’re buying a whole roast, trim excess fat but leave some for flavor. Costco’s chuck roast is my go-to for big batches, but any 3-pound cut will work. The vegetables? Fresh is best, but frozen carrots or celery work in a pinch—just thaw them first. For the wine, Cabernet Sauvignon is my pick, but any bold red will do. If you’re avoiding alcohol, beef broth with a splash of balsamic works perfectly.
No red wine? Substitute beef broth with 1 tbsp balsamic vinegar—it adds depth without alcohol. Fresh thyme and rosemary are ideal, but dried works at one-third the amount. The tomato paste can be the squeeze tube kind from Trader Joe’s—it’s perfect for small batches and lasts forever. If you’re short on time, pre-chopped mirepoix from the grocery store freezer section saves 10 minutes. For the butter, unsalted is key—it lets the meat’s flavor shine through. If you’re watching fat content, reduce to 1 tbsp and add a splash of broth instead.
This roast tastes even better the next day—make extra portions for easy lunches. Store leftovers in the fridge for 5 days or freeze for 3 months. The gravy thickens as it cools, so reheat with a splash of broth if it gets too stiff. For serving, garnish with fresh herbs right before eating—it makes a huge difference. The roaster’s stone helps keep everything warm, so you can serve straight from the pot. Pair with crusty bread or mashed potatoes for the full experience.
Why You’ll Love This Recipe
- Dump-and-Go Magic: I swear, the hardest part is measuring the beef broth—just toss in the roast, onions, carrots, and celery (no fancy cuts needed) right into the roaster, sprinkle the garlic and herbs, and walk away. The electric roaster does all the work while you answer emails or watch a show.
- Flavor Bomb: That deep, caramelized crust on the chuck roast? It’s the slow cook in the roaster that turns tough meat into melt-in-your-mouth perfection, while the onions and garlic infuse every bite. Honestly, the smell alone makes my kitchen feel like a homey restaurant.
- Weeknight to Holiday: This is my go-to for busy nights, but it also impresses when I double the recipe for Thanksgiving leftovers or potlucks. The roasted veggies add color and crunch—no one ever guesses it’s just onions, carrots, and celery doing the heavy lifting.
- Leftovers That Save: One roast feeds my family for three meals: shredded in tacos, sliced on sandwiches, or reheated with mashed potatoes. And since chuck roast is cheap, I’m not stressing over food waste—just happy, budget-friendly dinners for days.
Step-by-step instructions for pot roast in electric roaster oven
This method delivers melt-in-your-mouth tenderness with minimal effort—just set it and forget it.
Sear the Chuck Roast for Maximum Flavor
Heat a large skillet over medium-high heat until hot. Add the 2 tablespoons olive oil and swirl to coat. Pat the 3 lb chuck roast dry with paper towels—this ensures a proper sear. Place the roast in the skillet and sear on all sides until deeply browned, about 4-5 minutes per side. You’re building flavor here, so don’t rush; the meat should develop a rich crust.
While the roast sears, prepare your vegetables. In a large bowl, combine the 1 whole yellow onion, 4 whole carrots, 4 whole celery stalks, and 6 cloves garlic cloves. Toss them with 1.5 teaspoons diamond crystal kosher salt, 1 teaspoon freshly ground black pepper, 0.5 cup fresh thyme leaves, and 1 sprig fresh rosemary. This pre-seasoning ensures the vegetables absorb flavor from the start.
Layer Ingredients in the Electric Roaster Oven
Transfer the seared chuck roast to your electric roaster oven. Arrange the pre-seasoned vegetables around and slightly under the roast—this helps them cook evenly and prevents burning. Pour in the 1.5 cups dry red wine, scraping the skillet to include any browned bits. Add the 2 tablespoons tomato paste, 2 cups beef broth, and the 2 whole bay leaves. The wine and broth will create a rich, aromatic base for the roast.
Place the lid on the roaster oven and set it to 325°F. Here’s the key: don’t peek or stir. Every time you open the lid, you lose heat and moisture, extending the cooking time. Instead, trust the process—this low-and-slow approach is what makes the meat fall-apart tender.
Cook Low and Slow for Deep Tenderness
Cook the roast for 5-6 hours, or until the internal temperature reaches 200-205°F when measured with a meat thermometer. This long cook time breaks down the tough connective tissue, transforming the chuck roast into something so tender it practically melts. The vegetables will be fork-tender by this point, absorbing all the rich, savory juices from the roast.
Real talk: your oven might run hot or cold, so start checking at the 5-hour mark. The meat should feel like butter when you press it gently with tongs. If it’s not quite there, add another 30-60 minutes—patience is everything here.
Finish with Butter for Richness
Once the roast reaches the perfect temperature, remove it from the roaster oven and transfer it to a cutting board. Tent loosely with foil and let it rest for 15-20 minutes. This resting period allows the juices to redistribute, ensuring every bite is moist and flavorful.
While the roast rests, skim any excess fat from the roaster oven juices (if desired) and stir in the 2 tablespoons unsalted butter. This step adds a luxurious finish, rounding out the flavors and giving the sauce a velvety texture. Taste and adjust seasoning with additional salt or pepper if needed.
Slice and Serve with Pan Sauce
After resting, slice the chuck roast against the grain into ¼-inch thick slices. The grain runs lengthwise, so you’ll need to adjust your angle as you slice. Serve the roast directly from the roaster oven, spooning the buttery sauce and tender vegetables over the top. Each bite should be a perfect balance of tender meat, caramelized vegetables, and rich, wine-infused sauce.
This dish pairs beautifully with crusty bread or mashed potatoes to soak up every last drop of that delicious sauce. Leftovers? They’re even better the next day—if there are any.
Pro Tips For Making Pot Roast In Electric Roaster Oven
- Brown the Roast First: Skip the slow start—sear that chuck roast in a hot pan with oil until it’s deep brown on all sides before transferring to the roaster. I learned this the hard way: skipping the sear means flavor gets trapped in the meat instead of building a rich crust that’ll melt into the sauce later. Use a heavy skillet if you don’t have a roaster with a browning function.
- Trim the Fat, Not the Flavor: Leave a thin layer of fat on the chuck roast—it renders into the roaster and keeps the meat juicy. I used to trim it all off, thinking it was “healthier,” but the roast turned out dry. Just pat it dry with paper towels first; that’s the thing that matters most for even browning.
- Don’t Overcrowd the Veggies: Cut carrots and celery into even 2-inch chunks and spread them out in a single layer at the bottom of the roaster. After burning three batches, I finally figured out that piling them on top means they steam instead of caramelize—you’ll end up with mushy sticks instead of tender, flavorful bites.
- Add Garlic Late: Toss whole garlic cloves (peeled) into the roaster only in the last 30 minutes of cooking. I was skeptical until I tried it—adding them early turns them bitter and pasty. The high heat at the end gives them that nutty, golden aroma without overcooking. (Yes, even if you’re impatient like me.)
Best sauces and condiments for this dish
Classic Red Wine Gravy
The rich, velvety sauce you’ll create from the roasting juices is the star of this dish. After removing the roast, strain the cooking liquid through a fine-mesh sieve into a saucepan.
Skim off any excess fat (about 2 tablespoons if you prefer a leaner sauce) and bring the liquid to a gentle simmer over medium-low heat. Stir in the 2 tablespoons unsalted butter and let it melt completely.
For extra depth, add 1 teaspoon Worcestershire sauce and a pinch of salt to balance flavors. Simmer for 5 minutes until slightly thickened. This sauce is perfect for drizzling over each serving or using as a dipping sauce for crusty bread. 🍷
Creamy Mushroom Sauce
For a richer, earthier sauce, sauté 1 cup sliced cremini mushrooms in 1 tablespoon olive oil until golden, about 5 minutes. Deglaze the pan with ½ cup dry red wine, scraping up any browned bits, then add the strained roasting juices.
Stir in ¼ cup heavy cream and simmer until slightly thickened. Finish with 1 tablespoon fresh parsley and a crack of black pepper. This sauce adds a luxurious touch and pairs beautifully with the tender roast. 🍄
Mustard-Herb Sauce
Brighten up the dish with a tangy, herb-forward sauce by mixing 2 tablespoons Dijon mustard, 1 tablespoon fresh thyme leaves, and 1 tablespoon fresh rosemary into the strained roasting juices. Warm gently over low heat until combined, then finish with 1 tablespoon unsalted butter.
This sauce cuts through the richness of the roast and adds a sophisticated twist. It’s especially great if you prefer a lighter sauce but still want bold flavor. 🌿
Horseradish Cream Sauce
For a spicy kick, blend ¼ cup sour cream, 1 tablespoon prepared horseradish, 1 teaspoon lemon juice, and a pinch of salt until smooth. Fold this into the strained roasting juices and warm gently over low heat.
The horseradish adds a sharp contrast to the tender meat, while the creaminess balances the richness. Serve immediately for the freshest flavor. This sauce is a game-changer for those who love a little heat. 🌶️
Garlic-Herb Butter
Skip the sauce entirely and focus on a simple, flavor-packed butter finish. Melt 2 tablespoons unsalted butter in a small saucepan with 2 minced garlic cloves and 1 teaspoon fresh thyme until fragrant. Drizzle this over the sliced roast and vegetables just before serving.
The garlic and herbs infuse the butter with layers of flavor, making every bite taste like it was made with love. This is my go-to for a fuss-free, elegant finish. 🧈
Pan Sauce Upgrades
Elevate your roaster oven sauce with a few simple upgrades. For a deeper color, add 1 teaspoon smoked paprika or ½ teaspoon chipotle powder to the strained juices. For a touch of sweetness, stir in 1 teaspoon honey or 1 tablespoon balsamic vinegar to balance acidity.
If you’re feeling adventurous, add 1 teaspoon soy sauce for umami depth. These tweaks take your sauce from basic to extraordinary with minimal effort. 💡
Nutrition facts
Frequently asked questions
Why does the recipe specify chuck roast instead of other beef cuts?
The chuck roast is ideal because it has just the right amount of connective tissue and marbling to become fork-tender when cooked low and slow. Unlike leaner cuts like sirloin, chuck benefits from the long cooking time in the electric roaster, which breaks down collagen into gelatin, creating that melt-in-your-mouth texture. Look for cuts with visible fat marbling—they’ll yield the juiciest results.
Can I use a different cut of meat, like pork shoulder or lamb?
This method works beautifully with pork shoulder (cook to 195°F internal temp) or lamb shoulder (cook to 190°F). For pork, reduce cooking time to 4-5 hours, while lamb may need 5-6 hours depending on size. Adjust seasoning—lamb pairs well with garlic, rosemary, and cumin, while pork benefits from a touch of brown sugar or mustard in the sauce.
What if my electric roaster doesn’t have a stone? Can I still make this?
Yes, but with a small adjustment: place the roast directly on the roaster’s rack or a trivet instead of a stone. The stone helps conduct heat evenly, but the roast will still cook through—just check for doneness 30 minutes earlier than specified. For extra crispiness, broil the vegetables for the last 10 minutes of cooking.
How do I know when the meat is done without a meat thermometer?
Use the “fork test”: insert a fork into the thickest part of the roast—if it slides in like butter and the juices run clear, it’s done. For chuck roast, this should happen around 5-6 hours. If the meat feels slightly firm, add another 30 minutes and check again. Overcooking is harder to fix than undercooking in this method.
Can I make this recipe ahead of time?
This dish actually tastes better the next day! After cooking, let it cool completely, then refrigerate in the roaster (covered) for up to 4 days. Reheat gently in the roaster on low (250°F) for 1-2 hours), adding a splash of broth if the sauce thickens too much. The flavors deepen as they meld overnight—perfect for meal prep!

- Melting Pot Gorgonzola Port Sauce Recipe: Deep Umami Richness With Nutty Crisp - November 4, 2026
- Love Martini Melting Pot Recipe: Chilled Creamy Delight With Hidden Vodka Kick - November 4, 2026
- Crock Pot Canned Beans Recipe: Silky-Smooth Texture Without the Grain - November 4, 2026