
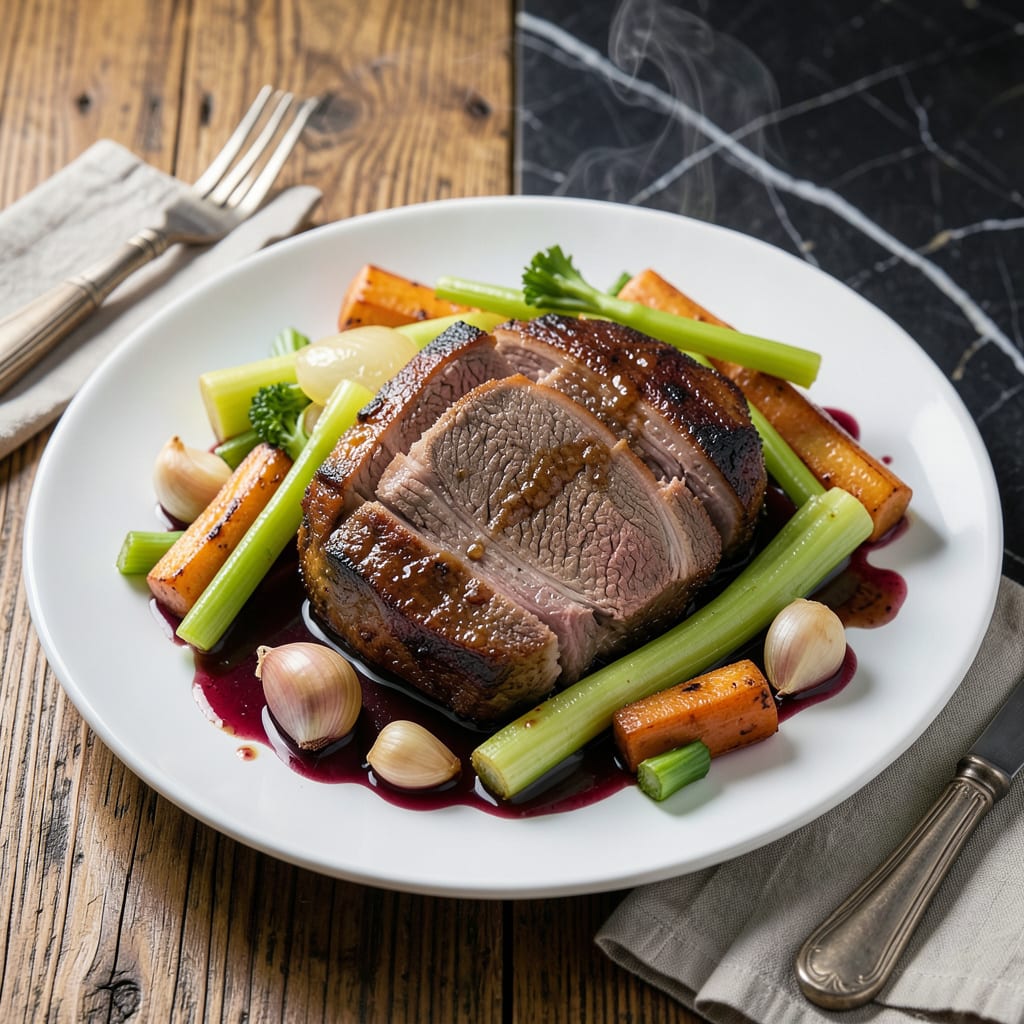
This slow-braised pot roast transforms humble ingredients into a tender, flavorful masterpiece. The celery adds subtle earthiness that complements the beef’s richness perfectly.
With a low-and-slow approach, the meat becomes fork-tender while the vegetables soak up every savory note. The result is a dish that feels both comforting and elegant.
Ingredients for Pot Roast Recipe Celery
Transform humble ingredients into a slow-braised masterpiece with these aromatic components.
| Ingredient | Amount | Notes |
|---|---|---|
| Chuck Roast 🥩 | 3 lb | Boneless, well-marbled preferred |
| Celery Stalks 🥬 | 6 whole | Fresh, trimmed and cut into chunks |
| Carrots 🥕 | 4 whole | Peeled and cut into thick pieces |
| Yellow Onions 🧅 | 2 whole | Large, quartered |
| Garlic Cloves 🧄 | 5 cloves | Smashed, peeled |
| Dry Red Wine 🍷 | 1 ½ cups | Bold and dry variety |
| Beef Stock 💧 | 2 cups | Low-sodium preferred |
| Tomato Paste 🍅 | 2 tbsp | For depth of flavor |
| Fresh Thyme Sprigs 🌿 | 4 whole | Or 1 tsp dried thyme |
| Fresh Rosemary Sprigs 🌿 | 2 whole | Or 1 tsp dried rosemary |
| Bay Leaves 🍃 | 2 whole | Dried, for aromatic depth |
| Olive Oil 🫒 | 2 tbsp | Extra-virgin for richness |
| Kosher Salt 🧂 | 1 ½ tsp | Diamond Crystal preferred |
| Black Pepper 🌶️ | 1 tsp | Freshly ground for best flavor |
The beef is the foundation. Chuck roast with visible marbling yields the most tender results—avoid lean cuts like sirloin, which dry out. Source from Whole Foods or Costco for consistent quality. The celery should be crisp and bright green; avoid wilted or rubbery stalks. Fresh herbs like thyme and rosemary elevate the dish, but dried herbs at one-third the quantity work in a pinch.
No dry red wine? Substitute with beef stock plus 1 tbsp balsamic vinegar for acidity. Out of fresh thyme or rosemary? Dried Italian seasoning can fill the gap. For the carrots, baby carrots are acceptable but may soften faster—cut them thicker if using. If your pot roast comes tied with twine, keep it on for even cooking.
Store raw beef in the coldest part of your fridge for up to 3 days before cooking. Cooked pot roast keeps for 4-5 days in the fridge or 3 months frozen. The flavor deepens overnight, making leftovers even more delicious (worth the extra minute).
Why You’ll Love This Recipe
- One Pot Magic: I toss everything in, cover it, and let the oven do the work—no babysitting required.
- Rich, Earthy Depth: The celery and garlic melt into the chuck roast, creating a gravy so good I could drink it.
- Sunday Dinner, Any Day: Honestly, it’s fancy enough for guests but unfussy enough for a lazy Tuesday.
- Stretches for Days: I get at least three solid meals out of one roast—sandwiches, stew, you name it.
Step-by-Step Instructions for Slow-Braised Beef With Aromatic Depth
Master the technique for fall-apart tender beef with rich, layered flavors in every bite.
Step 1: Sear and Season the Chuck Roast
Pat the 3 lb chuck roast dry with paper towels and season generously with the 1.5 tsp kosher salt and 1 tsp black pepper. This step ensures a deep, flavorful crust. Heat the 2 tbsp olive oil in a heavy Dutch oven over medium-high heat until shimmering.
Sear the roast on all sides for 4-5 minutes per side until deeply browned. Don’t rush this—you want a rich fond to develop on the bottom of the pot. This caramelized layer will dissolve into your braising liquid, creating incredible depth. Transfer the seared roast to a plate and set aside.
Step 2: Sauté the Aromatic Vegetables
In the same pot, add the 2 whole yellow onions (quartered), 6 whole celery stalks (cut into chunks), and 4 whole carrots (peeled and cut into thick pieces). Cook over medium heat for 8-10 minutes, stirring occasionally, until the vegetables begin to soften and brown slightly.
Add the 5 cloves garlic cloves (smashed and peeled) and the 2 tbsp tomato paste. Stir well to coat the vegetables and cook for 2 minutes until the tomato paste deepens in color. This builds a robust base for your braising liquid.
Step 3: Deglaze and Add Braising Liquid
Pour in the 1.5 cups dry red wine and scrape up all the browned bits from the bottom of the pot with a wooden spoon. Let the wine simmer for 3-4 minutes until it reduces by about half. This step is crucial for lifting all that caramelized flavor into the liquid.
Add the 2 cups beef stock, 4 whole fresh thyme sprigs, 2 whole fresh rosemary sprigs, and 2 whole bay leaves. Stir to combine, then return the seared chuck roast to the pot, along with any accumulated juices. The liquid should come about halfway up the roast.
Step 4: Braise to Tender Perfection
Bring the liquid to a simmer, then reduce the heat to low. Cover the pot and let it braise gently for 2.5 to 3 hours, turning the roast every 45 minutes to ensure even cooking. The meat is done when it shreds easily with a fork and reaches an internal temperature of 195-200°F.
Resist the urge to check too often—each time you lift the lid, you lose heat and extend the cooking time. The celery, carrots, and onions will soften beautifully into the liquid, infusing it with their sweet, earthy flavors.
Step 5: Rest and Serve
Carefully transfer the chuck roast to a cutting board and tent loosely with foil. Let it rest for 15-20 minutes to allow the juices to redistribute. Skim any excess fat from the surface of the braising liquid, if desired, and adjust seasoning with additional salt and pepper to taste.
Serve the pot roast sliced or shredded, spooned over with the rich, aromatic braising liquid and tender vegetables. The celery will have absorbed the deep flavors of the wine and beef, making each bite wonderfully complex.
Pro Tips For Making Pot Roast Recipe Celery
- Sear the Chuck: Brown the chuck roast on all sides in a hot Dutch oven—about 3-4 minutes per side—before adding any liquids. I learned this the hard way after my first few pot roasts turned out bland and pale.
- Cut Celery Thick: Slice celery stalks into 2-inch pieces so they hold up during the long braise. Thin slices turn mushy and disappear into the sauce.
- Skip the Boiling: Keep the pot at a gentle simmer, not a rolling boil, or the meat will toughen up. After ruining a roast with aggressive heat, I now check the liquid just barely shimmers.
- Add Garlic Late: Toss in whole garlic cloves during the last hour of cooking to prevent bitterness. Sounds weird, but it works: the flavor stays sweet and mellow.
Essential Equipment for This Recipe
Dutch Oven Essentials
A heavy 5-7 quart Dutch oven is non-negotiable for even heat distribution. I swear by Le Creuset or Lodge—both retain heat beautifully and transition seamlessly from stovetop to oven. The tight-fitting lid locks in moisture, which is key for that fall-apart texture.
Precision Thermometer
Don’t guess your temperatures. A digital instant-read thermometer like the ThermoWorks ThermoPop ensures your roast hits that perfect 195-200°F internal temp. I check multiple spots in the meat to confirm it’s fully tender. 🌡️
Wooden Spoon
A sturdy wooden spoon is ideal for deglazing—it won’t scratch your Dutch oven’s enamel. Use it to scrape up every last bit of that flavorful fond from the bottom. I keep mine within arm’s reach the entire time I’m cooking.
Sharp Chef’s Knife
Invest in a good 8-inch chef’s knife for prepping your celery, carrots, and onions. A sharp blade makes quick work of chopping and ensures even pieces that cook uniformly. I’ve had my Wüsthof for over a decade and it’s still my go-to.
Tongs for Handling
Long 12-inch locking tongs give you control when searing and turning the roast. Look for ones with a good grip—OXO Good Grips are my favorite. They’re heat-resistant and won’t slip when handling a heavy, hot piece of meat.
Honestly, these tools make the process smoother and more enjoyable. ✨
Nutrition Facts
Frequently Asked Questions
Can I use celery leaves in the recipe?
Yes! Celery leaves add a fresh, herbaceous note. Chop and sprinkle them over the finished dish for garnish or stir into the braising liquid for extra flavor.
What if my celery is wilted?
Revive limp celery by trimming the ends and soaking in ice water for 15-20 minutes. It will crisp up and work perfectly in the recipe. Avoid celery with soft or slimy spots.
Can I skip searing the meat?
Not recommended. Searing creates a flavorful crust and fond that deepens the braising liquid. It takes 10 minutes but makes a huge difference in taste.
How do I thicken the sauce?
Mix 1 tbsp cornstarch with 1 tbsp water, then stir into the simmering liquid. Cook for 2-3 minutes until thickened. For a richer finish, whisk in 1 tbsp butter at the end.

- 4C Bread Crumbs Meatballs Recipe: Crispy Crust and Juicy Centers - September 25, 2026
- 6 Oz Chocolate Chip Cookie Recipe: Perfectly Balanced Crispy Edges and Chewy Hearts - September 25, 2026
- 6-Inch Coffee Cake Recipe: Vanilla Bean Swirls and Buttery Streusel Topping - September 25, 2026