
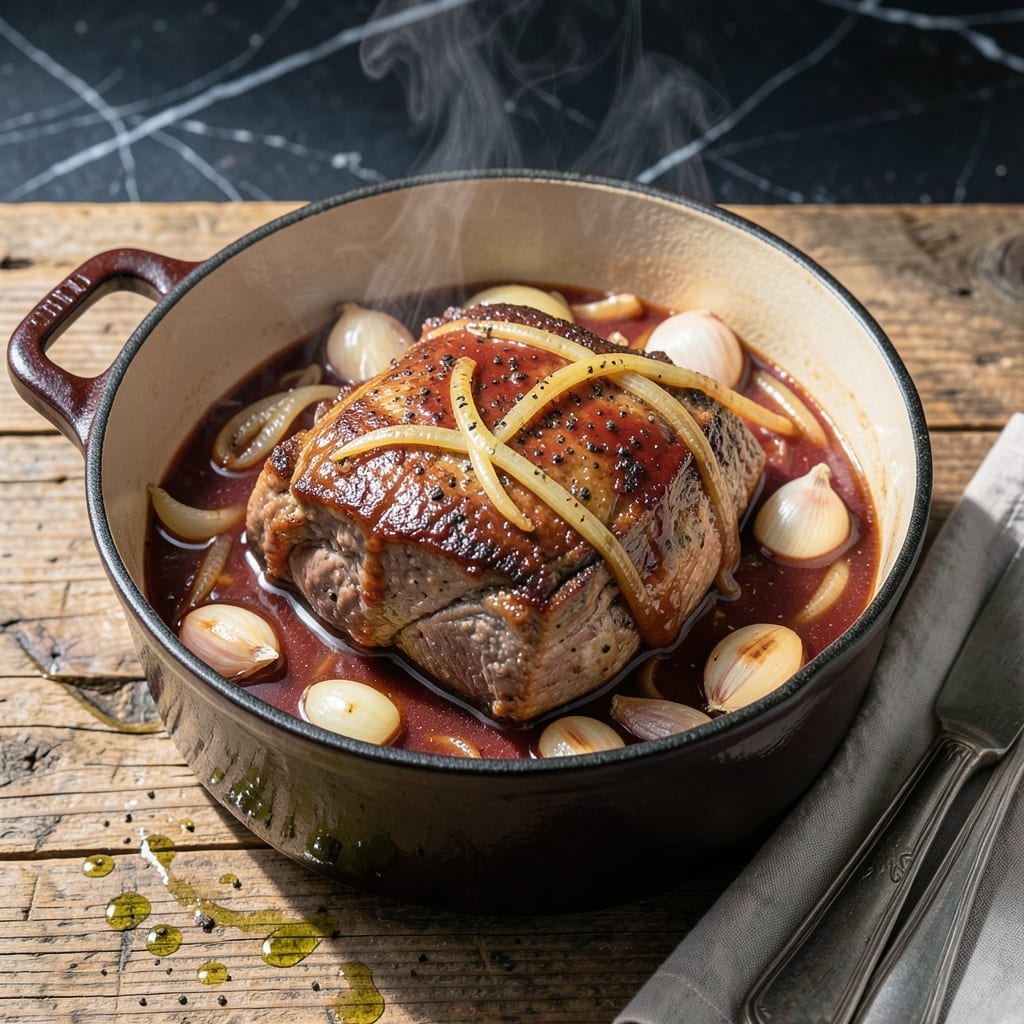
This stovetop pot roast delivers old-fashioned tenderness with minimal effort. The Dutch oven method locks in moisture while creating deeply caramelized onions that melt into the meat.
I’ve refined this technique over years to ensure every bite is juicy and flavorful. The slow, steady heat breaks down tough cuts into succulent perfection, with onions transforming into sweet, golden threads.
The secret is patience—low heat and time work together to develop layers of rich, savory depth. The result is a dish that tastes like it simmered all day, even if it didn’t.
Serve this with mashed potatoes or crusty bread to soak up every drop of the tender, aromatic sauce.
Ingredients for Pot Roast Recipe Dutch Oven Stovetop
Old-fashioned comfort requires just these simple, hearty ingredients for tender perfection every time.
| Ingredient | Amount | Notes |
|---|---|---|
| Chuck Roast 🥩 | 3 lb | Well-marbled for tenderness |
| Yellow Onions 🧅 | 3 whole | Thinly sliced for caramelizing |
| Garlic Cloves 🧄 | 6 cloves | Minced for depth of flavor |
| Beef Broth 💧 | 2 cups | Low-sodium preferred |
| Red Wine 🍷 | 1 cup | Dry variety like Cabernet |
| Tomato Paste 🍅 | 2 tbsp | For rich umami base |
| Worcestershire Sauce 🫒 | 1 tbsp | Adds savory complexity |
| Dried Thyme 🌿 | 1 tsp | Crushed between fingers |
| Dried Rosemary 🌿 | 1 tsp | Crushed for aroma |
| Bay Leaves 🍃 | 2 pieces | Remove before serving |
| Olive Oil 🫒 | 2 tbsp | For searing roast |
| Kosher Salt 🧂 | 2 tsp | Diamond Crystal preferred |
| Black Pepper 🌶️ | 1 tsp | Freshly ground for best flavor |
| Carrots 🥕 | 3 whole | Cut into large chunks |
| Celery Stalks 🌿 | 2 whole | Cut into large chunks |
The chuck roast is non-negotiable here—look for heavy marbling at the butcher counter or Whole Foods meat section. Well-marbled fat melts into the meat as it cooks, creating that signature tenderness. Avoid lean cuts like sirloin; they’ll dry out. If buying pre-packaged, Certified Angus Beef is a reliable choice. Freshness matters less than marbling for this dish (the long cook time forgives a lot).
No red wine? Extra beef broth plus 1 tbsp balsamic vinegar gets you 90% there. Swap fresh herbs for dried at one-third the amount—just crush them to release oils. The Worcestershire can be omitted, but the dish will lack depth. For the onions, Vidalia or Walla Walla (when in season) caramelize beautifully, but standard yellow onions work year-round.
This actually improves overnight. Store in the fridge for up to 4 days—the flavors deepen as it rests. Freezes well for 3 months (portion before freezing for easy thawing). Reheat gently on the stovetop with a splash of water or broth to revive the sauce.
Why You’ll Love This Recipe
- Set It and Forget: I love how the dutch oven does all the work—just sear the chuck roast, toss in onions, garlic, broth and wine, then let it simmer.
- Sunday Dinner, Any Day: Honestly, it’s fancy enough for company but simple enough for a random Wednesday when I crave comfort food.
- Leftovers for Days: One pot feeds my family for two nights, and the flavors taste even better the next day.
Step-by-Step Instructions for Dutch Oven Pot Roast
This stovetop method delivers melt-in-your-mouth beef with rich, caramelized flavors every time.
Step 1: Sear the Chuck Roast for Deep Flavor
Heat the 2 tbsp olive oil in a Dutch oven over medium-high heat until shimmering. Pat the 3 lb chuck roast dry with paper towels and season generously with the 2 tsp kosher salt and 1 tsp black pepper on all sides.
Sear the meat for 4-5 minutes per side until a deep brown crust forms. This creates the Maillard reaction that builds complex flavor. Don’t rush this step—let the roast develop that rich, dark sear before turning. Transfer the seared roast to a plate and set aside.
Step 2: Build the Aromatic Base
In the same Dutch oven, add the 3 whole yellow onions (thinly sliced) and cook for 8-10 minutes until softened and beginning to caramelize. Stir occasionally to prevent burning, scraping up any browned bits from the seared roast.
Add the 6 cloves garlic cloves (minced), 2 tbsp tomato paste, 1 tsp dried thyme, and 1 tsp dried rosemary. Cook for 1-2 minutes until fragrant. Pour in the 1 cup red wine and 1 tbsp Worcestershire sauce, simmering for 3 minutes to reduce slightly.
Step 3: Braise with Vegetables and Liquid
Return the seared chuck roast to the Dutch oven. Add the 3 whole carrots (cut into large chunks), 2 whole celery stalks (cut into large chunks), 2 pieces bay leaves, and 2 cups beef broth. The liquid should come about halfway up the roast.
Bring to a simmer, then reduce heat to low. Cover and cook for 2.5 to 3 hours, turning the roast every 45 minutes for even cooking. You’ll know it’s done when the meat shreds easily with a fork and the carrots are tender.
Step 4: Rest and Serve
Remove the 2 pieces bay leaves and transfer the chuck roast to a cutting board. Let it rest for 15 minutes before slicing or shredding. This allows the juices to redistribute, ensuring every bite is moist and flavorful.
Skim any excess fat from the braising liquid if desired, then serve the pot roast with the carrots, celery, and onions, spooning the rich gravy over the top. The vegetables should be fork-tender and infused with the deep, savory flavors of the braise.
Pro Tips For Making Pot Roast Recipe Dutch Oven Stovetop
- Sear the Chuck Hard: I learned this the hard way—get your Dutch oven screaming hot before adding the chuck roast, and don’t touch it for at least 4-5 minutes per side. That deep brown crust is where all the flavor builds, and it only happens with patience and high heat.
- Deglaze with Wine: After pulling the meat out, pour in a full cup of red wine and scrape the bottom like your life depends on it. Those browned bits dissolve into the liquid, turning your broth into something rich and complex.
- Skip the Cold Meat: Take the chuck roast out of the fridge 30-45 minutes before searing. Cold meat seizes up in the pan and steams instead of browning, and you’ll end up with a gray, sad exterior.
- Use a Meat Thermometer: I was skeptical until I tried it, but checking for 195-200°F internally guarantees fall-apart tenderness. Guessing by time alone leaves you with either tough or dry pot roast—neither is worth the risk.
Storing and Reheating This Recipe
Refrigerator Storage
Let the pot roast cool for no more than 2 hours before transferring to airtight containers. I use glass containers to preserve flavors. Store in the fridge at 40°F or below for up to 4 days—the flavors deepen over time. ❄️
Freezer Storage
This dish freezes beautifully for up to 3 months without losing quality. Portion into quart-size freezer bags, leaving 1 inch of headspace for expansion. Squeeze out excess air to prevent freezer burn, and label with the date.
Stovetop Reheating
My preferred method: transfer portions to a saucepan, add ¼ cup beef broth or water, and heat over medium-low heat for 10-15 minutes. Stir occasionally to prevent sticking. The sauce revives beautifully this way. 🔥
Microwave Reheating
For quick meals, place a single portion in a microwave-safe dish, cover with a damp paper towel, and heat on 70% power for 2-3 minutes. Stir, then continue in 1-minute intervals until reaching 165°F.
Oven Reheating
Preheat oven to 300°F, cover the pot roast with foil, and heat for 20-25 minutes. Add a splash of broth to keep it moist. This method works best for larger portions.
Nutrition Facts
Frequently Asked Questions
What cut works best if I can’t find chuck roast?
Brisket or short ribs are excellent alternatives. Both have the marbling needed for tenderness during long cooking. Avoid lean cuts like sirloin, as they’ll dry out during the 2.5 to 3 hours of braising.
Can I make this without red wine?
Yes! Substitute with 1 cup extra beef broth plus 1 tbsp balsamic vinegar for similar depth. The acidity helps tenderize the meat, while the broth maintains moisture during cooking.
Why turn the roast every 45 minutes?
Turning ensures even cooking and prevents sticking. It also helps the meat absorb the braising liquid uniformly, resulting in consistent tenderness throughout the 3 lb chuck roast.
How do I know when it’s done?
The roast is ready when it shreds easily with a fork. The internal temperature should reach 195-205°F for perfect tenderness. Don’t rely on time alone—check with a meat thermometer.

- 4 Ingredient Pignoli Cookie Recipe: Almond Joy Crunch in 15 Minutes - September 25, 2026
- 4-Ingredient Meatloaf Recipe No Bread: Moist and Savory Without a Single Crumb - September 25, 2026
- 3 Lb Potato Salad Recipe: Bold Mustard & Herb Crunch in One Bowl - September 25, 2026