
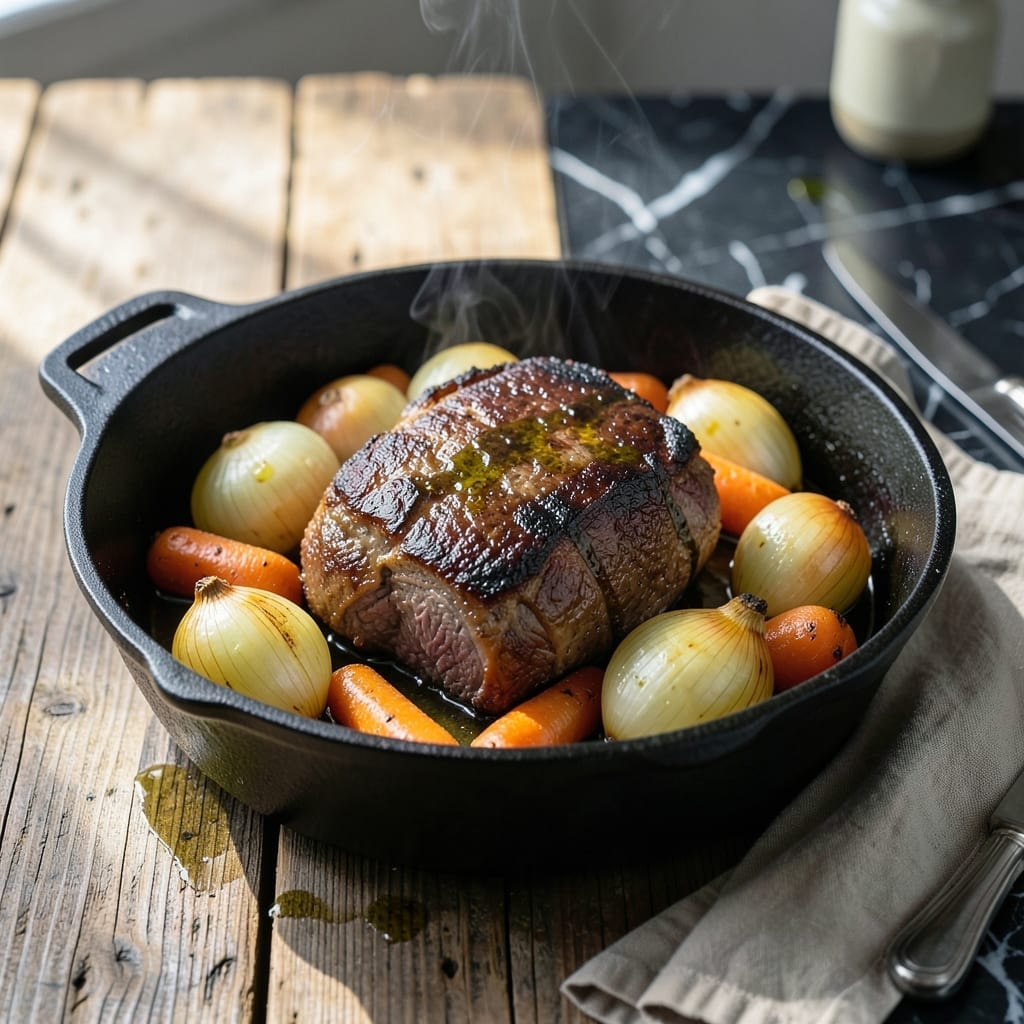
This Dutch oven method proves you don’t need broth for a deeply flavorful pot roast. The secret lies in caramelizing the beef and vegetables first, building rich, complex layers without liquid.
By searing the meat and sautéing aromatics in the same pot, you create a fond that transforms into a luxurious sauce as the roast braises. The natural juices from the beef and vegetables provide all the moisture needed.
The result is fall-apart tender meat with a concentrated, savory gravy that clings to every bite. Low and slow cooking ensures the flavors meld beautifully.
Perfect for Sunday suppers or special occasions, this technique delivers restaurant-quality results with minimal effort.
Ingredients for Pot Roast Recipe No Broth
A well-marbled chuck roast plus fresh herbs and vegetables create this sumptuous dish.
| Ingredient | Amount | Notes |
|---|---|---|
| Chuck Roast 🥩 | 3 lb | Well-marbled, trimmed of excess fat |
| Kosher Salt 🧂 | 2 tsp | Diamond Crystal preferred for even seasoning |
| Black Pepper 🌶️ | 1 tsp | Freshly cracked for robust flavor |
| Olive Oil 🫒 | 2 tbsp | High smoke point for searing |
| Yellow Onions 🧅 | 2 whole | Medium, cut into thick wedges |
| Carrots 🥕 | 4 whole | Large, peeled and cut into chunks |
| Celery Stalks 🌿 | 3 whole | Cut into 2-inch pieces |
| Garlic Cloves 🧄 | 6 cloves | Smashed with skin on for mellow flavor |
| Tomato Paste 🍅 | 3 tbsp | Double-concentrated preferred |
| Dry Red Wine 🍷 | 1 cup | Bold variety like Cabernet Sauvignon |
| Fresh Thyme Sprigs 🌿 | 4 whole | Tied with kitchen twine |
| Fresh Rosemary Sprigs 🌿 | 2 whole | Tied with kitchen twine |
| Bay Leaves 🌿 | 2 whole | Dried, for aromatic depth |
The chuck roast is non-negotiable here. Well-marbled cuts from a trusted butcher or Whole Foods ensure fall-apart tenderness. Look for pieces with visible fat streaking—this renders down during cooking, creating that luxurious sauce. Avoid leaner cuts like round or sirloin, which will toughen. The tomato paste should be double-concentrated for maximum depth without excess liquid.
No red wine? Substitute beef stock reduced by half (though this breaks the no-broth rule, it’s the closest alternative). Fresh herbs are ideal, but dried at one-third the amount works in a pinch. If you can’t find good chuck, short ribs offer similar marbling and flavor. The wine can be any bold red—Cabernet Sauvignon or Merlot both work beautifully.
This tastes even better the next day after flavors meld overnight. Refrigerate leftovers for up to 4 days or freeze portions for 3 months. Reheat gently on the stovetop with a splash of water to thin the gravy.
Why You’ll Love This Recipe
- Set It and Forget It: I rub the chuck roast with salt, pepper, and a drizzle of olive oil, then let the oven do the work while I tackle the rest of my day.
- Rich Caramelized Onions: The yellow onions slowly melt into sweet, golden strands that make every bite of the beef ridiculously good.
- Sunday Dinner, Tuesday Leftovers: This feeds my family twice—first as a hearty meal, then shredded into sandwiches or tacos the next day.
- Budget-Friendly Centerpiece: A simple chuck roast and pantry staples stretch into a meal that feels like a special occasion without the cost.
Step-by-Step Instructions for Pot Roast No Broth
This method delivers deep, caramelized flavor without relying on store-bought stock.
Step 1: Season and Sear the Chuck Roast
Pat the 3 lb chuck roast completely dry with paper towels. This ensures a proper sear. Season all sides aggressively with the 2 tsp kosher salt and 1 tsp black pepper, pressing the seasoning into the meat so it adheres well.
Heat the 2 tbsp olive oil in a Dutch oven over medium-high heat until it shimmers. Add the chuck roast and sear undisturbed for 4-5 minutes per side until a deep, mahogany crust forms. You’ll know it’s ready to flip when it releases easily from the pot. Transfer to a plate and set aside.
Step 2: Caramelize the Aromatics
In the same Dutch oven, add the 2 whole yellow onions, 4 whole carrots, and 3 whole celery stalks. Cook over medium heat for 8-10 minutes, stirring occasionally, until the onions begin to soften and develop golden-brown edges.
Add the 6 cloves garlic cloves and 3 tbsp tomato paste, stirring well to coat the vegetables. Cook for 2-3 minutes until the tomato paste darkens slightly and starts to stick to the bottom of the pot—this builds the fond that will deepen your sauce.
Step 3: Deglaze and Build the Braising Liquid
Pour in the 1 cup dry red wine, using a wooden spoon to scrape up all the browned bits from the bottom of the pot. This step is critical—those caramelized bits are pure flavor. Bring the mixture to a simmer and cook for 3-4 minutes until the liquid reduces by about half.
Return the chuck roast to the Dutch oven, along with any accumulated juices. Add the 4 whole fresh thyme sprigs, 2 whole fresh rosemary sprigs, and 2 whole bay leaves. The liquid should come about halfway up the roast—this is perfect for braising without submerging the meat.
Step 4: Braise to Tenderness
Cover the Dutch oven and transfer it to a preheated 325°F oven. Braise for 2.5 to 3 hours, turning the roast halfway through, until the meat is fork-tender and easily pulls apart with a gentle tug.
Check occasionally to ensure the liquid hasn’t reduced too much—you want just enough to baste the roast. If it looks dry, add a splash of water, but remember, this is a no-broth method, so the liquid will be rich and concentrated.
Step 5: Rest and Serve
Carefully transfer the chuck roast to a cutting board and tent loosely with foil. Let it rest for 15-20 minutes—this allows the juices to redistribute, ensuring every bite is moist and flavorful.
Skimming excess fat from the braising liquid and serve the roast with the vegetables and sauce spooned over the top. The sauce should be thick, rich, and deeply aromatic from the wine and herbs.
Pro Tips For Making Pot Roast Recipe No Broth
- Sear It Hard: Get your pan screaming hot before adding the chuck roast—about 2 tablespoons of olive oil, then sear each side for 3-4 minutes until deep brown. I learned this the hard way after too many pale, steamed-looking roasts.
- Salt the Night Before: Rub the chuck roast with kosher salt at least 12 hours ahead. Sounds weird, but it works: the salt penetrates deep, making every bite more flavorful without needing broth.
- Don’t Crowd the Onions: Slice those yellow onions thick—about ½-inch—and spread them in a single layer under the roast. Steer clear of piling them up, or they’ll steam instead of caramelizing.
- Low and Slow: After searing, drop the oven temp to 275°F and give it 3-4 hours. After burning three batches at higher heat, I finally figured out patience is what turns tough chuck into fork-tender perfection.
Essential Equipment for This Dish
Dutch Oven Essentials
Invest in a quality 5-7 quart enameled cast iron Dutch oven—I swear by my Le Creuset for even heat distribution and retention. The heavy lid traps steam perfectly, creating the ideal braising environment for your roast.
Thermometer Importance
An instant-read meat thermometer is non-negotiable for perfect doneness. I use the ThermoWorks ThermoPop for accuracy within 2°F. Check the thickest part of the roast for 195-205°F internal temperature. 🌡️
This ensures fall-apart tenderness without overcooking.
Wooden Spoon Magic
A wooden spoon is your best friend for deglazing—it won’t scratch your Dutch oven’s surface. Use it to scrape up every last bit of fond from the bottom when adding the wine. Those browned bits are pure flavor.
Oven Thermometer
Don’t trust your oven’s built-in thermometer. I keep an oven thermometer (like Taylor Precision) on the rack to verify the 325°F temperature. Many home ovens run 10-15°F off, which can affect cooking time.
Tongs for Turning
Use 12-inch locking tongs to safely turn the roast during searing and braising. I prefer OXO’s silicone-tipped version—they grip securely without piercing the meat, preserving those precious juices.
Fat Separator
A fat separator helps remove excess fat from the braising liquid before serving. I pour the sauce into my OXO separator, then discard the fat that rises to the top. This gives you a cleaner, more concentrated gravy. 💡
Nutrition Facts
Frequently Asked Questions
Can I use a different cut of beef?
Stick with well-marbled cuts like chuck. Brisket or short ribs work too, but avoid lean cuts like round. The fat is essential for flavor and tenderness.
What if I don’t have red wine?
Substitute with 1 cup beef stock reduced by half, or use balsamic vinegar mixed with water. The acidity helps tenderize the meat.
How do I know when it’s done?
Check for 195-205°F internal temperature with a meat thermometer. The meat should pull apart easily with a fork.
Can I make this in a slow cooker?
Yes! Sear the roast first, then transfer to a slow cooker with all ingredients. Cook on low for 8-10 hours.

- 6 Oz Chocolate Chip Cookie Recipe: Perfectly Balanced Crispy Edges and Chewy Hearts - September 25, 2026
- 6-Inch Coffee Cake Recipe: Vanilla Bean Swirls and Buttery Streusel Topping - September 25, 2026
- 1 Hour Soup Recipe: Velvety Richness Without the Wait - September 25, 2026