
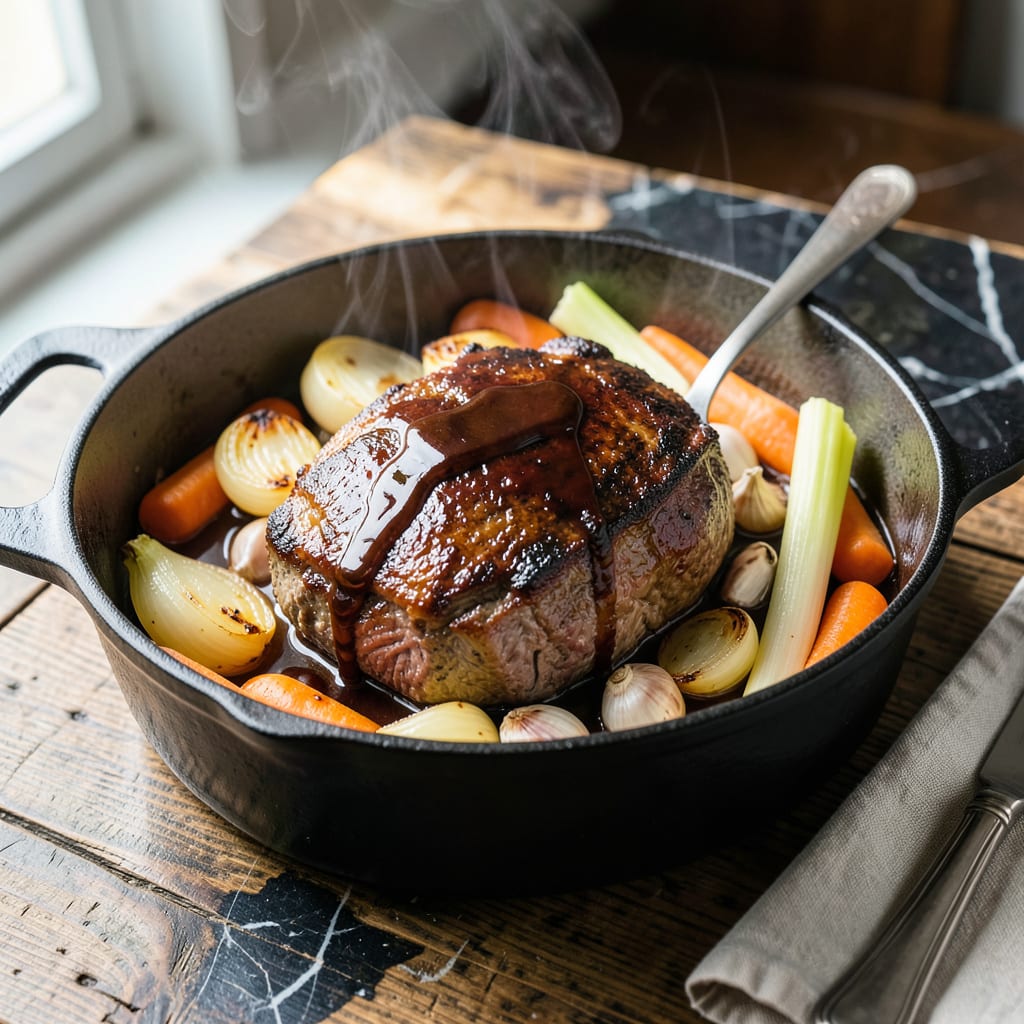
This pot roast delivers tender beef through a simple braising method using water as the base liquid. The low and slow cooking process breaks down tough cuts into melt-in-your-mouth perfection.
With minimal ingredients and hands-off preparation, this technique guarantees consistently tender results. The water transforms into a rich, flavorful broth that infuses the meat with moisture and depth.
Ingredients for Pot Roast Recipe with Water
Minimal ingredients transform tough beef into melt-in-your-mouth perfection through slow braising.
| Ingredient | Amount | Notes |
|---|---|---|
| Beef Chuck Roast 🥩 | 3 lb | Well-marbled for tenderness |
| Water 💧 | 4 cups | Base braising liquid |
| Yellow Onions 🧅 | 2 whole | Large, quartered |
| Carrots 🥕 | 4 whole | Cut into 2-inch chunks |
| Celery Stalks 🥬 | 3 whole | Cut into 2-inch pieces |
| Garlic Cloves 🧄 | 6 cloves | Smashed, peeled |
| Bay Leaves 🍃 | 2 whole | Dried, for aroma |
| Dried Thyme 🌿 | 1 tsp | Crushed between fingers |
| Dried Rosemary 🌿 | 1 tsp | Crushed between fingers |
| Kosher Salt 🧂 | 2 tsp | Diamond Crystal preferred |
| Black Pepper 🌶️ | 1 tsp | Freshly ground |
| Olive Oil 🫒 | 2 tbsp | For searing beef |
| Worcestershire Sauce 💧 | 2 tbsp | Adds umami depth |
The beef selection is critical for this preparation. Chuck roast with visible marbling yields the most tender results after long cooking. Source from a butcher or Whole Foods for consistent quality. The water base, while simple, requires enough volume to submerge the vegetables—4 cups ensures proper braising without dilution of flavors.
Substitutions are limited but possible: Beef short ribs work equally well with adjusted cooking time. No Worcestershire? Soy sauce at half the amount provides similar umami, though the flavor profile shifts slightly. For herbs, fresh thyme or rosemary can be used at triple the quantity—just tie them in cheesecloth for easy removal.
Store the finished pot roast in its braising liquid—it keeps 4-5 days refrigerated. The flavors intensify overnight, making leftovers ideal. Freeze portions for up to 3 months; thaw overnight before reheating gently to preserve texture.
Why You’ll Love This Recipe
- One Pot Wonder: I toss the chuck roast, onions, carrots, celery, and water in one pot—no fancy steps, just set it and forget it.
- Fallback Flavor: The water turns into the richest broth as the beef slow-cooks with the veggies. Honestly, it’s better than any store-bought stock I’ve tried.
- Meal Prep Hero: This makes enough for Sunday dinner and Monday’s lunch, and the leftovers taste even deeper the next day.
- Budget Stretcher: A cheap cut like chuck roast turns into a hearty meal that feeds my family for days without breaking the bank.
Step-by-Step Instructions for Pot Roast With Water
This braising method delivers fall-apart tender beef with minimal effort and maximum flavor.
Step 1: Sear the Beef Chuck Roast
Pat the 3 lb Beef Chuck Roast completely dry with paper towels—this ensures a proper sear. Season all sides generously with the 2 tsp Kosher Salt and 1 tsp Black Pepper. Heat the 2 tbsp Olive Oil in a large Dutch oven over medium-high heat until shimmering.
Carefully place the roast in the pot and sear undisturbed for 4-5 minutes per side until a deep, rich brown crust forms. You’ll know it’s ready to flip when it releases easily from the bottom. Transfer the roast to a plate and set aside.
Step 2: Sauté the Aromatics
In the same pot, add the 2 whole Yellow Onions (quartered), 4 whole Carrots (cut into 2-inch chunks), and 3 whole Celery Stalks (also in 2-inch pieces). Sauté for 5-6 minutes until the onions begin to soften and develop a light golden color.
Add the 6 cloves Garlic Cloves (smashed and peeled), 1 tsp Dried Thyme, and 1 tsp Dried Rosemary (both crushed between your fingers to release their oils). Stir for 1 minute until the garlic is fragrant—don’t let it brown.
Step 3: Deglaze and Braise
Pour in the 2 tbsp Worcestershire Sauce and scrape up all the browned bits from the bottom of the pot with a wooden spoon. This step captures all the fond (those flavorful browned bits) and incorporates it into the braising liquid.
Return the seared roast to the pot. Add the 4 cups Water and 2 whole Bay Leaves. The liquid should come about halfway up the roast. Bring to a gentle simmer over medium heat.
Step 4: Slow Cook to Tenderness
Once simmering, reduce the heat to low, cover the pot, and let it braise for 3 to 3½ hours. Check occasionally to ensure the liquid maintains a gentle simmer. You’ll know it’s done when the beef pulls apart easily with a fork.
Real talk: If the liquid reduces too much, add a bit more water to maintain the level. This slow, steady heat is what transforms the chuck roast into that melt-in-your-mouth texture we’re after.
Step 5: Rest and Serve
Carefully transfer the roast to a cutting board and let it rest for 10-15 minutes. This allows the juices to redistribute throughout the meat. Meanwhile, skim any excess fat from the surface of the braising liquid if desired.
Slice the beef against the grain and serve with the vegetables and some of the braising liquid spooned over the top. The result should be fork-tender, rich, and deeply flavorful with every bite.
Pro Tips For Making Pot Roast Recipe With Water
- Sear the Beef: Brown the chuck roast on all sides in a hot pan before adding water—this builds a deep flavor base that plain boiling just can’t match.
- Use Hot Water: Start with boiling water instead of cold to jumpstart the cooking process and prevent the meat from seizing up at the beginning.
- Skip the Overcrowding: If doubling the recipe, use two pots or cook in batches; cramming in too many vegetables will steam them instead of letting them soften properly.
- Check the Liquid: About halfway through cooking, top up with more hot water if needed—evaporation can leave your veggies exposed and the meat dry.
Dietary Considerations for This Dish
Gluten-Free Friendly
This dish is naturally gluten-free as written, with no wheat-based ingredients in the recipe. The Worcestershire sauce is the only potential concern—some brands contain malt vinegar. I always use Annie’s or Lea & Perrins for guaranteed gluten-free options. 💪
Low-Carb Adaptation
For a keto-friendly version, simply reduce the carrots to 2 whole and replace half the onions with 1 cup chopped mushrooms. This cuts the carb count significantly while maintaining rich flavor. The beef and braising liquid remain perfect for low-carb diets.
Dairy-Free Naturally
No modifications needed here—the recipe contains no dairy products whatsoever. The braising liquid relies on water and Worcestershire, making it safe for lactose-intolerant diners. Even the searing uses olive oil rather than butter.
Sodium Considerations
To reduce sodium, cut the Kosher salt to 1 tsp and use low-sodium Worcestershire sauce. The long cooking time concentrates flavors, so you won’t miss the extra salt. I often add a splash of apple cider vinegar at the end for brightness. ✨
Allergen Note
The primary allergens to watch are in the Worcestershire sauce (fish/anchovies in some brands) and celery for those with sensitivities. Always verify sauce labels and consider omitting celery if needed. The rest of the ingredients are allergen-free.
Vegetarian Option
While this is a beef recipe, you can adapt it using portobello mushrooms or seitan. Use the same braising liquid and time, but add 1 tbsp soy sauce for depth. The water-based method works just as well for plant-based proteins.
Nutrition Facts
Frequently Asked Questions
Why use water instead of broth?
Water allows the natural beef flavors to shine without overpowering them. The long braising time extracts rich gelatin from the meat, creating its own flavorful liquid. You can always add a bouillon cube if you want extra depth.
Can I use a different cut of beef?
Yes, but stick to tough, marbled cuts like brisket or round roast. These benefit most from slow cooking. Avoid lean cuts like sirloin—they’ll dry out during the 3-3½ hour braise.
How do I know when it’s done?
The beef should pull apart easily with a fork. If it resists, keep cooking. The internal temperature should reach at least 195°F for perfect tenderness. Don’t rush it!
Can I make this in a slow cooker?
Sear the beef first, then transfer everything to the slow cooker. Cook on low for 8-10 hours or high for 5-6 hours. The results will be just as tender.

- 4C Bread Crumbs Meatballs Recipe: Crispy Crust and Juicy Centers - September 25, 2026
- 6 Oz Chocolate Chip Cookie Recipe: Perfectly Balanced Crispy Edges and Chewy Hearts - September 25, 2026
- 6-Inch Coffee Cake Recipe: Vanilla Bean Swirls and Buttery Streusel Topping - September 25, 2026