
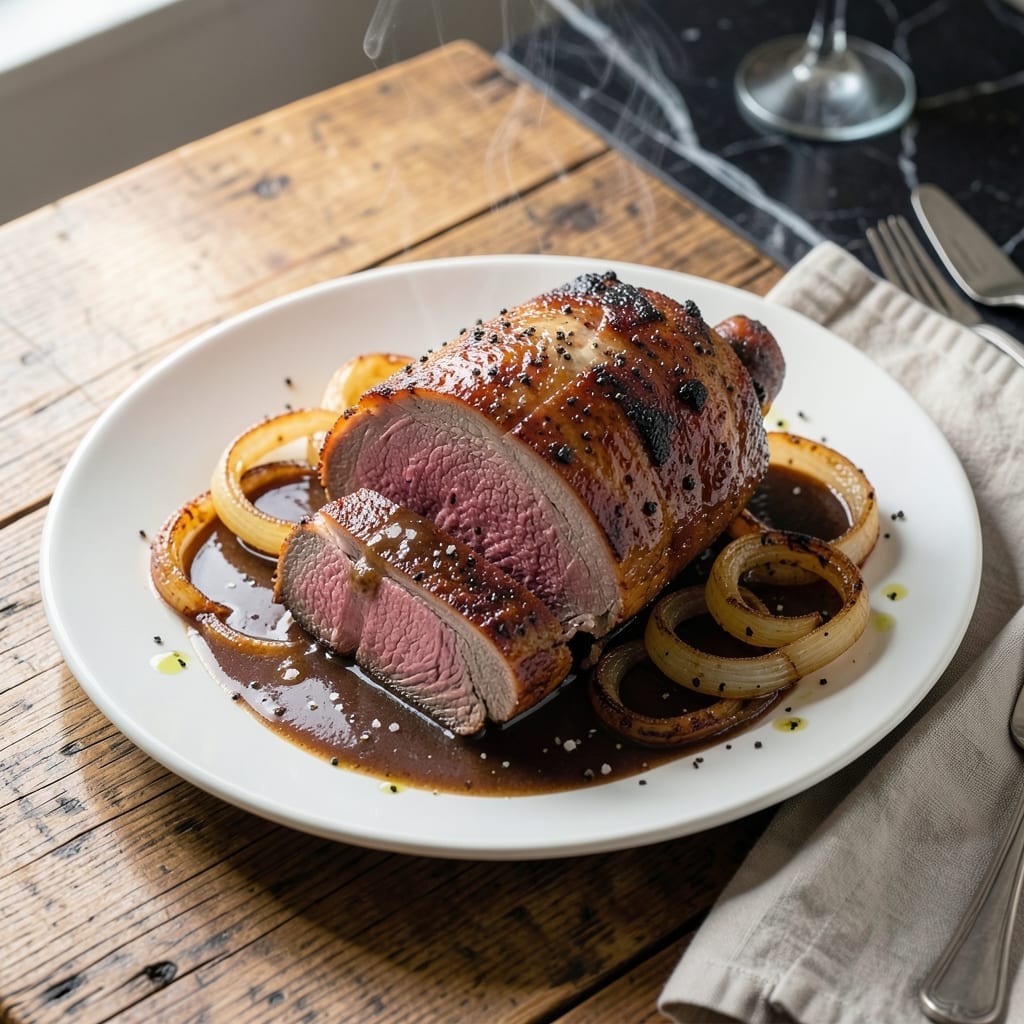
There’s a reason pot roast remains a Sunday tradition—it transforms humble ingredients into something extraordinary. This method coaxes fall-apart tender topside beef from a Dutch oven, filling your kitchen with rich, savory aromas that promise a meal worth waiting for.
I’ve refined this technique over years of Sunday dinners, focusing on low, steady heat and a simple braising liquid. The key is patience: sear the beef first, then let it cook slowly until it yields to the fork with zero resistance.
What emerges is meat so tender it nearly dissolves, surrounded by vegetables that soak up every bit of flavor. The gravy, thickened naturally from the cooking juices, ties it all together into a dish that tastes like home.
Perfect for feeding a crowd or saving leftovers for sandwiches. Here’s how to make it right.
Ingredients for Pot Roast Topside Beef
Transform humble ingredients into extraordinary Sunday dinner with these essentials for rich, tender beef.
| Ingredient | Amount | Notes |
|---|---|---|
| Topside Beef Roast 🥩 | 3 lb | Well-marbled, trimmed of excess fat |
| Kosher Salt 🧂 | 2 tsp | Diamond Crystal preferred for even seasoning |
| Freshly Ground Black Pepper 🌶️ | 1 tsp | Coarse grind for texture |
| All-Purpose Flour 🌾 | ¼ cup | For dusting beef before searing |
| Olive Oil 🫒 | 2 tbsp | High smoke point for searing |
| Yellow Onions 🧅 | 2 whole | Large, quartered for braising |
| Carrots 🥕 | 3 whole | Peeled, cut into chunks |
| Celery Stalks 🥬 | 3 whole | Cut into large pieces |
| Garlic Cloves 🧄 | 6 cloves | Smashed, peeled for aroma |
| Dry Red Wine 🍷 | 1 ½ cups | Full-bodied like Cabernet Sauvignon |
| Beef Stock 🥫 | 2 cups | Low-sodium preferred for control |
| Tomato Paste 🍅 | 2 tbsp | For depth of umami flavor |
| Fresh Thyme Sprigs 🌿 | 4 whole | Stems removed, tied for easy removal |
| Bay Leaves 🍃 | 2 whole | Dried, for aromatic depth |
The topside beef is non-negotiable here. Look for well-marbled cuts at a reputable butcher—this fat renders down during the slow cook, creating that signature tenderness. Whole Foods or local butcher shops typically carry quality topside; avoid pre-cut stew meat, as it lacks the structural integrity needed for a proper roast. Aim for a single piece that’s uniform in thickness for even cooking.
No red wine? Substitute with additional beef stock plus a splash of balsamic vinegar for acidity. Fresh thyme can be replaced with one-third the amount of dried thyme. If you lack tomato paste, a tablespoon of ketchup in a pinch works (though less ideal). For the stock, Better Than Bouillon makes a robust beef base—just dissolve it in hot water.
Leftovers keep beautifully. Store in an airtight container in the fridge for up to 5 days or freeze for 3 months. The flavors deepen overnight, making next-day sandwiches a revelation. Reheat gently on the stove with a splash of water to prevent drying.
Why You’ll Love This Recipe
- Set It and Forget: I sear the beef, pop it in the oven, and let the topside do its magic with just salt, pepper, and a dusting of flour.
- Rich, Deep Flavor: The crust from that simple flour coating seals in juices, and the slow roast turns the topside into melt-in-your-mouth perfection.
- Feeds the Crew: I make this for Sunday supper, and it stretches to feed six with enough left for sandwiches the next day.
- Budget-Friendly Centerpiece: Topside is lean but still flavorful, and with just olive oil and pantry staples, it feels indulgent without the cost.
Step-by-Step Instructions for Pot Roast Topside Beef
Here’s the method. Straightforward, tested, works every time.
Step 1: Sear and Season the Topside Beef Roast
Pat the 3 lb Topside Beef Roast completely dry with paper towels. This ensures a proper sear rather than steaming the meat. Season all sides aggressively with the 2 tsp Kosher Salt and 1 tsp Freshly Ground Black Pepper—this creates a flavorful crust and tenderizes the surface.
Dust the roast lightly with the 0.25 cup All-Purpose Flour, tapping off any excess. The flour helps thicken the cooking liquid later and adds a subtle crispness to the exterior. Don’t skip this step (I learned the hard way).
Step 2: Brown the Meat and Sauté the Aromatics
Heat the 2 tbsp Olive Oil in a Dutch oven over medium-high heat until shimmering. Add the beef and sear for 4-5 minutes per side until deeply browned on all sides. You’ll know it’s ready to flip when it releases easily from the pot—don’t force it.
Remove the beef and set aside. In the same pot, add the 2 whole Yellow Onions, 3 whole Carrots, 3 whole Celery Stalks, and 6 cloves Garlic Cloves. Cook for 5-6 minutes until the vegetables begin to soften and develop golden brown edges.
Step 3: Deglaze and Build the Braising Liquid
Add the 2 tbsp Tomato Paste and cook for 1-2 minutes, stirring constantly until it deepens in color. This step intensifies its sweetness and removes any raw flavor. Pour in the 1.5 cups Dry Red Wine and scrape up all the browned bits from the bottom of the pot—this is where the depth of flavor comes from.
Let the wine reduce by half, about 5 minutes, then add the 2 cups Beef Stock, 4 whole Fresh Thyme Sprigs, and 2 whole Bay Leaves. Stir to combine, then return the beef to the pot along with any accumulated juices.
Step 4: Braise Low and Slow to Perfection
Bring the liquid to a gentle simmer, then cover the pot and transfer it to a preheated 325°F oven. Braise for 2.5 to 3 hours, turning the beef once halfway through, until the meat is fork-tender and nearly falling apart. The low, steady heat breaks down the collagen into gelatin, creating that luxurious, melt-in-your-mouth texture.
You’ll know it’s done when a fork slides in and out with absolutely no resistance. If the liquid reduces too much during cooking, add a splash of water to maintain the level about halfway up the beef.
Step 5: Rest and Serve
Carefully remove the beef from the pot and transfer it to a cutting board. Tent loosely with foil and let it rest for 15-20 minutes. This allows the juices to redistribute throughout the meat so every slice is moist and flavorful.
Skimming excess fat from the braising liquid and serve it alongside the beef and vegetables. The sauce should be rich, deeply flavored, and thick enough to coat the back of a spoon. This is Sunday dinner at its finest.
Pro Tips For Making Pot Roast Topside Beef
- Sear in Batches: I learned this the hard way—overcrowding the pan steams the meat instead of browning it. Sear the topside in 2-3 pieces with about 2 tablespoons of olive oil per batch to get that deep crust.
- Dry the Beef First: Pat the topside roast bone-dry with paper towels before seasoning, or the flour won’t stick and you’ll lose that golden crust. Sounds tedious, but it actually changes the outcome.
- Skip Cold Beef: Always pull the roast from the fridge 30-45 minutes before cooking. Cold meat seizes up in the pan and cooks unevenly—I used to rush this part and wondered why my pot roast was tough.
- Use Fresh Pepper: Pre-ground black pepper loses its punch fast. Grind it fresh right before dusting the beef—it makes a real difference in the depth of flavor.
Storing and Reheating This Recipe
Refrigerator Storage
Let your pot roast cool for no more than 2 hours before transferring to airtight containers. I use glass Pyrex with snap-on lids to keep flavors fresh. Store at 40°F or below for up to 5 days. ❄️
Freezer Storage
For longer storage, freeze in quart-sized freezer bags with excess air pressed out. Portion into meal-sized amounts for easy thawing. This keeps beautifully for up to 3 months without compromising texture.
Stovetop Reheating
Gently reheat in a saucepan over medium-low heat with ¼ cup beef stock or water. Cover and warm for 10-15 minutes, stirring occasionally. This prevents drying while restoring that just-cooked tenderness. 🔥
Oven Reheating
Wrap portions in foil with 2 tbsp braising liquid and warm at 350°F for 20-25 minutes. This method works best for larger cuts, maintaining moisture throughout.
Gravy Revival
If the gravy thickens too much in storage, whisk in 1 tbsp water at a time while reheating. For extra richness, stir in 1 tsp butter at the end. The flavors often intensify after a day or two.
Nutrition Facts
Frequently Asked Questions
Can I use a slow cooker instead of a Dutch oven?
Yes! Sear the beef first, then transfer to your slow cooker with all liquid and vegetables. Cook on low for 7-8 hours or high for 4-5 hours until fork-tender.
Why is my pot roast tough?
It likely didn’t cook long enough. Topside needs slow, moist heat to break down collagen. Ensure liquid covers halfway up the meat and maintain 325°F throughout cooking.
What’s the best way to slice it?
Always slice against the grain after resting. Look for the muscle fibers’ direction and cut perpendicular for the most tender pieces. Use a sharp knife for clean slices.
Can I make this ahead?
The flavors improve overnight. Refrigerate up to 2 days before serving, then reheat gently with extra stock to prevent drying.

- 4C Bread Crumbs Meatballs Recipe: Crispy Crust and Juicy Centers - September 25, 2026
- 6 Oz Chocolate Chip Cookie Recipe: Perfectly Balanced Crispy Edges and Chewy Hearts - September 25, 2026
- 6-Inch Coffee Cake Recipe: Vanilla Bean Swirls and Buttery Streusel Topping - September 25, 2026