
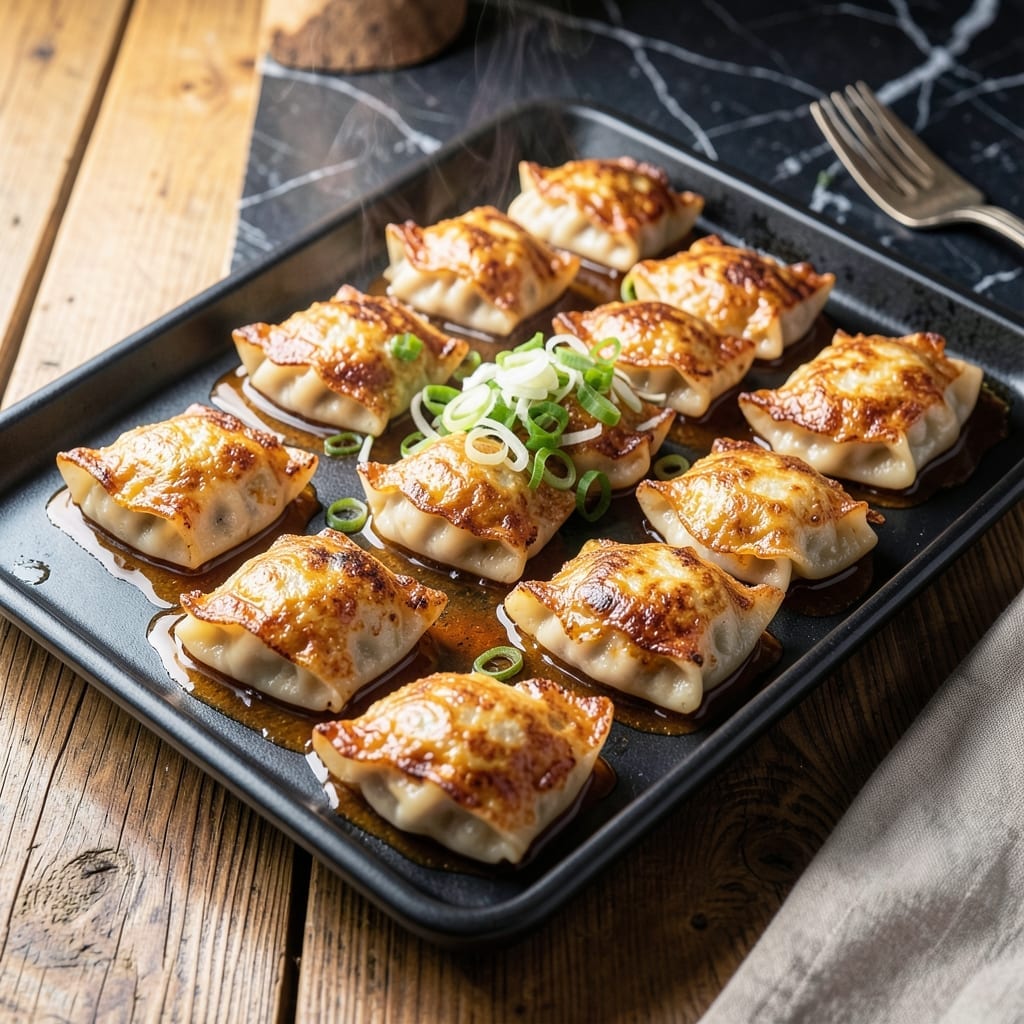
This pot sticker bake delivers crispy golden bottoms and tender tops without the mess of pan-frying. I developed this oven method to simplify the process while keeping that signature texture we all love.
The technique is straightforward: arrange the dumplings in a baking dish, brush with oil, and bake at high heat. This creates a shatteringly crispy base as the tops steam to perfection in the covered environment.
What emerges is a platter of pot stickers with the ideal contrast between textures. The bottoms develop a deep golden crust while the fillings stay juicy and flavorful, just like traditional versions.
Serve these straight from the oven with your favorite dipping sauce. The results are consistently impressive and far easier than standing over a hot pan.
Ingredients for Pot Sticker Bake
Frozen pot stickers plus a few pantry items create this crowd-pleasing dish.
| Ingredient | Amount | Notes |
|---|---|---|
| Frozen Pot Stickers 🥟 | 24 pieces | Pork or vegetable filling |
| Neutral Oil 🫒 | 3 tbsp | For brushing, high smoke point |
| Soy Sauce 🥢 | ¼ cup | Low-sodium preferred |
| Rice Vinegar 🍚 | 2 tbsp | For dipping sauce |
| Sesame Oil 🫒 | 1 tsp | For dipping sauce |
| Green Onions 🧅 | 3 whole | Thinly sliced for garnish |
| Garlic Cloves 🧄 | 2 cloves | Minced for dipping sauce |
| Fresh Ginger 🌿 | 1 tsp | Grated for dipping sauce |
| Red Pepper Flakes 🌶️ | ½ tsp | Optional for heat |
| Cornstarch 🌾 | 1 tsp | For dipping sauce thickening |
| Water 💧 | 2 tbsp | For dipping sauce |
| Sesame Seeds 🌰 | 1 tsp | For garnish, toasted |
The pot stickers are the star here. Trader Joe’s and Costco have great frozen options—look for ones labeled ‘oven-ready’ or ‘pan-fry then steam.’ I always grab the pork ones (the classic), but vegetable works just as well. Check the ingredients if you’re avoiding specific allergens. For the oil, any neutral oil with a high smoke point does the trick—vegetable, canola, or avocado oil all work.
No rice vinegar? Apple cider vinegar in a pinch, though the flavor is slightly different. Short on green onions? Red onion or chives can fill in. If you don’t have fresh ginger, ground ginger at one-third the amount works, but fresh really shines here. The soy sauce can be swapped for tamari if you need gluten-free. San-J makes a great tamari that’s easy to find.
Pot stickers bake straight from frozen—no thawing needed. Leftovers keep in the fridge for 3-4 days and reheat well in the oven or air fryer. The dipping sauce stays fresh for about 1 week in the fridge, so make extra. It’s perfect on everything from dumplings to salads.
Why You’ll Love This Recipe
- One Pan Wonder: I toss frozen pot stickers with oil, bake, and drizzle with soy sauce—hardly any cleanup.
- Umami Bomb: That mix of soy sauce, rice vinegar, and sesame oil hits all the right savory notes.
- Weeknight Hero: Between us, this is my go-to when I need dinner fast and the kids won’t complain.
- Leftovers Winner: Honestly, they taste even better the next day straight from the fridge.
Step-by-Step Instructions for Pot Sticker Bake
Here’s how to get perfectly crispy bottoms with minimal effort and maximum flavor.
Step 1: Arrange and Oil the Pot Stickers
Preheat your oven to 425°F. While it heats, arrange the 24 pieces Frozen Pot Stickers in a single layer on a rimmed baking sheet. I like to place them close together but not touching—this keeps them from steaming each other instead of crisping.
Brush the tops of the pot stickers generously with 1 tbsp Neutral Oil. This might seem like a lot, but it’s what gives you that golden brown crisp. Don’t skip this step or you’ll miss out on the best part: that irresistible crunch.
Step 2: Bake Until Crispy and Golden
Place the baking sheet in the preheated oven and bake for 15-18 minutes. You’ll know they’re ready when the bottoms are deep golden brown and crisp to the touch. Resist the urge to flip them—this method is all about that perfect crispy base.
Halfway through the baking time, brush the tops with another 1 tbsp Neutral Oil. This ensures they crisp evenly. If you notice the tops browning too quickly, tent the sheet loosely with foil to prevent burning while the bottoms finish crisping.
Step 3: Prepare the Dipping Sauce
While the pot stickers bake, mix the 0.25 cup Soy Sauce, 2 tbsp Rice Vinegar, 1 tsp Sesame Oil, minced 2 cloves Garlic Cloves, and 1 tsp Fresh Ginger in a small bowl. Stir until everything is well combined.
In a separate tiny bowl, mix the 1 tsp Cornstarch with 2 tbsp Water to create a slurry. Slowly whisk this into the sauce mixture until smooth. If you prefer a little heat, stir in the 0.5 tsp Red Pepper Flakes now. Taste and adjust the seasoning if needed.
Step 4: Finish and Garnish
Remove the pot stickers from the oven and brush them with the remaining 1 tbsp Neutral Oil to add extra shine and flavor. Let them rest for 2-3 minutes—this lets the filling set slightly so it doesn’t burst when you bite in.
Thinly slice the 3 whole Green Onions and sprinkle them over the pot stickers along with the 1 tsp Sesame Seeds. Serve immediately with the dipping sauce on the side. The contrast of the crispy bottoms and tender tops with that savory, tangy sauce is what makes this dish so addictive.
Pro Tips For Making Pot Sticker Bake
- Preheat the Pan: I learned this the hard way—start with a screaming hot pan (medium-high heat) to get that crispy bottom before the pot stickers steam in the oven.
- Don’t Thaw First: Skip thawing the frozen pot stickers; toss them in straight from the freezer to avoid soggy edges before baking.
- Oil the Tray Well: Use about 2 tablespoons of neutral oil to coat the baking sheet—this guarantees they release easily and crisp up properly.
- Finish with Sesame Oil: Drizzle the sesame oil over the baked pot stickers right before serving, not before, to preserve its aroma and prevent bitterness from high heat.
Regional Styles of pot sticker bake
Chinese Classic Style
Traditional guotie (锅贴) are pan-fried then steamed, but this baked version captures that same crunch. The key is high heat—425°F mimics the Maillard reaction you’d get from frying. I use pork pot stickers for authentic flavor.
Korean Mandu Twist
Korean mandu are often larger and more complex. For this method, I’d use kimchi-filled dumplings and add 1 tsp gochujang to the dipping sauce for spicy depth. The bake gives them a crispy edge that’s perfect with the heat.
Japanese Gyoza Approach
Japanese gyoza typically have thinner wrappers. I’d bake these for only 12-15 minutes at 400°F to prevent over-browning. The dipping sauce stays the same, but add 1 tsp mirin for sweetness. 💛
Thai-Inspired Version
For Thai flavors, use chicken or shrimp pot stickers and swap the dipping sauce for fish sauce mixed with lime juice. Add 1 stalk lemongrass (finely minced) to the sauce for aromatic brightness.
American Fusion
Try buffalo chicken pot stickers with a blue cheese dipping sauce. I’d mix ¼ cup crumbled blue cheese into the soy-vinegar base and add 1 tbsp hot sauce for tang. The crispy bottoms stand up well to bold flavors. 🔥
Vegetable Variations
For vegetarian versions, mushroom or cabbage-filled pot stickers work beautifully. I’d add 1 tsp hoisin sauce to the dipping sauce for extra depth. The baking method ensures they crisp up just as nicely as meat-filled ones.
Nutrition Facts
Frequently Asked Questions
Do I need to thaw the pot stickers first?
No, bake them straight from frozen for best results. Thawing can make the wrappers soggy and prevent that perfect crisp.
Why are my pot stickers not crispy?
Check your oven temperature—it must reach 425°F. Also, ensure they’re in a single layer with space between each one for proper browning.
Can I make this in an air fryer?
Yes! Air fry at 390°F for 8-10 minutes, shaking halfway. The circulates heat for even crispiness without flipping.
What if I don’t have rice vinegar?
Substitute apple cider vinegar or lime juice. The acidity is key, but the flavor will vary slightly.

- 4C Bread Crumbs Meatballs Recipe: Crispy Crust and Juicy Centers - September 25, 2026
- 6 Oz Chocolate Chip Cookie Recipe: Perfectly Balanced Crispy Edges and Chewy Hearts - September 25, 2026
- 6-Inch Coffee Cake Recipe: Vanilla Bean Swirls and Buttery Streusel Topping - September 25, 2026