
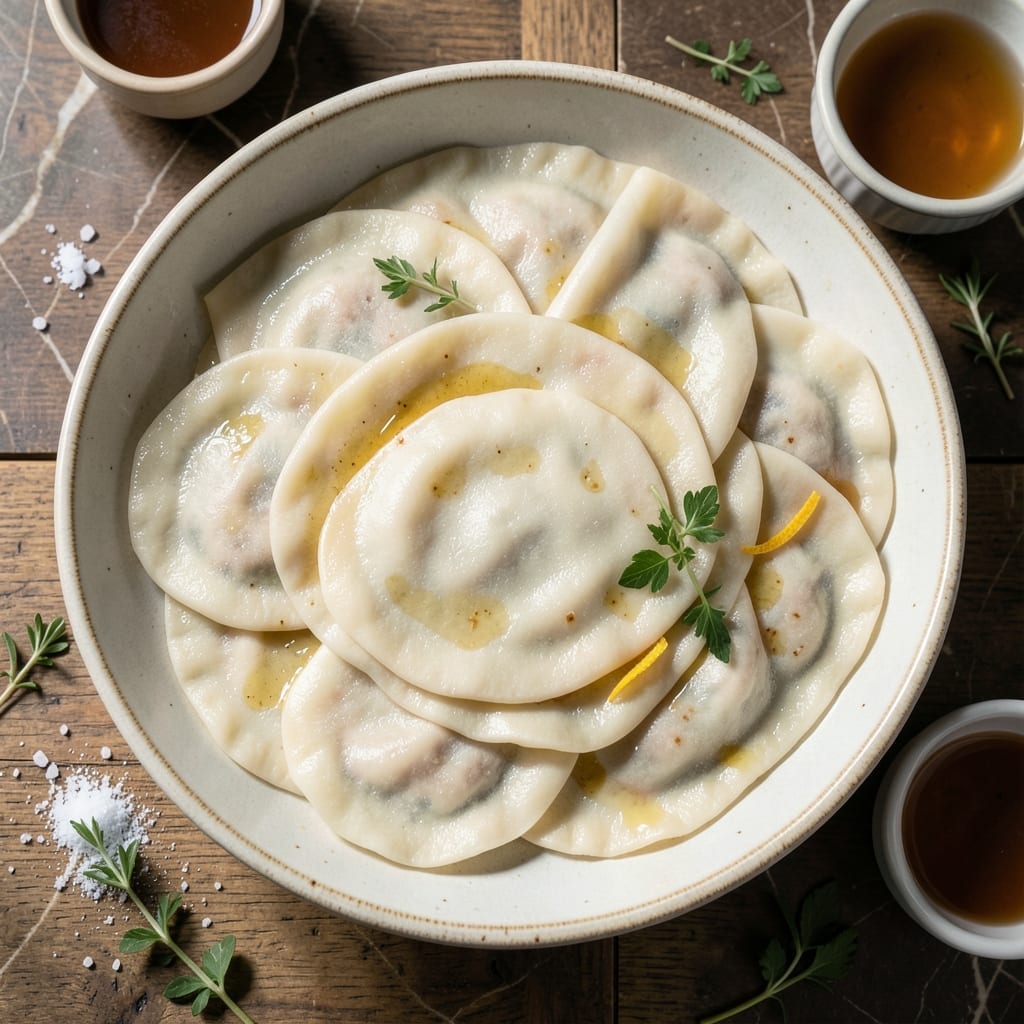
Crafting your own pot sticker skins transforms the dumpling-making experience. This homemade approach ensures the ideal texture—tender yet sturdy enough to hold pleats and fillings without tearing.
The dough comes together with just flour and water, but the magic lies in the resting and rolling techniques. Properly kneaded and rested dough develops the elasticity needed for thin, even skins that cook up perfectly.
These wrappers open up endless possibilities for traditional fillings like pork and cabbage or creative twists. The satisfaction of making every component from scratch elevates your dumplings to restaurant quality.
With practice, you’ll achieve consistent, paper-thin skins that pleat beautifully and cook to a delicate, slightly chewy finish. The foundation of exceptional dumplings starts here.
Ingredients for Pot Sticker Skin
Just flour, water, and a few pantry staples for these tender, elastic dumpling skins.
| Ingredient | Amount | Notes |
|---|---|---|
| All-Purpose Flour 🌾 | 2 cups | Plus extra for dusting surfaces |
| Warm Water 💧 | ¾ cup | Approximately 110°F to 115°F |
| Kosher Salt 🧂 | ½ tsp | Diamond Crystal preferred for consistency |
| Neutral-Flavored Oil 🫒 | 1 tbsp | Like vegetable or canola for dough |
| Cornstarch 🌽 | 2 tbsp | For dusting to prevent sticking |
| Sesame Oil 🫒 | ½ tsp | Optional for authentic flavor |
| Baking Soda 🧂 | ¼ tsp | Alkaline for chewy texture |
| Vinegar 💧 | 1 tsp | White or rice vinegar works |
| Sugar 🍚 | ½ tsp | Optional for subtle sweetness |
| Egg 🥚 | 1 whole | Optional for richer dough |
The flour is non-negotiable here. King Arthur All-Purpose is my go-to—consistent protein content means predictable elasticity. Warm water should feel like a baby’s bath (wrist-test it). Diamond Crystal kosher salt dissolves evenly without bitterness. I keep a dedicated 5-lb bag of flour for dumpling days since the dough comes together faster with fresh flour.
No egg? Skip it—these skins work beautifully without. Out of cornstarch? Arrowroot powder at the same ratio works too. The vinegar can be any mild kind, but avoid balsamic (too dark). Want extra tenderness? Replace 1 tbsp flour with cornstarch. The sesame oil adds depth, but omit if you prefer neutral flavor. Fresh flour makes a noticeable difference.
Dough rests best covered with damp towel—prevents crusting. Finished skins freeze 3 months between parchment layers. Always dust generously with cornstarch before stacking. Room temp dough rolls thinner than cold, so let it sit 30 minutes after resting if it springs back.
Why You’ll Love This Recipe
- Mix & Rest: I just stir flour, water, and salt, let it rest, and boom—homemade pot sticker skins ready to roll.
- Buttery Chew: The cornstarch keeps them tender, and a quick pan-fry gives that satisfying crisp edge.
- Freezer Friendly: I make a big batch, freeze the extras, and pull them out whenever I crave dumplings.
- Penny Wise: Honestly, a bag of flour and a little oil cost less than store-bought wrappers and taste way better.
Step-by-Step Instructions for Pot Sticker Skin
This method delivers tender, elastic wrappers that pleat like a dream every time.
Step 1: Activate the Alkaline Base
In a small bowl, combine the 0.25 tsp Baking Soda with the 1 tsp Vinegar. You’ll see it fizz immediately—that chemical reaction is what gives these wrappers their signature chewy texture. Let it sit for 30 seconds until the bubbling stops completely.
This step mimics the effect of alkaline water used in traditional recipes. I’ve found it makes the dough more pliable and less likely to tear when rolling thin. Don’t skip this—it’s the secret to authentic texture.
Step 2: Create the Dough Base
In a large mixing bowl, whisk together the 2 cups All-Purpose Flour and 0.5 tsp Kosher Salt. Make a well in the center and add the baking soda mixture, 0.75 cup Warm Water, 1 tbsp Neutral-Flavored Oil, 0.5 tsp Sesame Oil, 0.5 tsp Sugar, and the 1 whole Egg.
Using your hands, gradually incorporate the wet ingredients into the dry until a shaggy dough forms. The dough will be slightly tacky but shouldn’t stick to your fingers excessively. If it feels too dry, add warm water 1 tsp at a time.
Step 3: Knead to Perfect Elasticity
Turn the dough onto a lightly floured surface and knead for 8-10 minutes until smooth and elastic. You’ll know it’s ready when you can press your finger into the dough and it springs back immediately. The surface should be silky, not rough or cracked.
I like to use the heel of my hand to push the dough away, then fold it back over itself repeatedly. This develops the gluten strands that give the wrappers their stretch. If the dough starts sticking, dust with a little more all-purpose flour, but use a light hand—too much extra flour makes the wrappers tough.
Step 4: Rest and Relax the Gluten
Shape the dough into a ball and place it in a clean bowl. Cover with a damp kitchen towel or plastic wrap and let it rest at room temperature for 1 hour. This resting period allows the gluten to relax, making the dough much easier to roll thin later.
The dough will rise slightly during this time—that’s normal. After resting, it should feel softer and more pliable. If you’re in a hurry, you can refrigerate it for 30 minutes, but room temperature resting gives the best texture.
Step 5: Roll and Cut the Wrappers
Divide the rested dough into 4 equal portions and work with one at a time, keeping the others covered. On a surface dusted with cornstarch, roll the dough as thin as possible without tearing—aim for about 1/16-inch thickness.
Use a 3-inch round cutter to stamp out the wrappers. Dust each wrapper with additional cornstarch to prevent sticking, then stack them with parchment paper between layers. You should get about 24-28 wrappers total. Cover unused wrappers with a towel while you work to prevent them from drying out.
Pro Tips For Making Pot Sticker Skin
- Use Boiling Water: I learned this the hard way—using just warm water makes the dough tough. Boiling water (about ¾ cup for 2 cups flour) creates a silkier, more elastic texture that rolls out like a dream.
- Rest the Dough: After kneading, let it sit covered for at least 30 minutes. Sounds tedious, but it relaxes the gluten so the skins won’t shrink or fight you when rolling.
- Dust With Cornstarch: Skip the extra flour when rolling—lightly dust your surface with cornstarch instead. It prevents sticking without making the skins dry or gummy.
- Roll Evenly Thin: Aim for about 1/16-inch thickness, especially at the edges. Any thicker and they won’t crisp properly; any thinner and they’ll tear when folding. A tortilla press saves time if you’re making a big batch.
Essential Equipment for This Recipe
The Right Rolling Pin
A French rolling pin without handles gives you the most control for rolling thin dough. I prefer J.K. Adams maple wood—its weight helps create even pressure. A 9-inch pin is ideal for this size batch of dough.
Precision Cutters
For consistent 3-inch rounds, invest in a stainless steel round cutter. Ateco makes durable ones that won’t rust. Press straight down—don’t twist—when cutting to avoid sealing the edges prematurely. 💡
Work Surface Matters
A marble pastry board stays cool and provides a smooth surface for rolling. If using wood, choose maple or beech—avoid porous woods that absorb moisture. Always dust with cornstarch rather than flour to prevent sticking.
Thickness Guide
Achieving 1/16-inch thickness takes practice. I use rolling pin guide rings from Joseph Joseph to maintain consistency. Without guides, aim for translucency when held to light—the dough should be nearly see-through at the edges.
Dough Scraper
A bench scraper helps divide dough cleanly and lift thin sheets without tearing. OXO’s stainless steel version has comfortable handles. Use it to portion your dough into 4 equal pieces before rolling. 💛
Storage Solutions
Stack finished wrappers between parchment sheets in an airtight container. OXO Pop Containers work well and keep them fresh for up to 3 days in the fridge. For longer storage, freeze with parchment between each layer.
Nutrition Facts
Frequently Asked Questions
Why does the dough need to rest?
Resting relaxes the gluten strands, making the dough easier to roll thin. Without resting, the dough springs back when you try to stretch it. 1 hour at room temperature is ideal for perfect elasticity.
Can I make these without a rolling pin?
Yes, use a tortilla press or wine bottle as alternatives. For even thickness, place dough between parchment sheets before pressing. A 3-inch round cutter still works for shaping.
How thin should the skins be?
Aim for 1/16-inch thickness or nearly translucent at the edges. Too thick skins become doughy when cooked. Use guide rings for consistent results.
Why use cornstarch instead of flour for dusting?
Cornstarch prevents sticking better and doesn’t toughen the dough like flour can. It also gives the skins a smoother finish. Dust generously between each layer.

- 6 Oz Chocolate Chip Cookie Recipe: Perfectly Balanced Crispy Edges and Chewy Hearts - September 25, 2026
- 6-Inch Coffee Cake Recipe: Vanilla Bean Swirls and Buttery Streusel Topping - September 25, 2026
- 1 Hour Soup Recipe: Velvety Richness Without the Wait - September 25, 2026