
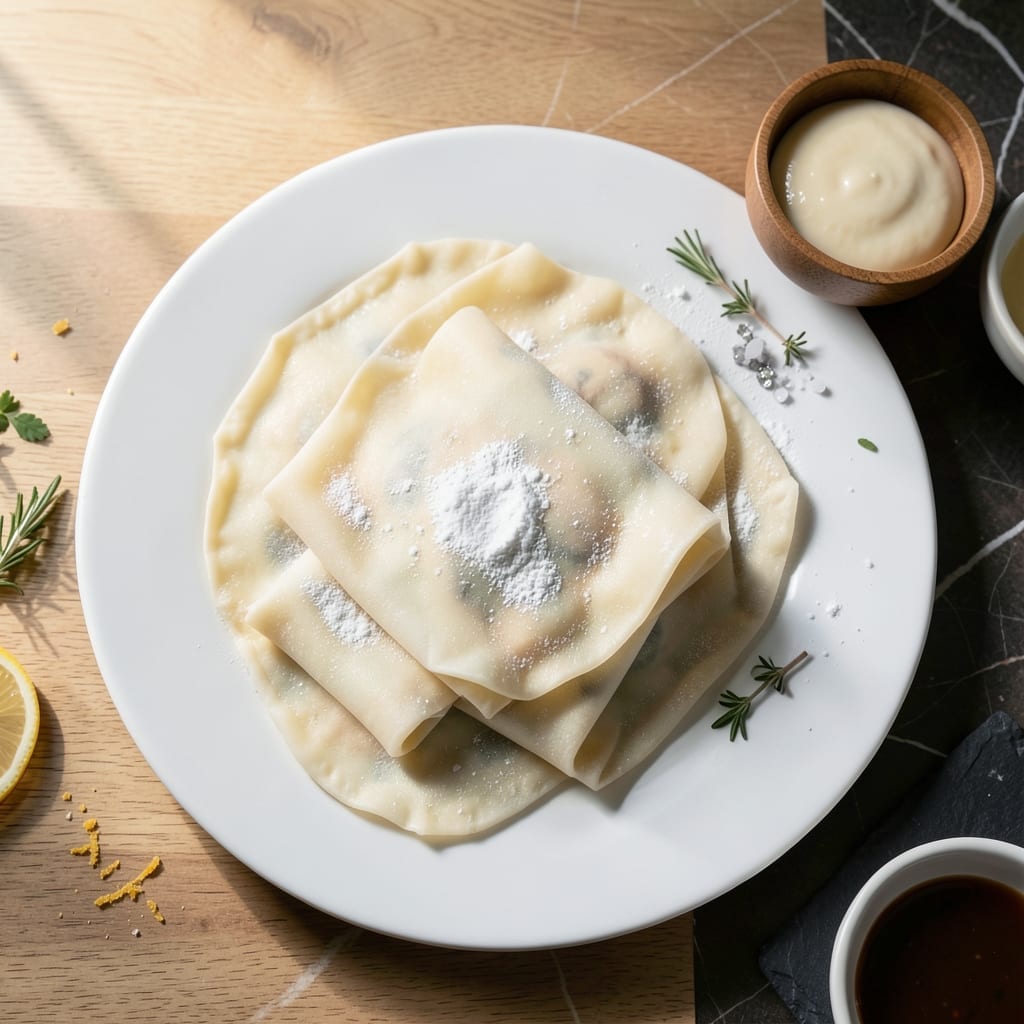
Making pot sticker wrappers from scratch transforms your dumplings from good to extraordinary. The key is achieving dough that’s thin yet elastic, strong enough to hold fillings without tearing during cooking.
This homemade version requires just two ingredients and a bit of patience. The resting time is crucial—it allows the gluten to relax, making the dough easier to roll out paper-thin without springing back.
You’ll end up with wrappers that are tender when cooked, with just the right chew. They brown beautifully in the pan, creating that signature crispy bottom that makes pot stickers so irresistible.
Once you try these, store-bought wrappers won’t compare. The difference in texture and flavor is immediately noticeable.
Ingredients for Pot Sticker Wrapper
Just three humble ingredients create wrappers that outshine any store-bought version by miles.
| Ingredient | Amount | Notes |
|---|---|---|
| All-Purpose Flour 🌾 | 2 cups | Plus extra for dusting surface |
| Hot Water 💧 | ¾ cup | Just boiled, about 180°F |
| Salt 🧂 | ¼ tsp | Fine sea salt preferred |
The flour is the foundation here. King Arthur or Bob’s Red Mill all-purpose gives consistent results with the right protein content (around 11%). Don’t skip the resting time—this is what transforms the dough from stubborn to supple. I’ve found that boiling the water fresh (rather than reheating) makes a noticeable difference in elasticity.
No all-purpose flour? Bread flour at a 50/50 ratio with AP flour works in a pinch, though it’ll be slightly chewier. Skip the salt if you’re watching sodium, but it does enhance the flavor subtly. The water temperature is key—too cool and the dough won’t come together, too hot and you risk cooking the flour (yes, that’s a thing).
The dough rests best at room temp, covered with a damp towel for 30-60 minutes. Makes about 24-30 wrappers, enough for a big batch of dumplings. Use immediately or refrigerate for up to 24 hours—it’ll stiffen up, so let it sit at room temp for 15 minutes before rolling.
Why You’ll Love This Recipe
- Three Ingredients Only: I love that it’s just flour, hot water, and salt—no fancy grocery runs or special tools.
- Chewy Perfection: That slight bite and tender stretch from the hot water dough? It’s what makes pot stickers irresistible.
- Endless Fillings: I’ve stuffed these with pork, veggies, even leftover turkey—whatever I have on hand works.
- Penny Wise: A bag of flour and tap water cost pennies, yet taste like takeout. Honestly, my wallet thanks me.
Step-by-Step Instructions for Pot Sticker Wrappers
Master the technique for perfectly thin, elastic wrappers that hold their shape when folded.
Step 1: Combine and Knead the Dough
In a large mixing bowl, combine the 2 cups All-Purpose Flour and 0.25 tsp Salt. Create a well in the center and pour in the 0.75 cup Hot Water all at once. The water should be just boiled, around 180°F, to activate the gluten properly.
Using chopsticks or a wooden spoon, mix in a circular motion until clumpy. Then switch to your hands and knead directly in the bowl for 2-3 minutes until the dough comes together. The mixture will look shaggy at first, but keep working it—it should form a rough ball that pulls away from the bowl sides.
Step 2: Develop the Gluten Through Resting
Turn the dough onto a lightly floured surface and knead for another 5-7 minutes until smooth and elastic. You’ll notice the texture transform from rough to silky as the gluten develops. Press your thumb into the dough—if it springs back slowly, it needs more kneading.
Shape into a ball, place in a clean bowl, and cover with a damp towel. Let it rest at room temperature for 30 minutes. This resting period relaxes the gluten strands, making the dough easier to roll out thinly without shrinking back. The dough should feel slightly tacky but not sticky after resting.
Step 3: Divide and Shape the Dough
After resting, punch down the dough to release any air bubbles. Divide it into 4 equal portions (about 110g each), then roll each portion into a 1-inch thick log. Keep the portions you’re not working with covered to prevent drying.
Cut each log into 8-10 pieces (you should get about 36 wrappers total). Roll each piece into a ball between your palms, then flatten slightly into a disc. The dough should be smooth with no cracks—if it cracks during shaping, it needs more kneading or resting time.
Step 4: Roll Out the Wrappers
Lightly dust your work surface with flour. Using a rolling pin, roll each dough ball from the center outward in all directions, rotating the dough 90 degrees after each roll to maintain an even circle. Aim for wrappers about 3-3.5 inches in diameter.
The edges should be slightly thinner than the center—this helps create that perfect pleated shape when folding. If the dough springs back, let it rest for 1-2 minutes before continuing. The ideal thickness is about 1/16 inch—thin enough to see your hand through it when held up to light, but not so thin it tears.
Step 5: Store or Use Immediately
Dust each wrapper with a bit of flour to prevent sticking, then stack them neatly. If not using immediately, cover the stack with plastic wrap and refrigerate for up to 24 hours, or freeze for up to 1 month with parchment between layers.
When ready to use, let chilled wrappers come to room temperature before filling. The dough should feel pliable and stretch slightly when you press it between your fingers. These wrappers will hold up beautifully to pan-frying, creating that classic crispy-bottom, tender-top texture pot stickers are known for.
Pro Tips For Making Pot Sticker Wrapper
- Use Boiling Water: Pour just-boiled water over the flour—cooler water makes the dough tough and chewy. I learned this the hard way after my first three batches came out gummy.
- Knead Immediately: Start kneading the dough as soon as the water is mixed in, while it’s still hot. Waiting even 2 minutes makes it harder to work with.
- Rest the Dough: Let the dough rest for at least 30 minutes under a damp towel. Skipping this step makes the wrappers crack when you roll them out.
- Roll Thin, Not Translucent: Aim for wrappers about 1/16 inch thick—thinner than a dime but not see-through. Any thinner and they’ll tear when folding.
Regional Styles of These Flavors
Northern Chinese Style
In Northern China, these wrappers are rolled slightly thicker, about 1/8 inch, to hold heartier fillings like pork and cabbage. The dough uses just flour and water, no salt, to highlight the filling’s natural flavors. This style produces a chewier texture that stands up to boiling and pan-frying. 🗺️
Cantonese Version
Cantonese cooks often add 1 tsp lard to the dough for extra tenderness. The wrappers are rolled paper-thin, about 1/16 inch, creating delicate dumplings like har gow. I learned this technique from my grandmother, who insisted on using boiling water for maximum elasticity.
Korean Mandu
Korean mandu wrappers are similar but often include 1 tsp vegetable oil in the dough. They’re typically larger, about 4 inches in diameter, to accommodate more filling. The oil makes the dough more pliable for intricate folding patterns. I prefer using neutral-flavored oil to avoid overpowering the filling.
Japanese Gyoza
Japanese gyoza wrappers are slightly thicker than Chinese versions, about 1/10 inch. The dough often includes 1 tbsp cornstarch for extra crispness when pan-fried. These are perfect for the classic half-moon shape with frilled edges. The cornstarch gives them a satisfying crunch.
Vegetarian Adaptation
For a plant-based version, replace the hot water with ¾ cup warm vegetable broth. This adds subtle flavor to the wrappers. The technique remains the same, but the dough may need an extra 5 minutes of resting time to develop proper elasticity.
Gluten-Free Option
Use a 50/50 blend of rice flour and tapioca starch with 1 tsp xanthan gum to mimic gluten’s elasticity. The dough will be more delicate, so roll between parchment paper. These work best for steaming rather than pan-frying. 💡
Nutrition Facts
Frequently Asked Questions
Why use hot water for the dough?
Hot water around 180°F activates the gluten more effectively, creating a more elastic dough. This method also prevents the dough from becoming too sticky while kneading.
Can I make wrappers ahead of time?
Yes! Store stacked wrappers in an airtight container in the fridge for up to 24 hours. For longer storage, freeze with parchment between layers for up to 1 month.
How thin should the wrappers be?
Aim for about 1/16 inch thick. The edges can be slightly thinner than the center. When held to light, you should just see your hand through them.

- 4C Bread Crumbs Meatballs Recipe: Crispy Crust and Juicy Centers - September 25, 2026
- 6 Oz Chocolate Chip Cookie Recipe: Perfectly Balanced Crispy Edges and Chewy Hearts - September 25, 2026
- 6-Inch Coffee Cake Recipe: Vanilla Bean Swirls and Buttery Streusel Topping - September 25, 2026