
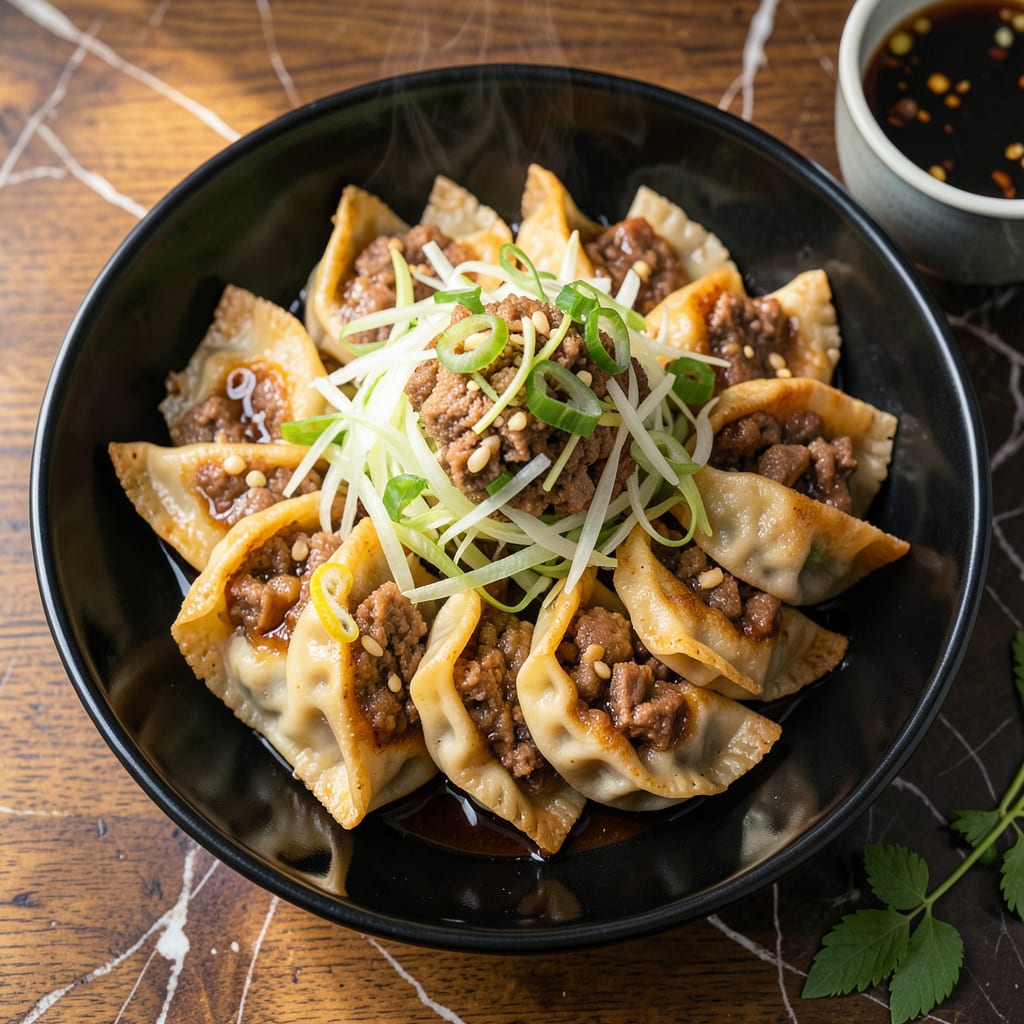
This pot sticker recipe delivers crispy golden bottoms with juicy fillings that burst with flavor in every bite. The key is a hot pan and proper steaming technique.
I’ve perfected the balance between tender wrappers and savory pork-cabbage filling, creating dumplings that rival your favorite restaurant. The contrast of textures makes them irresistible.
Ingredients for Pot Stickers
Crispy bottoms and juicy insides start with these fresh, flavorful ingredients.
| Ingredient | Amount | Notes |
|---|---|---|
| Ground Pork 🐷 | 1 lb | Regular or fatty for juiciness |
| Napa Cabbage 🥬 | 2 cups | Finely shredded, salted and drained |
| Green Onions 🧅 | ½ cup | Thinly sliced, white and green parts |
| Garlic Cloves 🧄 | 3 cloves | Minced finely for even flavor |
| Fresh Ginger 🌿 | 1 tbsp | Peeled and grated |
| Sesame Oil 🫒 | 1 tbsp | Toasted variety for depth |
| Soy Sauce 💧 | 2 tbsp | Low-sodium preferred |
| Rice Vinegar 🍶 | 1 tbsp | Or substitute apple cider vinegar |
| Pot Sticker Wrappers 🥟 | 40 pieces | Round dumpling skins, thawed |
| Neutral Oil 🛢️ | 3 tbsp | For pan-frying, like vegetable or canola |
| Water 💧 | ½ cup | For steaming dumplings |
| Salt 🧂 | ½ tsp | Adjust to taste |
| Black Pepper 🌶️ | ¼ tsp | Freshly ground |
| Cornstarch 🌾 | 1 tbsp | For thickening filling |
[recipeingredientscaler]
The pork is the backbone here. Ground pork with 20% fat gives you that juicy filling that doesn’t dry out. I grab mine from Whole Foods for quality, but any grocery store works. The Napa cabbage needs to be salted and drained well—no one wants soggy dumplings. For the wrappers, nasoya brand is my go-to, found in the refrigerated section at most supermarkets.
No pork? Ground chicken or turkey works in a pinch (just add an extra tbsp of sesame oil). Short on Napa cabbage? Regular green cabbage is fine—just shred it finer. If you’re out of rice vinegar, apple cider vinegar at the same amount does the trick. The sesame oil is non-negotiable though—it’s what gives that authentic flavor (the toasted kind, not raw).
Filling can be made a day ahead—keeps 24 hours in the fridge. Wrappers dry out fast, so keep them covered with a damp towel. Cooked pot stickers? They’ll hold for 3 days in the fridge, but honestly, they’re best straight from the pan.
Why You’ll Love This Recipe
- Minimal Chopping Required: I just toss the napa cabbage, green onions, and pork together—no fancy knife skills needed.
- Garlic-Ginger Punch: The combo of fresh ginger and garlic gives these that restaurant-quality depth.
- Freezer Friendly: I double the batch and freeze extras for lazy nights. (Yes, even on a Tuesday night)
- Stretches Far: Ground pork and cabbage make this dish surprisingly budget-friendly for feeding a crowd.
Step-by-Step Instructions for Pot Stickers
Here’s how I create that perfect crispy bottom with a juicy filling every time.
Step 1: Prepare the Filling with Optimal Texture
In a large bowl, combine the 1 lb Ground Pork with 2 cups Napa Cabbage, 0.5 cup Green Onions, 3 cloves Garlic Cloves, 1 tbsp Fresh Ginger, 1 tbsp Sesame Oil, 2 tbsp Soy Sauce, and 1 tbsp Rice Vinegar. The cabbage should be finely shredded and well-drained to prevent a soggy filling.
Add the 0.5 tsp Salt, 0.25 tsp Black Pepper, and 1 tbsp Cornstarch to bind the mixture. I mix until just combined—overworking makes the filling dense. The cornstarch ensures the juices stay trapped inside each dumpling as they cook.
Step 2: Assemble the Pot Stickers with Precision
Place a Pot Sticker Wrapper in your palm and add 1 tablespoon of filling to the center. Don’t overfill; the edges need to seal properly. Dip your finger in water and trace the outer edge of the wrapper to moisten it.
Fold the wrapper in half over the filling and pleat the edges by pinching small folds along the curved side. Press firmly to seal—this keeps the filling contained during cooking. I aim for 5-6 pleats per pot sticker for that classic look and secure closure. Repeat with all 40 pieces Pot Sticker Wrappers.
Step 3: Pan-Fry for the Perfect Crispy Bottom
Heat 2 tbsp Neutral Oil in a large nonstick skillet over medium-high heat. Arrange the pot stickers in a single layer, flat side down, without crowding. Fry undisturbed for 3-4 minutes until the bottoms turn deep golden brown—this creates that signature crisp.
Watch for the edges to become translucent as the filling begins to cook. Resist the urge to peek too soon; the crisp forms best when left undisturbed. I rotate the pan occasionally for even browning.
Step 4: Steam to Finish with Juicy Perfection
Carefully pour the 0.5 cup Water into the skillet (it will sizzle). Immediately cover with a tight-fitting lid to trap the steam. Reduce heat to medium and cook for 6-8 minutes until the water has mostly evaporated.
The steam finishes cooking the filling while keeping it moist. You’ll hear the water bubbling—when it slows significantly, the pot stickers are nearly done. Remove the lid and cook for another 1-2 minutes to crisp the bottoms again.
Step 5: Serve Immediately for Maximum Crispiness
Transfer the pot stickers to a serving plate, crispy side up. The bottoms should be a rich, deep brown with a satisfying crunch. Serve immediately while hot—the contrast between the crispy bottom and tender filling is best right out of the pan.
I like to drizzle a little extra Soy Sauce and Sesame Oil on top for added flavor. The filling should be juicy and aromatic, with the cabbage adding a subtle sweetness that balances the savory pork.
Pro Tips For Making Pot Stickers
- Pre-cook the cabbage: Salt and squeeze excess water from shredded napa cabbage before mixing—otherwise your filling turns soggy. I learned this the hard way after my first batch fell apart in the pan.
- Chill the filling: Pop the pork and veggie mix in the fridge for 20 minutes before wrapping. It firms up the filling so it’s way easier to fold without tearing the wrappers.
- Hot pan, cold oil: Heat the pan until it’s almost smoking, then add oil and immediately place pot stickers in. This guarantees a crispy bottom without steaming them into gumminess.
- Skip the overcrowding: Leave at least an inch between each dumpling in the pan—steam builds up fast, and they’ll stick together if packed too tight. Sounds obvious, but I still have to remind myself every time.
Troubleshooting Great pot stickers
Sticking to the Pan
If your pot stickers won’t release, your pan isn’t hot enough initially. Preheat on medium-high for 2-3 minutes before adding oil. Also, ensure the oil shimmers before placing dumplings in the pan. A well-seasoned cast iron skillet works best for me. 🔥
Soggy Bottoms
This usually means too much liquid in your filling. After salting and draining your Napa cabbage, squeeze it in a clean kitchen towel to remove every drop of moisture. The cornstarch in the filling must be fully incorporated to bind the juices.
Wrappers Tear
Dry wrappers crack easily. Keep unused wrappers under a damp towel while working. If they tear during folding, patch with a tiny piece of wrapper dipped in water. Don’t overfill—1 tablespoon of filling max per dumpling ensures proper sealing.
Filling Falls Out
Incomplete sealing is the culprit. Press edges firmly after each pleat. I use a pleating technique where I create 5-6 folds on one side, then crimp the edges together tightly. The seal should be completely airtight before cooking.
Not Crispy Enough
After steaming, uncover and cook 1-2 minutes longer on medium-high heat. The residual moisture needs to evaporate completely. I often add an extra 1 tsp oil at this stage to refresh the crisping process.
Steam Escapes
Use a lid that fits tightly or weigh it down with a heavy pot. If steam escapes, the tops won’t cook properly. I check that no gaps exist between lid and pan. The water should sizzle violently when first added, confirming a good seal. ✨
Nutrition Facts
Frequently Asked Questions
Can I use a different type of meat?
Yes! Ground chicken or turkey work well, though they’re leaner. Add an extra 1 tbsp sesame oil to keep the filling juicy. For a vegetarian option, try finely chopped mushrooms or tofu.
Why did my pot stickers stick to the pan?
Your pan likely wasn’t hot enough. Preheat on medium-high for 2-3 minutes until the oil shimmers. A nonstick skillet or well-seasoned cast iron helps prevent sticking.
Can I make these ahead of time?
Assemble and freeze on a tray lined with parchment paper. Once frozen, transfer to a bag and store for up to 1 month. Cook from frozen by adding 1-2 minutes extra steaming time.

- 4C Bread Crumbs Meatballs Recipe: Crispy Crust and Juicy Centers - September 25, 2026
- 6 Oz Chocolate Chip Cookie Recipe: Perfectly Balanced Crispy Edges and Chewy Hearts - September 25, 2026
- 6-Inch Coffee Cake Recipe: Vanilla Bean Swirls and Buttery Streusel Topping - September 25, 2026