
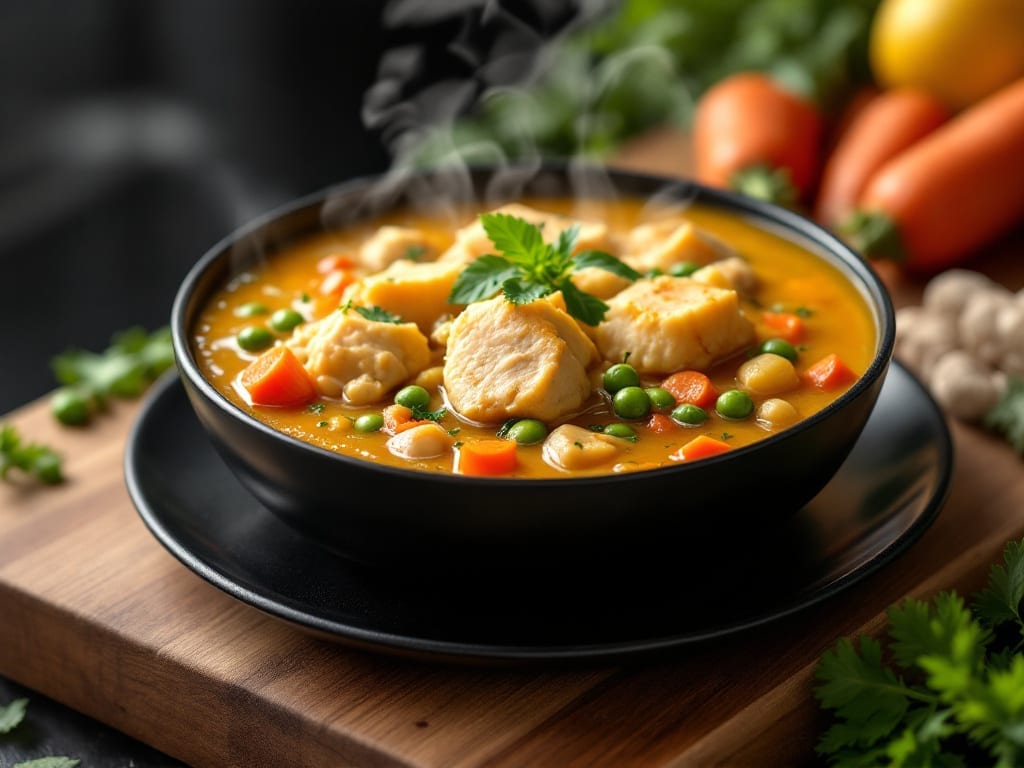
This potbelly chicken pot pie soup combines the hearty richness of pot roast with the creamy comfort of classic pot pie—all in one deeply satisfying bowl.
The secret lies in slow-braising chicken thighs until they’re fall-apart tender, then blending them into a velvety broth thickened with just the right amount of cornstarch and cream.
What sets this apart is the flaky pie crust topping, baked until golden and crisp, that transforms a simple soup into a restaurant-worthy centerpiece.
Professional results don’t require complicated techniques—just precise timing and layering. You’ll start with a flavor-packed broth infused with carrots, celery, and onions, then build the filling with shredded chicken, peas, and a touch of thyme.
The crust, made from a simple pie dough, gets cut into lattice strips for that signature flaky texture that contrasts beautifully with the creamy filling. Every spoonful delivers that perfect balance of tender meat, rich broth, and buttery crust.
The slow simmer develops deep, savory flavors that turn this into a weeknight hero or holiday centerpiece. The chicken stays moist and flavorful, the vegetables melt into the broth, and the crust achieves that golden, crisp finish without burning.
This recipe delivers on the promises of comfort, creaminess, and flaky perfection—just like your favorite childhood pot pie, but with the convenience of a soup.
Serve with crusty bread for dipping or a simple green salad to balance the richness. The leftovers reheat beautifully, making this an ideal meal-prep solution for busy days. Let’s get started on creating this slow-simmered, creamy comfort that feels like a hug in a bowl.
Ingredients for potbelly chicken pot pie soup
Simple ingredients that pack a punch of comfort and creaminess in every spoonful.
| Ingredient | Amount | Notes |
|---|---|---|
| Chicken Thighs, Bone-In 🍗 | 1 ½ lb | Skin-on, fall-apart tender preferred |
| Yellow Onion 🧅 | 1 whole | Medium size, diced |
| Carrots 🥕 | 3 whole | Medium size, peeled and sliced |
| Celery Stalks 🌿 | 3 whole | Medium size, diced |
| Garlic Cloves 🧄 | 4 cloves | Fresh, peeled and minced |
| Fresh Thyme 🌿 | ½ oz | Or 2 tbsp dried thyme |
| Chicken Broth 💧 | 4 cups | Low-sodium preferred |
| Heavy Cream 🥛 | ½ cup | Full-fat for creaminess |
| Cornstarch 🌾 | 1 tbsp | For thickening |
| Frozen Peas 🌱 | ½ cup | Thawed before adding |
| Salt 🧂 | 1 ½ tsp | Kosher or sea salt |
| Black Pepper 🌶️ | ½ tsp | Freshly ground preferred |
| Unsalted Butter 🧈 | ½ cup | Cold for crust |
| All-Purpose Flour 🌾 | 1 ½ cups | Plus 1 tbsp for dusting |
| Ice Water 💧 | ¼ cup | For pie dough |
The chicken thighs are the star—bone-in stays juicier and more flavorful. Look for thighs with good marbling at the grocery store, and don’t skip the skin—it renders down for extra richness. If you can’t find bone-in, use boneless thighs but add a little extra broth. For the broth, low-sodium is key—you’ll be adding plenty of salt yourself. The carrots and celery can be baby versions if that’s what’s on hand, but whole stalks keep better and you can trim them down later. Fresh thyme is ideal, but if you’re using dried, measure it carefully—it’s more concentrated.
No heavy cream on hand? Half-and-half works in a pinch, though it’ll be slightly lighter. Short on cornstarch? Arrowroot powder at the same amount works just as well. The pie dough is simple—just butter, flour, and ice water. Chill the dough for 30 minutes before rolling to avoid sticking. For the crust, lattice cuts are traditional, but a simple crisscross pattern works too. If you’re short on time, just cut it into strips and weave them. The crust should be golden and crisp—don’t overbake or it’ll get tough.
This soup tastes even better the next day as the flavors meld. Store leftovers in the fridge for 4-5 days or freeze for 3 months. The crust can be made ahead and baked just before serving—keep it covered at room temperature until ready to use. For meal prep, portion the soup into containers and store the crust separately. Reheat gently on the stove to keep the crust from getting soggy. Serve with crusty bread or a simple salad to round out the meal.
Why You’ll Love This Recipe
- One-Pot Wonder: I swear by this recipe—just toss bone-in thighs, onions, carrots, and celery into a pot, simmer, then shred. No chopping like a fine chef, no fancy steps. Honestly, the hardest part is waiting for the garlic to caramelize.
- Deep, Rich Flavor: That crispy chicken skin? Gold. The bone-in thighs add so much depth—juicy, savory, with a broth so rich it tastes like you simmered for hours. Between us, the celery and onion combo makes it taste like your grandma’s kitchen, but with half the effort.
- Soup-to-Pie Swap: Make it once, eat it twice—turn leftovers into a pot pie by piling the soup into a baking dish, topping with puff pastry, and popping in the oven. Perfect for game day, sick nights, or when you need something hearty without the fuss.
- Budget-Friendly Feast: Bone-in thighs stretch further than breasts, and the veggies? Cheap as chips. I’ve fed six people for under $15 with this—plus, the leftovers taste just as good the next day. My wallet and my family thank me every time.
Step-by-step instructions for potbelly chicken pot pie soup
Here’s how to build layers of flavor and texture for that perfect creamy soup with a golden crust.
Sear the Chicken Thighs for Deep Flavor
Pat the 1.5 lb chicken thighs, bone-in dry with paper towels. Heat a large Dutch oven over medium-high heat and add the 0.5 cup unsalted butter. Once the butter foams, add the chicken thighs skin-side down and cook for 5-6 minutes until the skin turns golden brown and crispy.
Flip the chicken and cook for another 4-5 minutes until the meat reaches an internal temperature of 165°F. Remove the chicken from the pot and set aside on a plate. This initial searing creates a rich, caramelized crust that infuses the broth with incredible depth of flavor. The skin-on thighs will also provide that comforting, crispy texture we all love in a proper pot pie.
Build the Flavor-Packed Vegetable Base
In the same Dutch oven, reduce the heat to medium and add the diced 1 whole yellow onion, sliced 3 whole carrots, and diced 3 whole celery stalks. Cook for 5-6 minutes, stirring occasionally, until the vegetables begin to soften and release their natural juices.
Add the minced 4 cloves garlic and the 0.5 oz fresh thyme, stirring for 30 seconds until fragrant. Pour in the 4 cups chicken broth and bring to a gentle simmer. Return the chicken thighs to the pot, skin-side up, and cover with a lid. Let it simmer for 30 minutes, allowing the chicken to cook through and the vegetables to become tender while absorbing all those delicious flavors.
Create the Creamy Soup Base
Once the chicken is fully cooked and tender, remove it from the broth and let it rest on a cutting board. In a small bowl, whisk together the 0.5 cup heavy cream and 1 tbsp cornstarch until smooth. Slowly pour this mixture into the simmering broth while stirring constantly. The soup will begin to thicken immediately.
Add the thawed 0.5 cup frozen peas and the chicken thighs, cut into bite-sized pieces. Stir in the 1.5 tsp salt and 0.5 tsp black pepper. Let the soup simmer for an additional 10 minutes to allow all the flavors to meld together. The result should be a velvety, creamy soup with perfectly tender chicken and vegetables – the heart of our comforting pot pie.
Prepare the Flaky Crust Topping
In a medium bowl, combine the 1.5 cups all-purpose flour and 1 tbsp additional flour for dusting. Cut in the remaining 0.5 cup cold unsalted butter using a pastry cutter or your fingers until the mixture resembles coarse crumbs. Gradually add the 0.25 cup ice water, mixing just until the dough comes together.
Turn the dough onto a lightly floured surface and roll it out to about 1/8-inch thickness. Cut the dough into strips about 1/2-inch wide. Here’s where the magic happens – you want to create a lattice pattern that will crisp beautifully while still allowing the soup’s steam to rise through.
Assemble and Bake for the Perfect Finish
Preheat your oven to 375°F. Spoon the creamy soup into individual oven-safe bowls or a single large baking dish. Arrange the dough strips in a lattice pattern over the top, creating that classic pot pie look. Bake for 15-20 minutes until the crust is golden brown and crispy.
Let the soup rest for 5 minutes before serving. The crust should be perfectly flaky on top while the soup below remains creamy and comforting. This resting time allows the crust to set properly and the flavors to settle, giving you that restaurant-quality pot pie experience right at home.
Pro Tips For Making Potbelly Chicken Pot Pie Soup
- Brown the Thighs: Don’t just toss those bone-in thighs into the pot raw—sear them first over medium-high heat until golden, about 5-6 minutes per side. I used to skip this, and the soup always tasted like it needed more depth. The caramelized crust adds flavor that no amount of broth can match.
- Mince the Onion: Dice that yellow onion into small, even pieces—think 1/4-inch cubes, not thick slices. It’ll cook faster and dissolve into the broth without leaving chunks that make you wonder why you bothered. (Yes, even if you’re impatient like me.)
- Skip the Overcrowding: When you add the carrots and celery, leave space between them so they sizzle instead of steam. I learned this the hard way—crowding turns them mushy, and nobody wants sad veggies in their pot pie soup. Give them room to crisp slightly.
- Deglaze with Wine: After browning the chicken, splash in 1/2 cup of dry white wine (or even a splash of apple cider vinegar) and scrape up those browned bits. It’s the easiest way to lift all that flavor off the bottom—no extra work, just better-tasting soup. (Your future self will thank you.)
Serving suggestions for this potbelly chicken pot pie soup
Crusty Bread Pairing
Serve this rich soup with a warm, crusty baguette or sourdough loaf for dipping. The crispy crust contrasts beautifully with the creamy soup, while the soft interior soaks up every last drop.
I recommend a freshly baked French baguette from your local bakery—its airy texture and buttery crust elevate the dish. For extra flair, brush the bread with garlic-infused olive oil and sprinkle with flaky sea salt before serving. 🥖
Fresh Greens Balance
A simple side salad brightens the richness of the soup. Toss 4 cups mixed greens (like spinach, arugula, or spring mix) with 1 tbsp lemon vinaigrette (3 parts olive oil, 1 part lemon juice, pinch of salt).
Add ¼ cup sliced almonds or crumbled feta cheese for texture. The acidity cuts through the creaminess, making each bite feel balanced. 🥗
Crispy Potato Wedges
For a heartier meal, serve with oven-roasted potato wedges tossed in 2 tbsp olive oil, 1 tsp paprika, and ½ tsp garlic powder.
Roast at 425°F for 25-30 minutes until golden and crispy. The starchiness of the potatoes complements the soup’s creaminess while adding a satisfying crunch. 🥔
Garnish Like a Pro
Elevate your presentation with fresh garnishes. Sprinkle chopped fresh parsley or green onions over the soup just before serving for a pop of color. A drizzle of truffle oil (just ½ tsp) adds a luxurious touch, while a pinch of crushed black pepper enhances the flavors.
The crust should be golden and flaky—use a sharp knife to cut clean slices if serving family-style. ✨
Leftovers Reinvented
Transform leftover soup into a quick pot pie by transferring it to a baking dish, topping with extra crust strips, and baking at 375°F for 10-12 minutes until golden. For a deconstructed version, ladle the soup into bowls and serve the crust on the side for dipping.
Store leftovers in airtight containers for up to 5 days—the flavors deepen overnight! 💡
Nutrition facts
Frequently asked questions
Can I make this potbelly chicken soup without a traditional crust?
For a lighter version, swap the crust for buttery biscuit toppers or crispy fried shallots on top. Another option is to serve the soup with toasted bread croutons or a sprinkle of crumbled bacon for texture. The creaminess will still shine without the crust!
How do I prevent the crust from getting soggy?
The key is baking the crust separately for 3-5 minutes at 375°F before placing it on the soup. This creates a barrier. For extra insurance, brush the crust strips with egg wash (1 egg + 1 tbsp water) before baking. Also, avoid opening the oven door during the final 10 minutes of baking to maintain heat.
Can I use chicken breast instead of thighs?
While possible, thighs are ideal because they stay juicier and more flavorful during the long simmer. If using breasts, cut them into 1-inch cubes and cook them separately for 10 minutes before adding to the broth. For best results, marinate the breasts in 1 tbsp soy sauce + 1 tbsp olive oil for 30 minutes beforehand.
What can I substitute if I don’t have heavy cream?
Try half-and-half for a lighter texture or coconut milk for a dairy-free option. For extra richness, blend ½ cup Greek yogurt + ¼ cup milk to mimic cream’s thickness. Remember to adjust the cornstarch slightly (add ½ tsp extra) if using thinner substitutes. The soup will still be creamy!
How do I make this soup ahead of time?
Prepare the soup base up to the crust step and refrigerate for up to 3 days or freeze for 3 months. Reheat gently on the stove over medium-low heat, stirring frequently to prevent scorching. Assemble the crust fresh—baking it separately ensures it stays crisp. For make-ahead convenience, pre-cut the crust strips and store them in the fridge until ready to bake.

- Crock Pot Round Steak Recipe: Slow-Sear Crust With Juicy Center - November 6, 2026
- Candied Sweet Potatoes Crock Pot Recipe: Caramelized Sweetness With Zero Effort - November 6, 2026
- Steak Recipe Crock Pot: Juicy, Caramelized Crust in 4 Hours - November 6, 2026