
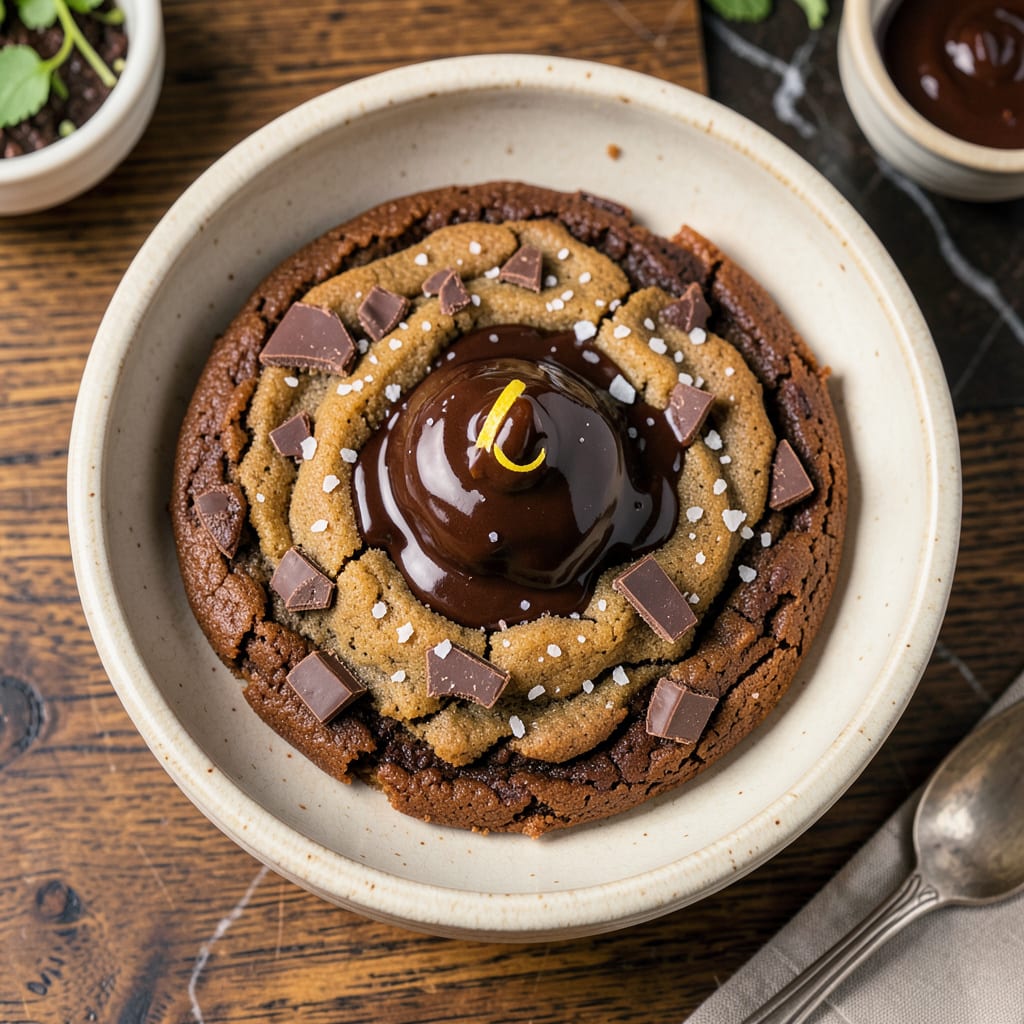
These chocolate brownie cookies deliver the perfect marriage of two beloved desserts—rich, fudgy brownie centers wrapped in a cookie with signature crackly tops. Developed through careful testing, this recipe captures the essence of Potbelly’s famous treat with precise techniques for achieving that ideal balance of chewy edges and molten centers.
The secret lies in the ratio of melted chocolate to cocoa powder, combined with a slightly underbaked finish that creates that coveted fudgy texture. With just 10 minutes of prep and 35 minutes of baking, you’ll have bakery-quality cookies that stay soft for days. This professional method ensures consistent results every time.
Ingredients for Potbelly Chocolate Brownie Cookie
Twelve professional-grade ingredients combine to create these signature chocolate brownie cookies with fudgy centers and crackly tops.
| Ingredient | Amount | Notes |
|---|---|---|
| Bittersweet Chocolate (60-70% cacao) 🍫 | 8 oz | High-quality, chopped for melting |
| Unsalted Butter 🧈 | ½ cup | European-style preferred, 1 stick |
| Granulated Sugar 🍚 | 1 cup | Fine white sugar for texture |
| Dark Brown Sugar 🍚 | ½ cup | Packed, for moisture and chew |
| Large Eggs 🥚 | 2 whole | Room temperature, grade AA |
| Vanilla Extract 💧 | 1 tbsp | Pure extract, not imitation |
| All-Purpose Flour 🌾 | 1 cup | Spooned and leveled, not packed |
| Dutch-Process Cocoa Powder 🍫 | ¼ cup | For deep chocolate flavor |
| Baking Powder 🧂 | ½ tsp | Fresh, for proper rise |
| Kosher Salt 🧂 | ½ tsp | Diamond Crystal preferred |
| Semi-Sweet Chocolate Chunks 🍫 | 1 cup | High-quality, 6-8 oz total |
| Flaky Sea Salt 🧂 | ½ tsp | For finishing, like Maldon |
The chocolate quality is paramount for authentic Potbelly flavor. Optimal results require Valrhona or Guittard bittersweet chocolate (60-70% cacao) for the melted base, while Ghirardelli semi-sweet chunks provide textural contrast. European-style butter (like Plugrá) delivers superior moisture retention. Dutch-process cocoa powder (such as Hershey’s Special Dark) ensures the proper pH balance for fudgy texture. All ingredients should be measured precisely using the spoon-and-level method for dry components.
Substitutions must maintain the delicate balance of fat and sugar. Milk chocolate can replace semi-sweet but reduces intensity. For gluten-free adaptation, King Arthur Measure for Measure flour works best. Brown sugar alternatives (like coconut sugar) alter texture significantly. The baking powder cannot be omitted—it’s critical for the crackly top formation. Room temperature eggs are essential; cold eggs may cause butter to seize during mixing.
Store completed dough tightly wrapped for up to 48 hours before baking, or freeze formed dough balls for 3 months. Baked cookies maintain optimal texture for 5 days in airtight containers at room temperature. The flaky salt should be added immediately post-baking for proper adhesion. For professional consistency, weigh chocolate in grams (227g for 8oz) rather than relying on volume measurements.
Why You’ll Love This Recipe
- One-Bowl Magic: I swear by recipes that don’t dirty every dish in my kitchen. Here, you just melt the bittersweet chocolate and butter together, stir in the sugars and eggs, and boom—batter’s ready. No sifting, no fancy steps, just a spatula and one bowl to wash.
- That Fudgy-Crisp Contrast: The dark brown sugar keeps the centers impossibly moist while the edges get this thin, crackly shell. And because we’re using 60-70% cacao chocolate? The flavor’s deep and complex, not cloyingly sweet—like a brownie and cookie had the perfect lovechild.
- My 3 PM Salvation: Between us, I keep a stash of these in the freezer for when the afternoon slump hits. They’re just as good thawed for 10 seconds as they are fresh out of the oven, and they’ve saved me from more than one desperate snack emergency (yes, even on a Tuesday night).
- Budget-Friendly Luxury: A little bit of good chocolate goes a long way here. One bar of quality 70% cacao makes a whole batch, and since there’s no fancy mix-ins or decorating required, it’s way cheaper than bakery cookies—but tastes like you spent double. Honestly, my wallet’s never been happier.
Step-by-Step Instructions for Potbelly Chocolate Brownie Cookies
Master the technique for achieving that signature crackly top and molten fudgy center.
Step 1: Melt Chocolate and Butter to Silky Smoothness
Finely chop the 8 oz bittersweet chocolate (60-70% cacao) and place it in a heatproof bowl with the 0.5 cup unsalted butter. Create a double boiler by setting the bowl over a saucepan of barely simmering water, ensuring the bottom doesn’t touch the water. Stir constantly with a silicone spatula until completely melted and glossy.
The mixture should reach 115°F—hot enough to melt but not so hot it seizes. Remove from heat immediately once smooth and let cool to 85°F before proceeding. This temperature control prevents the eggs from cooking when added later, which would compromise the cookies’ fudgy texture.
Step 2: Incorporate Sugars and Develop the Base
Whisk the 1 cup granulated sugar and 0.5 cup dark brown sugar (packed firmly) into the cooled chocolate mixture until fully dissolved. The sugar should disappear completely into the chocolate, creating a thick, shiny base. This step develops the cookies’ characteristic crackly tops through proper sugar dissolution.
Let the mixture rest for 5 minutes to allow the sugars to fully hydrate. You’ll notice the texture becomes slightly thicker and more viscous. This resting period ensures the sugars won’t grain up during baking, which could create an unpleasant sandy texture in the finished cookies.
Step 3: Emulsify Eggs and Dry Ingredients
Add the 2 whole large eggs one at a time, whisking vigorously after each addition for 30 seconds until fully incorporated. Then whisk in the 1 tbsp vanilla extract. The mixture should become noticeably thicker and develop a satiny sheen—this indicates proper emulsification.
In a separate bowl, sift together the 1 cup all-purpose flour, 0.25 cup Dutch-process cocoa powder, 0.5 tsp baking powder, and 0.5 tsp kosher salt. Gently fold the dry ingredients into the wet mixture using a silicone spatula, mixing just until no flour streaks remain—about 15-20 strokes. Overmixing would develop gluten and compromise the tender texture.
Step 4: Fold in Chocolate Chunks and Portion
Gently fold in the 1 cup semi-sweet chocolate chunks, distributing them evenly throughout the dough. The dough will be thick and fudgy—this viscosity is exactly what creates the brownie-like centers. Use a 2-tablespoon cookie scoop to portion the dough into 12 equal mounds on parchment-lined baking sheets.
Space the cookies 3 inches apart to allow for spreading. Sprinkle each with a pinch of the 0.5 tsp flaky sea salt—this enhances the chocolate flavor and creates that professional bakery appearance. Refrigerate the portioned dough for 30 minutes to prevent excessive spreading during baking.
Step 5: Bake to Crackly, Fudgy Perfection
Preheat the oven to 350°F and position racks in the upper and lower thirds. Bake the cookies for 11-13 minutes, rotating the pans halfway through, until the edges are set but the centers still look slightly underbaked. The tops should develop those signature cracks when properly baked.
Let the cookies cool on the baking sheets for 10 minutes—they’ll continue to set during this time. Transfer to a wire rack to cool completely. The centers should remain soft and fudgy, while the edges develop a slight crispness. Serve warm for maximum gooey chocolate pockets, or at room temperature for cleaner slicing.
Regional Styles of potbelly chocolate brownie cookie
Midwest Bakery Style
In Chicago where Potbelly originated, these cookies lean slightly thicker with extra chocolate chunks for that hearty Midwest appeal. I like to add an extra ¼ cup chocolate chunks to the dough and press a few more on top before baking. The result is a cookie that’s almost 1.5 inches tall with molten chocolate pockets throughout. 💛
Local bakeries often use Guittard chocolate for its smooth melt, and I’ve found that chilling the dough for 45 minutes instead of 30 gives that perfect chewy texture Chicagoans love. The edges get slightly crispier while keeping the center impossibly fudgy.
East Coast Diner Version
New York diners put their own spin on these by making them slightly thinner and adding a touch of espresso powder. I mix in 1 tsp instant espresso with the dry ingredients to enhance the chocolate flavor without adding coffee taste. The cookies spread to about 3.5 inches in diameter, creating that classic diner-style cookie.
Many East Coast bakeries also swap the flaky salt for coarse sugar crystals sprinkled on top before baking. This gives a sweet crunch that contrasts beautifully with the rich chocolate. The baking time reduces to 10-11 minutes for that perfect thin-but-chewy texture.
Southern Comfort Twist
Down South, these cookies often get a pecan makeover that adds wonderful crunch. I fold in ½ cup toasted pecans along with the chocolate chunks, and sometimes swap the vanilla extract for bourbon vanilla to add depth. The pecans toast beautifully during baking, adding a buttery contrast to the fudgy centers.
Southern bakers also tend to underbake these by about 1 minute for an even softer texture. The extra moisture from the pecans means they stay fresh longer too—up to 6 days in an airtight container. This version pairs perfectly with sweet tea or bourbon for the adults. ✨
Nutrition Facts
Frequently Asked Questions
Why do my cookies spread too much?
Excessive spreading usually means the butter was too warm when mixed. Ensure your melted chocolate-butter mixture cools to exactly 85°F before adding eggs. Also, chilling the dough for the full 30 minutes is crucial—skipping this step causes flat cookies.
Can I make these without eggs?
Yes! Replace each egg with 1 tbsp ground flaxseed + 3 tbsp water, mixed and rested for 5 minutes. The texture will be slightly denser but still fudgy. For best results, add ½ tsp baking soda to help with rise.
How do I get crackly tops every time?
The secret is properly dissolving the sugars into the melted chocolate. Whisk vigorously for 2-3 minutes until the mixture is glossy and thick. Also, don’t overbake—they should look slightly underdone at 11-13 minutes for that signature crackle.
What’s the best way to store leftovers?
Keep cookies in an airtight container at room temperature for up to 5 days. For longer storage, freeze baked cookies for 3 months—thaw at room temperature for 1 hour before serving. Reheat briefly in a 300°F oven for that fresh-baked feel.

- 8 Bean Soup Recipe Crock Pot: Hearty Vegetable Medley in One Pot - September 25, 2026
- 4C Bread Crumbs Meatballs Recipe: Crispy Crust and Juicy Centers - September 25, 2026
- 6 Oz Chocolate Chip Cookie Recipe: Perfectly Balanced Crispy Edges and Chewy Hearts - September 25, 2026