
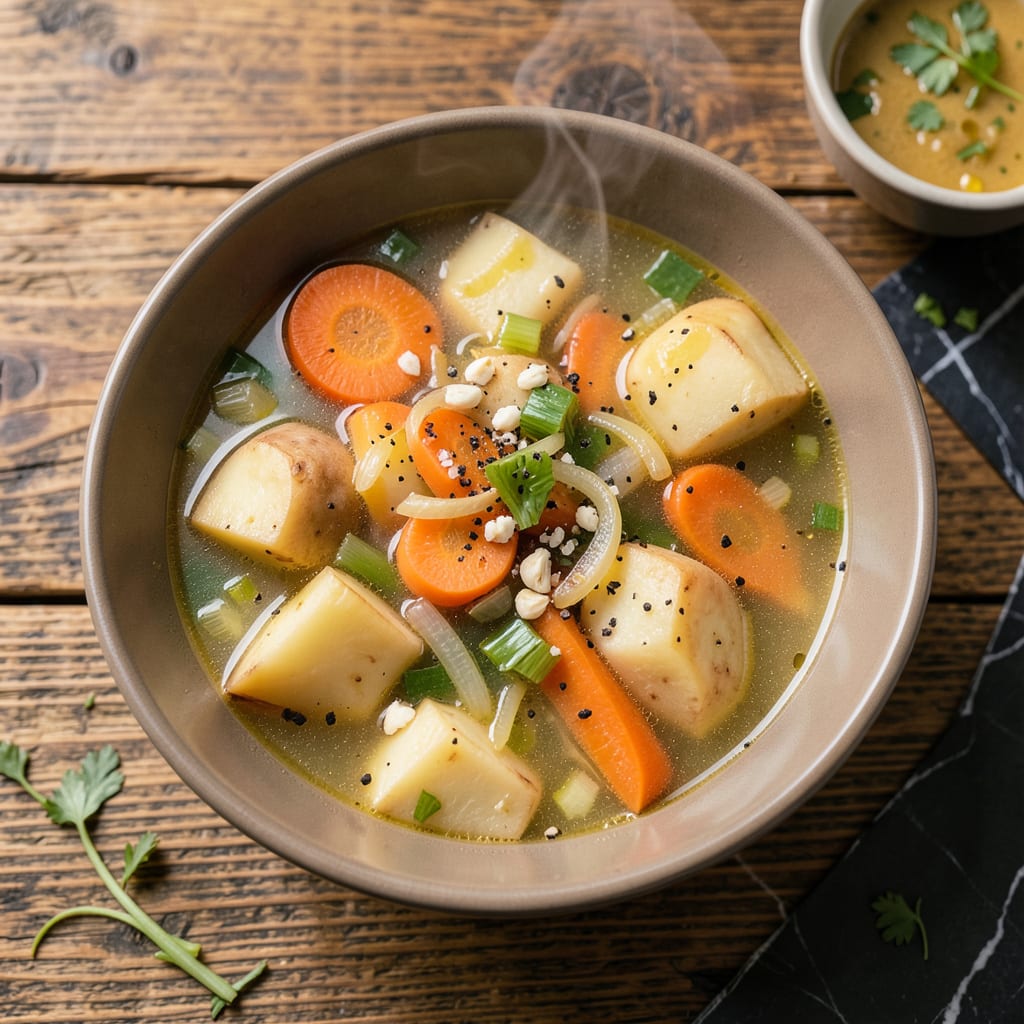
There’s something deeply satisfying about a bowl of vegetable soup that tastes like it came straight from Potbelly’s kitchen. This recipe captures that signature hearty comfort with a perfect balance of tender vegetables, aromatic herbs, and a rich broth that warms you from the inside out.
The secret lies in building layers of flavor through careful sautéing and simmering. What emerges is a restaurant-quality soup that’s both nourishing and deeply comforting—ideal for busy weeknights or lazy weekends when you crave something wholesome without sacrificing taste. The best part? It comes together with simple ingredients you likely already have on hand.
Ingredients for Potbelly Vegetable Soup
Pantry staples and fresh veggies come together for that signature Potbelly warmth you crave.
| Ingredient | Amount | Notes |
|---|---|---|
| Extra-Virgin Olive Oil 🫒 | 2 tbsp | For sautéing vegetables |
| Yellow Onion 🧅 | 1 whole | Medium-sized, finely diced |
| Carrots 🥕 | 3 whole | Peeled, cut into 1/2-inch pieces |
| Celery Stalks 🌿 | 3 whole | Diced, leaves included |
| Garlic Cloves 🧄 | 4 cloves | Minced for depth of flavor |
| Russet Potatoes 🥔 | 2 whole | Medium, cubed into 1/2-inch pieces |
| Green Beans 🌱 | 1 ½ cups | Trimmed, cut into 1-inch pieces |
| Diced Tomatoes 🍅 | 1 can | 14.5 oz, fire-roasted preferred |
| Vegetable Broth 💧 | 6 cups | Low-sodium for better control |
| Tomato Paste 🍅 | 2 tbsp | For concentrated umami richness |
| Dried Thyme 🌿 | 1 tsp | Or 1 tbsp fresh thyme leaves |
| Dried Oregano 🌿 | 1 tsp | Mediterranean variety preferred |
| Bay Leaves 🌿 | 2 whole | Remove before serving |
| Sea Salt 🧂 | 1 ½ tsp | Adjust to taste at the end |
| Freshly Ground Black Pepper 🌶️ | 1 tsp | Coarse grind for texture |
| Frozen Corn Kernels 🌽 | 1 cup | No need to thaw |
| Frozen Peas 🌱 | 1 cup | Added at the very end |
| Fresh Parsley 🌿 | ¼ cup | Chopped, for bright garnish |
The broth is everything here. Imagine Foods or Pacific Foods make solid vegan vegetable broths—look for low-sodium to control the salt yourself. I always grab the fire-roasted diced tomatoes (Muir Glen is my go-to) because they add that subtle charred depth. For the potatoes, russets hold their shape best—skip the waxy reds here. And don’t skimp on the olive oil; a good California extra-virgin (like Bragg or Trader Joe’s) gives you that rich base flavor.
Out of fresh parsley? Dried works at half the amount, but add it earlier so it softens. No thyme? Poultry seasoning (check for vegan) or a pinch of rosemary gets you close. Frozen veggies are your friend—no need to thaw the corn or peas (they’ll overcook). If you’re missing tomato paste, a tablespoon of ketchup in a pinch won’t ruin anything. And honestly, any starchy potato works—I’ve used Yukon Golds when that’s what I had.
This soup actually tastes better the next day once the flavors meld. Keeps for 5 days in the fridge—store it in glass to avoid plastic tastes. Freezes beautifully for up to 3 months (leave out the peas if freezing, add them fresh when reheating). I like to make a double batch and freeze half in quart containers for those ‘no-time-to-cook’ nights. The parsley garnish? Add it fresh when serving, not before storing.
Why You’ll Love This Recipe
- I’ll be real: the hardest part is chopping the onion, carrots, and celery—but even that’s just 10 minutes of work. The rest is hands-off simmering while your kitchen fills with that garlic-and-olive-oil aroma.
- Knife Work Made Easy: I’ll be real: the hardest part is chopping the onion, carrots, and celery—but even that’s just 10 minutes of work. The rest is hands-off simmering while your kitchen fills with that garlic-and-olive-oil aroma.
- Depth Without Fuss: The secret’s in the slow-sautéed garlic and onion. They turn sweet and jammy, then the carrots and celery soak up all that flavor—no fancy stock or hours of cooking needed.
- My Freezer’s Best Friend: Double the batch, and you’ve got lunch for a week. It reheats like a dream (even better the next day) and costs less than a sad desk salad.
Step-by-Step Instructions for Potbelly Vegetable Soup
Here’s how to build layers of flavor that’ll make this soup taste like it simmered all day.
Step 1: Sauté the Aromatic Base
Heat the 2 tbsp extra-virgin olive oil in a large Dutch oven over medium heat. When the oil shimmers, add the yellow onion, carrots, and celery stalks. I like to cook these for 8-10 minutes, stirring occasionally, until the onions turn translucent and the carrots start to soften around the edges.
The key here is patience—don’t rush this step. You want the vegetables to develop a slight caramelization at the edges without burning. This builds the flavor foundation for your soup. When the mixture smells sweet and looks glossy, you’re ready for the next step.
Step 2: Build the Flavor Profile
Add the garlic cloves and cook for 1 minute, stirring constantly until fragrant. Immediately add the tomato paste, dried thyme, and dried oregano. Stir this mixture for 2 minutes until the tomato paste darkens slightly—this removes the raw taste and deepens the umami flavor.
Pour in the diced tomatoes (with their juices) and cook for another 3-4 minutes, stirring to combine all the flavors. You’ll notice the mixture becoming thicker and more concentrated. This step creates that rich, savory base that makes this soup so comforting.
Step 3: Simmer the Vegetables to Perfection
Add the russet potatoes, green beans, vegetable broth, bay leaves, sea salt, and freshly ground black pepper. Bring the mixture to a boil, then reduce the heat to low and let it simmer uncovered for 20-25 minutes. You want the potatoes to become fork-tender and the green beans to soften but still retain some bite.
During this simmering time, the flavors will meld together beautifully. I like to stir occasionally and skim off any foam that rises to the surface. The soup should develop a rich, golden color and the broth will become slightly thicker as the vegetables release their starches.
Step 4: Finish with Bright, Fresh Additions
Once the potatoes are tender, stir in the frozen corn kernels and cook for 3 minutes. Then add the frozen peas and cook for just 2 minutes—they only need to heat through and maintain their bright green color. Remove and discard the bay leaves at this point.
Taste the soup and adjust the seasoning if needed. The sea salt and freshly ground black pepper measurements are guidelines, so add more if you prefer. The peas and corn will add a wonderful sweetness that balances the savory broth perfectly.
Step 5: Garnish and Serve
Ladle the hot soup into bowls and sprinkle each serving with the fresh parsley. The parsley adds a fresh, herbal note that brightens up the rich, hearty flavors. I like to serve this with crusty bread for dipping—it’s perfect for soaking up every last bit of the flavorful broth.
This soup tastes even better the next day as the flavors continue to develop. Store leftovers in an airtight container in the refrigerator for up to 5 days, or freeze for up to 3 months. The hearty vegetables hold up beautifully to reheating.
Creative Variations of This Recipe
Spicy Southwest Twist
Add 1 tbsp ground cumin and 1 tsp smoked paprika when sautéing the onions. Stir in 1 can black beans (drained) with the potatoes, and replace the peas with 1 cup frozen fire-roasted corn. Finish with juice of 1 lime and ¼ cup chopped cilantro for that zesty kick. 🌶️
Creamy Coconut Curry
Swap the vegetable broth for 4 cups light coconut milk and add 1 tbsp red curry paste with the tomato paste. Include 1 cup diced sweet potato and 1 cup chopped kale in the simmer. Garnish with toasted coconut flakes and fresh basil instead of parsley.
Italian Herb Garden
Boost the Italian flavors by adding 1 tsp fennel seeds and ½ tsp red pepper flakes with the garlic. Use 1 can white beans (drained) instead of corn, and stir in 2 cups chopped spinach at the end. Top with grated Parmesan (or vegan alternative) and fresh basil ribbons.
Hearty Lentil Boost
For extra protein, add 1 cup dried brown lentils (rinsed) with the potatoes. Increase broth to 7 cups and simmer for 30 minutes until lentils are tender. Finish with 1 tbsp balsamic vinegar for depth. This version keeps well for 6 days in the fridge.
Smoky BBQ Style
Replace tomato paste with 2 tbsp BBQ sauce (I like Stubb’s Original) and add 1 tsp liquid smoke with the broth. Swap green beans for 1 cup diced zucchini. Garnish with pickled red onions for tangy contrast. The smoky flavor deepens overnight.
Lemon-Garlic Brightness
Add zest of 1 lemon with the garlic and 2 tbsp fresh lemon juice at the end. Replace thyme with 1 tsp dried dill and add 1 cup chopped asparagus with the peas. This lighter version pairs beautifully with grilled sourdough for dipping. ✨
Nutrition Facts
Frequently Asked Questions
Can I use fresh vegetables instead of frozen?
Fresh corn and peas work beautifully. For corn, cut kernels from 2 medium ears and add with potatoes. For peas, use 1 cup fresh shelled peas and add during the last 3 minutes of cooking to preserve their sweetness.
How do I make this soup thicker?
For a heartier texture, blend 1 cup of cooked soup until smooth and stir it back in. Alternatively, mash ¼ of the potatoes against the pot’s side before serving. Both methods create creaminess without dairy.
What’s the best way to store leftovers?
Cool completely before transferring to airtight containers. Refrigerate for up to 5 days or freeze for 3 months. Leave peas out if freezing—they’ll turn mushy. Reheat gently on the stove with a splash of broth.
Can I make this in a slow cooker?
Yes! Sauté veggies first, then transfer everything except peas to the slow cooker. Cook on low for 6-7 hours or high for 3-4 hours. Add peas during the last 30 minutes on high to maintain their bright color.

- 8 Bean Soup Recipe Crock Pot: Hearty Vegetable Medley in One Pot - September 25, 2026
- 4C Bread Crumbs Meatballs Recipe: Crispy Crust and Juicy Centers - September 25, 2026
- 6 Oz Chocolate Chip Cookie Recipe: Perfectly Balanced Crispy Edges and Chewy Hearts - September 25, 2026