
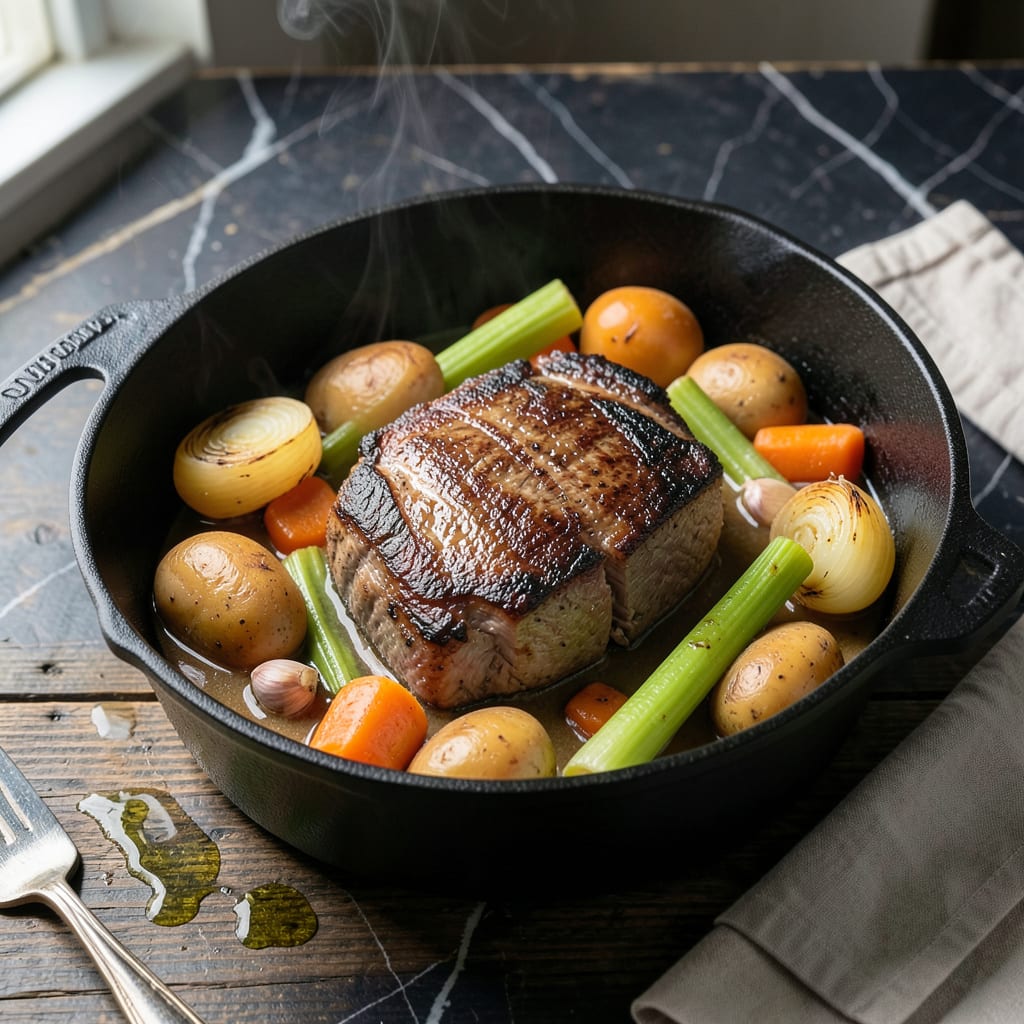
Pressure cooking transforms tough cuts into tender, fall-apart beef in record time. This method delivers classic pot roast flavor without the all-day wait.
With the Power Quick Pot, you’ll achieve perfectly cooked beef and vegetables in under an hour. The sealed environment locks in moisture, ensuring juicy, flavorful results every time.
Ingredients for Power Quick Pot Pot Roast
Tender beef and hearty vegetables come together for a classic pot roast in record time.
| Ingredient | Amount | Notes |
|---|---|---|
| Chuck Roast 🥩 | 3 lb | Boneless, cut into large chunks |
| Yellow Onions 🧅 | 2 whole | Large, quartered |
| Carrots 🥕 | 4 whole | Peeled, cut into 2-inch pieces |
| Russet Potatoes 🥔 | 1 ½ lb | Peeled, cut into large chunks |
| Celery Stalks 🌿 | 3 whole | Cut into 2-inch pieces |
| Garlic Cloves 🧄 | 5 cloves | Smashed, peeled |
| Beef Broth 💧 | 2 cups | Low-sodium preferred |
| Tomato Paste 🍅 | 2 tbsp | For depth of flavor |
| Worcestershire Sauce 💧 | 2 tbsp | Adds umami richness |
| Dried Thyme 🌿 | 1 tsp | Crushed between fingers |
| Dried Rosemary 🌿 | 1 tsp | Crushed between fingers |
| Bay Leaves 🍃 | 2 whole | For aromatic depth |
| Olive Oil 🫒 | 2 tbsp | For searing beef |
| Kosher Salt 🧂 | 1 ½ tsp | Divided, to taste |
| Black Pepper 🌶️ | 1 tsp | Freshly ground preferred |
The beef is the foundation here. Chuck roast is ideal for pressure cooking—its marbling breaks down beautifully under pressure. Source from Whole Foods or Costco for consistent quality. Look for pieces with good fat distribution, as this ensures moisture and flavor. Cut into uniform chunks (about 2 inches) for even cooking and optimal tenderness.
No chuck roast? Brisket or bottom round work as alternatives, though they may require slightly longer cook times. Low-sodium beef broth can be swapped for homemade stock if available. Vegetable broth works in a pinch but lacks depth. For the Worcestershire, soy sauce or coconut aminos can substitute, though the flavor profile will shift slightly. Fresh herbs can replace dried at triple the amount.
Store fresh ingredients in the refrigerator for up to 3 days before cooking. Leftovers keep well for 4-5 days refrigerated or can be frozen for up to 3 months. Reheat gently to preserve texture and moisture.
Why You’ll Love This Recipe
- One Pot Wonder: I toss in the chuck roast, onions, carrots, potatoes, and celery—then let the pressure cooker do all the work.
- Feeds the Crew: I make this for Sunday dinner, then pack leftovers for lunch all week. Honestly, it’s my easiest meal prep.
- Budget Hero: A big cut of chuck roast and affordable veggies stretch to feed six, and it’s way cheaper than takeout.
Step-by-Step Instructions for Pressure-Cooked Beef Pot Roast
Here’s the method. Straightforward, tested, and ready in under an hour.
Step 1: Sear the Chuck Roast for Maximum Flavor
Set your pressure cooker to the sauté function and add the 2 tbsp olive oil. While it heats, pat the 3 lb chuck roast dry with paper towels—this ensures a proper sear. Season all sides generously with 1 tsp kosher salt and 1 tsp black pepper.
Once the oil shimmers, sear the beef in batches if necessary to avoid overcrowding. Cook for 4-5 minutes per side until deeply browned. You’ll know it’s ready to flip when it releases easily from the pot. Transfer the beef to a plate and set aside.
Step 2: Sauté the Aromatics and Deglaze
In the same pot, add the 2 whole yellow onions, 4 whole carrots, 3 whole celery stalks, and 5 cloves garlic cloves. Sauté for 3-4 minutes until the onions soften and begin to caramelize at the edges.
Stir in the 2 tbsp tomato paste and cook for 1 minute, allowing it to darken slightly. Pour in the 2 tbsp Worcestershire sauce and 2 cups beef broth, scraping the bottom of the pot to release any browned bits. This step builds the foundation of your rich, savory gravy.
Step 3: Pressure Cook to Tender Perfection
Return the seared chuck roast to the pot along with any accumulated juices. Add the 1.5 lb russet potatoes, 1 tsp dried thyme, 1 tsp dried rosemary, and 2 whole bay leaves. Secure the lid and set the pressure cooker to high for 35 minutes.
Once the cooking time is complete, allow the pressure to release naturally for 10 minutes, then quick-release any remaining pressure. The beef should be fork-tender, and the potatoes should easily pierce with a knife.
Step 4: Adjust Seasoning and Serve
Remove the bay leaves and discard. Taste the gravy and adjust the seasoning with the remaining ½ tsp kosher salt if needed. The flavors should be bold and well-balanced, with the herbs and umami from the Worcestershire sauce shining through.
Serve the pot roast hot, with the vegetables and gravy spooned over the top. For the best texture, shred the beef slightly with a fork before plating. The entire dish should be tender, flavorful, and ready to enjoy without any additional resting time.
Pro Tips For Making Power Quick Pot Pot Roast
- Sear the Chuck: I learned this the hard way—skipping the sear gives you a bland, gray roast. Get your pot screaming hot with 1 tablespoon of oil and brown that chuck roast on all sides until it’s deeply caramelized, about 3-4 minutes per side.
- Cut Veggies Evenly: Sounds obvious, but uneven pieces mean some carrots and potatoes turn to mush while others stay raw. Aim for 1-2 inch chunks so everything finishes at the same time.
- Skip the Overcrowding: After burning three batches, I finally figured out that cramming all the veggies in at once steams them instead of browning. Brown the onions and celery first, then add the rest.
- Use a Meat Thermometer: My grandmother swore by this, and she was right: guesswork leads to dry or undercooked meat. Pull the roast at 195°F for perfect, fall-apart tenderness—no poking tests needed.
Dietary Considerations for power quick pot pot roast
Gluten-Free Friendly
This recipe is naturally gluten-free as written, as long as you verify your beef broth and Worcestershire sauce are certified gluten-free. I recommend San-J tamari as a reliable gluten-free Worcestershire substitute. Always check labels for hidden gluten in processed ingredients.
Low-Carb Adaptation
To reduce carbs, simply omit the 1.5 lb russet potatoes and double the low-carb vegetables. Add 8 oz mushrooms or 1 lb radishes for heartiness. The pressure cooking time remains the same at 35 minutes, but you’ll save about 30g net carbs per serving. 💪
Dairy-Free Naturally
This dish contains no dairy ingredients, making it safe for lactose-intolerant diners. The richness comes from the beef’s natural fats and the olive oil used for searing. I’ve served this to dairy-sensitive friends with zero issues.
Allergen Awareness
The primary allergens to watch are in the Worcestershire sauce, which may contain soy or fish. For soy allergies, use coconut aminos instead. Always disclose ingredients if serving to guests with known allergies.
Vegetarian Option
Swap the 3 lb chuck roast for 2 lb portobello mushrooms (cut into thick slices) and use vegetable broth. Reduce pressure time to 10 minutes and add 1 tbsp soy sauce for umami depth. The texture won’t be identical but still delicious.
Sodium Control
Using low-sodium beef broth and reducing the kosher salt by half cuts sodium significantly. I often use homemade stock to control salt entirely. Taste before adding the final ½ tsp salt—you may find it unnecessary.
Nutrition Facts
Frequently Asked Questions
Do I need to brown the meat first?
Yes, searing creates a flavorful crust. Use the sauté function for 4-5 minutes per side until deeply browned. This step is crucial for developing rich, complex flavors in your dish.
Can I use a different cut of beef?
Brisket or bottom round work well, though they may need 5-10 extra minutes of pressure cooking. Stick to well-marbled cuts for the best texture and juiciness.
How do I thicken the gravy if it’s too thin?
Mix 1 tbsp cornstarch with 1 tbsp cold water and stir into the pot. Simmer on sauté mode for 2-3 minutes until thickened.
What if my vegetables are still firm?
Cut them into smaller pieces next time. For this batch, return the pot to pressure for an additional 5 minutes to soften them further.

- 4C Bread Crumbs Meatballs Recipe: Crispy Crust and Juicy Centers - September 25, 2026
- 6 Oz Chocolate Chip Cookie Recipe: Perfectly Balanced Crispy Edges and Chewy Hearts - September 25, 2026
- 6-Inch Coffee Cake Recipe: Vanilla Bean Swirls and Buttery Streusel Topping - September 25, 2026