
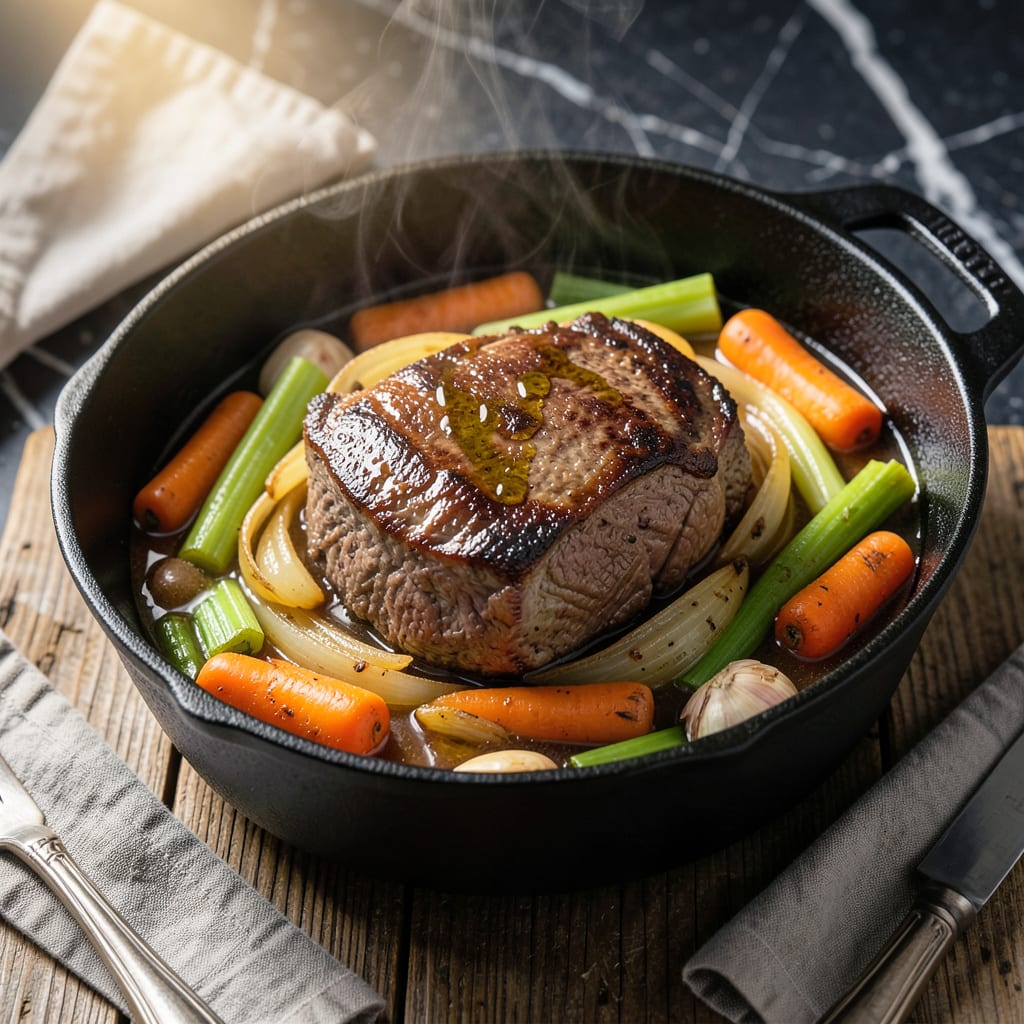
This Power XL pot roast delivers melting tenderness with minimal effort, using your multi-function cooker’s precise temperature control.
Slow-cooked with aromatic vegetables and rich broth, the meat becomes fork-tender while developing deep, savory flavors that define comfort food at its best.
Ingredients for Power Xl Pot Roast
Fork-tender beef and aromatic veggies slow-cooked to perfection. Nothing complicated here.
| Ingredient | Amount | Notes |
|---|---|---|
| Beef Chuck Roast 🥩 | 3 lb | Boneless, well-marbled for tenderness |
| Yellow Onions 🧅 | 2 whole | Medium-sized, quartered |
| Carrots 🥕 | 4 whole | Large, peeled and cut into chunks |
| Celery Stalks 🌿 | 3 whole | Cut into 2-inch pieces |
| Garlic Cloves 🧄 | 6 cloves | Smashed for bold flavor |
| Beef Broth 💧 | 2 cups | Low-sodium preferred for control |
| Red Wine 🍷 | 1 cup | Dry variety like Cabernet Sauvignon |
| Tomato Paste 🍅 | 2 tbsp | For depth of flavor |
| Worcestershire Sauce 💧 | 1 tbsp | Adds umami richness |
| Dried Thyme 🌿 | 1 tsp | Crushed between fingers to release oils |
| Dried Rosemary 🍃 | 1 tsp | Crushed for maximum aroma |
| Bay Leaves 🌿 | 2 whole | Removed before serving |
| Kosher Salt 🧂 | 1 ½ tsp | Diamond Crystal preferred for even seasoning |
| Black Pepper 🌶️ | 1 tsp | Freshly ground for best results |
| Olive Oil 🫒 | 2 tbsp | For searing beef |
[recipeingredientscaler]
The beef is non-negotiable here—chuck roast gives that buttery, fall-apart texture. Look for good marbling (those white fat streaks) at the store. Costco has great pre-packaged chuck, but your local butcher will cut it thicker if you ask. The onions and carrots? Grab whatever looks fresh at Kroger or Walmart. No need for organic unless that’s your thing.
No red wine? Beef broth plus a splash of balsamic vinegar works in a pinch. Swap dried herbs for fresh at one-third the amount. If you’re out of tomato paste, a tablespoon of ketchup (yes, really) adds similar depth. The Worcestershire can be omitted, but it adds that je ne sais quoi. For the broth, Better Than Bouillon makes a killer beef base.
Leftovers taste even better the next day. Store in the fridge for up to 4 days or freeze for 3 months. The fat solidifies when chilled—just skim it off before reheating. Perfect for sandwiches or shepherd’s pie later in the week.
Why You’ll Love This Recipe
- One Pot Wonder: Set it and forget it in the Power XL—beef chuck, carrots, and celery all cook together while I do something else.
- Fall-Off-The-Bone Good: The garlic and onions turn the chuck roast into this ridiculously tender, savory masterpiece.
- Meal Prep Hero: I make this Sunday and we’re eating like kings for days—sandwiches, tacos, you name it.
- Budget Stretcher: Feeds my whole family for less than takeout, and the leftovers taste even better the next day.
Step-by-Step Instructions for Multi-Function Cooker Pot Roast
Here’s how to coax maximum tenderness from your chuck roast with minimal effort.
Step 1: Sear the Beef Chuck Roast
Set your Power XL to the Sauté function and add the 2 tbsp Olive Oil. While it heats, pat the 3 lb Beef Chuck Roast dry with paper towels—this ensures a proper sear. Season all sides with the 1.5 tsp Kosher Salt and 1 tsp Black Pepper, pressing it in gently so it adheres.
When the oil shimmers, place the beef in the pot. Sear undisturbed for 4-5 minutes per side until a deep, dark brown crust forms. This step builds the foundation of flavor, so don’t rush it. Transfer the roast to a plate and set aside.
Step 2: Sauté the Aromatics
In the same pot, add the 2 whole Yellow Onions (quartered), 4 whole Carrots (chunked), 3 whole Celery Stalks (cut into 2-inch pieces), and 6 cloves Garlic Cloves (smashed). Sauté for 5-6 minutes until the onions soften and begin to caramelize at the edges.
Stir in the 2 tbsp Tomato Paste, 1 tbsp Worcestershire Sauce, 1 tsp Dried Thyme, 1 tsp Dried Rosemary, and 2 whole Bay Leaves. Cook for 1-2 minutes until the tomato paste darkens slightly—this deepens its sweetness and removes any raw taste.
Step 3: Deglaze and Pressure Cook
Pour in the 1 cup Red Wine and scrape the bottom of the pot with a wooden spoon to release all the browned bits. Let it simmer for 2-3 minutes until the liquid reduces by half. This step is critical—it prevents the Burn notice on your cooker.
Add the 2 cups Beef Broth and return the seared beef to the pot, along with any accumulated juices. Secure the lid, set the valve to Sealing, and cook on High Pressure for 60 minutes. The roast should be fork-tender when done.
Step 4: Natural Release and Serve
Allow the pressure to release naturally for 15 minutes, then quick-release any remaining pressure. This gradual release keeps the meat juicy. Remove the 2 whole Bay Leaves and discard.
Transfer the roast to a cutting board and let it rest for 10 minutes before slicing against the grain. The vegetables will be soft and infused with rich, meaty flavor, and the sauce should coat the back of a spoon. Serve with the juices spooned over the top.
Pro Tips For Making Power Xl Pot Roast
- Sear the Chuck First: I learned this the hard way—skipping the sear leaves your pot roast bland. Toss the chuck in the Power XL with a little oil on high for 3-4 minutes per side until deeply browned.
- Cut Veggies Evenly: Sounds obvious, but chop those carrots, celery, and onions into uniform 1-inch chunks so they cook at the same rate as the beef.
- Don’t Overfill the Pot: Resist the urge to add extra liquid—your Power XL needs at least 1 inch of free space at the top for proper pressure buildup and even cooking.
- Use Fresh Garlic: Jarred minced garlic works in a pinch, but fresh cloves crushed right before cooking add a brightness that actually changes the outcome.
Common Mistakes When Making This Dish
Skipping the Sear
I know it’s tempting to skip searing, but this step is non-negotiable for depth of flavor. Without that dark brown crust, your pot roast will taste flat. The 4-5 minutes per side creates the Maillard reaction that builds complex, meaty flavors. Trust me, it’s worth the extra effort. 🔥
Overfilling the Cooker
Your Power XL has a max fill line for a reason. Never exceed ⅔ full when pressure cooking. The liquid needs room to expand and create steam. I learned this the hard way when my first attempt nearly overflowed. Stick to 2 cups Beef Broth plus the wine.
Using the Wrong Cut
Not all beef cuts work for pot roast. Chuck roast is ideal because of its marbling and connective tissue that breaks down beautifully. Avoid lean cuts like round roast—they’ll turn dry and tough. Always choose well-marbled chuck for that fork-tender result.
Not Deglazing Properly
After searing, those browned bits stuck to the bottom are flavor gold. Use the 1 cup Red Wine to scrape them up during deglazing. This prevents the dreaded Burn notice and infuses your sauce with rich, caramelized flavors. Don’t rush this 2-3 minute step.
Rushing the Release
Let the pressure release naturally for the full 15 minutes. Quick-releasing too soon can make the meat tough. I’ve found that this gradual release allows the fibers to relax fully. The wait is frustrating, but your patience will be rewarded with perfect tenderness.
Forgetting to Rest
After cooking, let the roast rest for 10 minutes before slicing. This allows the juices to redistribute throughout the meat. Slicing too soon will send all those delicious juices pooling on your cutting board instead of staying in the beef. 💡
Nutrition Facts
Frequently Asked Questions
Can I use a different cut of beef?
Stick with chuck roast for best results. Lean cuts like round won’t break down properly.
What if I don’t have red wine?
Substitute 1 cup beef broth plus 1 tbsp balsamic vinegar. The acidity mimics wine’s depth.
How do I know when it’s done?
The meat should pull apart easily with a fork after 60 minutes on High Pressure.
Can I add potatoes to the cooker?
Yes! Add 1 lb baby potatoes with the broth. They’ll soak up all the flavor.

- 4C Bread Crumbs Meatballs Recipe: Crispy Crust and Juicy Centers - September 25, 2026
- 6 Oz Chocolate Chip Cookie Recipe: Perfectly Balanced Crispy Edges and Chewy Hearts - September 25, 2026
- 6-Inch Coffee Cake Recipe: Vanilla Bean Swirls and Buttery Streusel Topping - September 25, 2026