
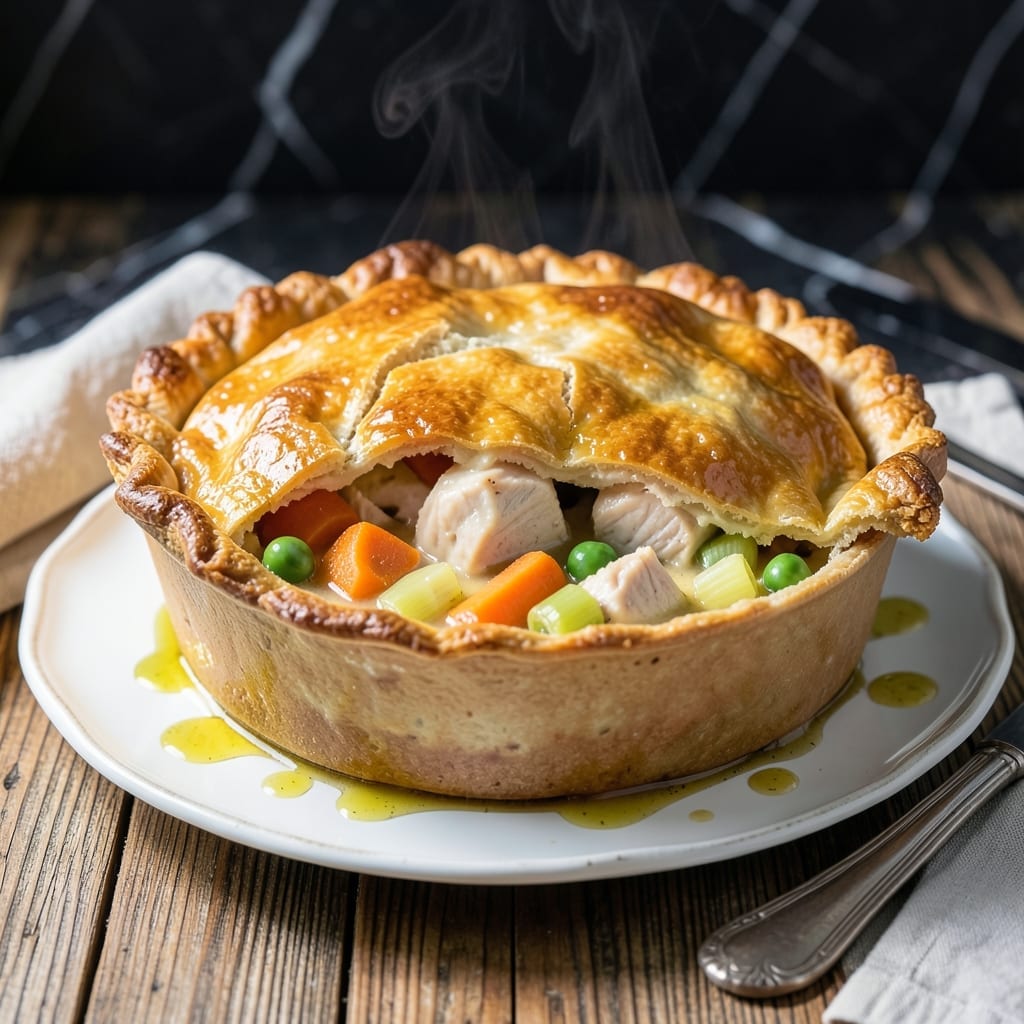
Comfort food gets a modern makeover with this pressure cooker version that delivers all the classic flavors in a fraction of the time.
The secret is layering ingredients strategically and using the pressure cooker to create a savory filling that tastes like it simmered for hours. A flaky crust tops it all off, baking to golden perfection while the filling cooks below.
You’ll achieve tender chicken, rich gravy, and perfectly cooked vegetables without ever turning on the oven. The result is a complete meal that satisfies like the traditional version, ready when you need it most.
This method cuts the usual cooking time dramatically while maintaining the hearty, homemade taste you expect. Serve it straight from the pot for a meal that feels special with minimal effort.
Ingredients for Pressure Cooker Pot Pie
Pantry staples plus a few fresh picks make this hearty dish come alive.
| Ingredient | Amount | Notes |
|---|---|---|
| Chicken Breast 🍗 | 1 ½ lb | Boneless, skinless, cut into cubes |
| Carrots 🥕 | 2 whole | Peeled and chopped into chunks |
| Celery Stalks 🥬 | 2 whole | Diced for filling |
| Yellow Onion 🧅 | 1 whole | Medium-sized, finely diced |
| Garlic Cloves 🧄 | 3 cloves | Minced for depth of flavor |
| Frozen Peas 🌱 | 1 cup | No need to thaw |
| Chicken Broth 🥣 | 1 ½ cups | Low-sodium preferred |
| Heavy Cream 🥛 | ½ cup | For creamy gravy base |
| All-Purpose Flour 🌾 | ⅓ cup | For thickening gravy |
| Unsalted Butter 🧈 | 4 tbsp | For sautéing and richness |
| Pie Crust 🥧 | 1 package | Pre-made or homemade |
| Dried Thyme 🌿 | 1 tsp | For earthy savory note |
| Dried Rosemary 🌿 | 1 tsp | Crushed for aroma |
| Salt 🧂 | 1 tsp | Adjust to taste |
| Black Pepper 🌶️ | ½ tsp | Freshly ground preferred |
The chicken is the foundation here. Boneless, skinless thighs work too if you prefer darker meat (they stay juicier). I grab mine from Costco for bulk savings, but any grocery store will do. Look for pieces that are evenly sized so they cook at the same rate. The veggies—carrots, celery, onion—should be fresh, but frozen works in a pinch (just thaw and drain first).
No heavy cream? Whole milk with a splash of cornstarch (1 tsp per cup) thickens nicely. Out of thyme? Poultry seasoning at half the amount covers the bases. The pie crust can be store-bought (I won’t tell)—Pillsbury is my go-to for convenience. For extra flakiness, brush the top with a little egg wash (1 egg + 1 tbsp water) before baking.
This keeps 3-4 days in the fridge—reheat in the microwave or oven. Freeze portions for up to 3 months (thaw overnight before reheating). Honestly, the filling tastes even better the next day.
Why You’ll Love This Recipe
- Set It & Forget: The pressure cooker does all the work while I prep the rest of dinner.
- Garlic-Kissed Comfort: That golden crust with tender chicken and veggies soaked in garlic and onion? Pure cozy.
- Weeknight Hero: I throw everything in after work and have dinner ready before the kids start asking.
- Leftovers for Days: Honestly, it tastes even better the next day—if there is any left.
Step-by-Step Instructions for Pressure Cooker Pot Pie
Here’s how I nail this comfort classic in record time without sacrificing that flaky top.
Step 1: Sauté the Vegetables and Chicken
Set your pressure cooker to sauté mode on normal heat. Melt 4 tbsp unsalted butter in the pot, then add the yellow onion, carrots, and celery stalks. Cook for 4-5 minutes until the onion turns translucent and the carrots start to soften.
Add the 1.5 lb chicken breast cubes and cook for another 3-4 minutes until the outside is no longer pink. Stir in the 3 cloves garlic cloves, 1 tsp dried thyme, 1 tsp dried rosemary, 1 tsp salt, and 0.5 tsp black pepper. This builds the flavor base for the filling.
Step 2: Create the Creamy Filling
Sprinkle the 0.33 cup all-purpose flour over the chicken and vegetables. Stir well to coat everything evenly and cook for 1 minute to remove the raw flour taste. This step prevents lumps and ensures a smooth gravy.
Slowly pour in the 1.5 cups chicken broth while stirring constantly to avoid clumping. Add the 1 cup frozen peas and 0.5 cup heavy cream. Stir to combine, scraping the bottom of the pot to release any browned bits. These add depth to the sauce.
Step 3: Pressure Cook the Filling
Secure the pressure cooker lid and set the valve to sealing. Cook on high pressure for 5 minutes. Once the cooking cycle is complete, let the pressure release naturally for 5 minutes, then quick-release any remaining pressure.
Open the lid carefully and give the filling a good stir. The chicken should be fully cooked and tender, and the sauce should have thickened nicely. If it seems too thin, let it simmer on the sauté function for 2-3 minutes to thicken further.
Step 4: Add the Pie Crust and Finish
Unroll the 1 package pie crust and place it over the filling, allowing the edges to overlap slightly. Press the crust gently into the filling to help it adhere. Secure the lid again and cook on high pressure for 4 minutes to steam the crust.
After the cooking cycle, quick-release the pressure and carefully open the lid. The crust should be golden and flaky. If it needs more browning, place the pot under a broiler for 2-3 minutes, watching closely to prevent burning. Let it rest for 5 minutes before serving to allow the filling to set.
Pro Tips For Making Pressure Cooker Pot Pie
- Sear the Chicken: Brown the chicken breast in batches before pressure cooking—about 3-4 minutes per side in the pot with a little oil. I learned this the hard way: skipping this step leaves the meat bland, even with a flavorful sauce.
- Uniform Veggie Cuts: Dice the carrots, celery, and onion into ½-inch pieces so they cook evenly under pressure. Sounds fussy, but nothing ruins a pot pie like crunchy carrots and mushy celery.
- Deglaze Thoroughly: After searing, pour in ½ cup broth or wine and scrape the browned bits from the bottom. My first few attempts stuck because I resisted scrubbing those flavor-packed bits—don’t make my mistake.
- Thicken After Cooking: Wait until the pressure releases naturally, then stir in a cornstarch slurry or roux to thicken the filling. Adding it earlier can clog the vent and leave a gummy texture.
Troubleshooting Perfect Results
Thin or Watery Filling
If your filling seems too thin after pressure cooking, don’t panic. Return the pot to sauté mode and let it simmer uncovered for 2-3 minutes. Stir frequently to prevent scorching. A cornstarch slurry (1 tbsp cornstarch mixed with 1 tbsp cold water) can also thicken it quickly. 💡
Soggy Crust
For a crispier top, avoid overfilling the pressure cooker—leave at least 1 inch of headspace. After pressure cooking the crust, transfer the whole pot to your oven’s broiler for 2-3 minutes. Watch closely to prevent burning. I find this extra step makes all the difference.
Chicken Not Cooked Through
If your chicken is undercooked, ensure it’s cut into even 1-inch cubes before starting. The pressure cooker needs proper liquid levels too—never go below 1.5 cups of broth. If needed, return to high pressure for 2-3 more minutes with the lid sealed.
Burn Notice
That dreaded “burn” error often happens if ingredients stick to the bottom. Always deglaze the pot with ½ cup broth after sautéing. Stir well to release all browned bits. I learned this the hard way with my first Instant Pot attempt.
Filling Stuck to Crust
Prevent this by pressing the pie crust gently into the filling before the second pressure cook. A light egg wash (1 egg + 1 tbsp water) on the crust can also help create a barrier. Let it rest 5 minutes after cooking to set properly.
Overly Salty Filling
Using low-sodium chicken broth helps control saltiness. If it’s still too strong, stir in ½ cup diced potatoes during the final 5 minutes of cooking—they absorb excess salt naturally. Taste before adding extra seasoning.
Nutrition Facts
Frequently Asked Questions
Can I use chicken thighs instead of breast?
Boneless, skinless thighs stay juicier and add richer flavor. Adjust cooking time to 4 minutes under pressure since dark meat cooks faster than breast.
How do I prevent the crust from getting soggy?
Broil for 2-3 minutes after pressure cooking to crisp it. Also, leave 1 inch of headspace and press the crust lightly into the filling before the final cook.
Can I make this gluten-free?
Yes! Swap all-purpose flour for cornstarch (2 tbsp) and use a gluten-free pie crust. Ensure broth and seasonings are certified gluten-free.
Why did I get a burn notice?
This happens if ingredients stick. Always deglaze with ½ cup broth after sautéing, scraping the bottom thoroughly. Stir well before sealing the lid.

- 4C Bread Crumbs Meatballs Recipe: Crispy Crust and Juicy Centers - September 25, 2026
- 6 Oz Chocolate Chip Cookie Recipe: Perfectly Balanced Crispy Edges and Chewy Hearts - September 25, 2026
- 6-Inch Coffee Cake Recipe: Vanilla Bean Swirls and Buttery Streusel Topping - September 25, 2026