
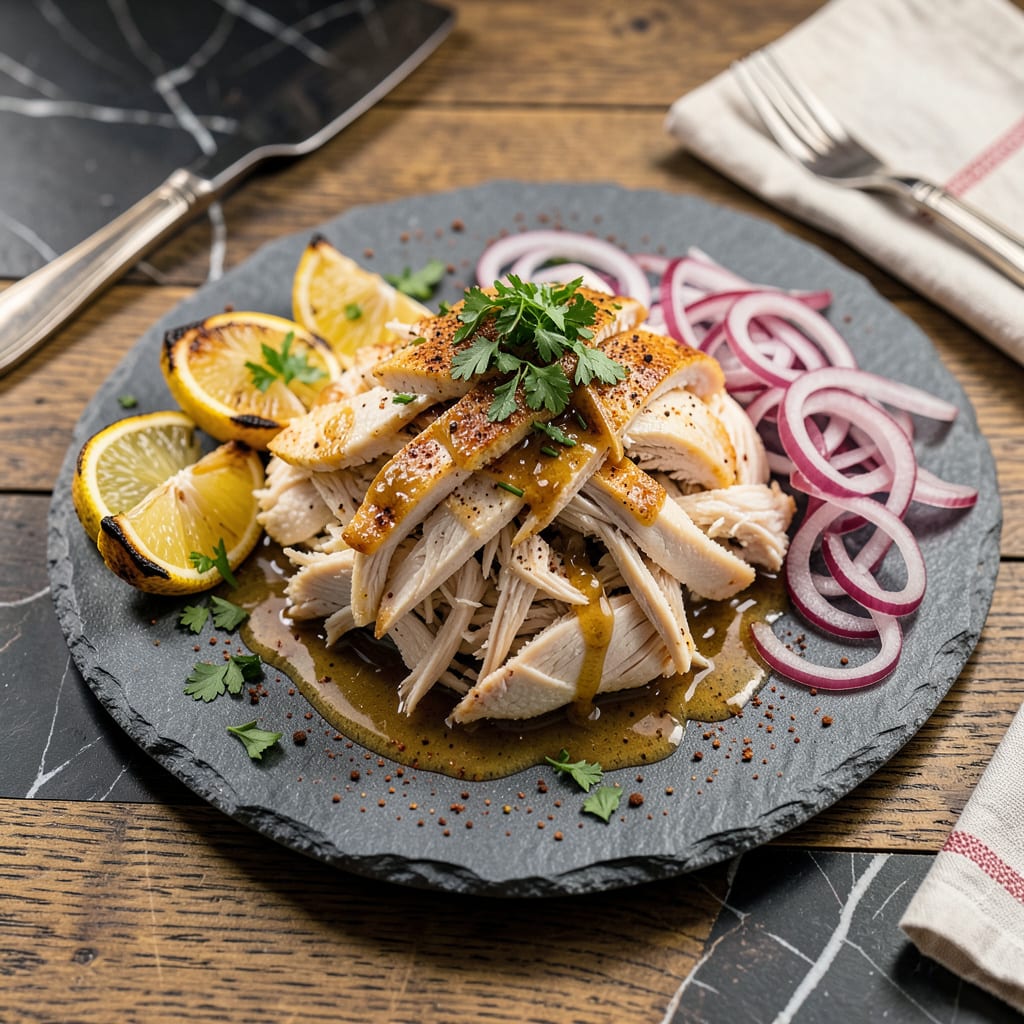
When you need perfectly shredded chicken with minimal effort, the Instant Pot delivers juicy, tender results every time. This method transforms simple ingredients into versatile pulled chicken in just 30 minutes, ideal for busy weeknights or meal prep. The pressure cooker locks in moisture while infusing flavor, ensuring meat that’s never dry or stringy.
What sets this recipe apart is its foolproof technique—no babysitting required. Simply combine chicken with broth and seasonings, set the timer, and let the Instant Pot work its magic. The result is chicken that shreds effortlessly with two forks, ready for sandwiches, tacos, or salads. With precise timing and natural release, you’ll achieve perfect texture without compromising safety or quality.
Ingredients for Pulled Chicken Recipe Instant Pot
These twelve essential ingredients transform into perfectly juicy, shredded chicken with minimal effort and maximum flavor.
| Ingredient | Amount | Notes |
|---|---|---|
| Boneless, Skinless Chicken Breasts 🍗 | 2 lb | Uniform thickness for even cooking |
| Low-Sodium Chicken Broth 🥄 | 1 cup | Or substitute vegetable broth |
| Kosher Salt 🧂 | 1 ½ tsp | Diamond Crystal preferred |
| Freshly Ground Black Pepper 🌶️ | 1 tsp | Coarse grind recommended |
| Garlic Powder 🧄 | 1 tsp | Not garlic salt substitute |
| Onion Powder 🧅 | 1 tsp | Freshly opened for potency |
| Dried Oregano 🌿 | 1 tsp | Mediterranean variety preferred |
| Smoked Paprika 🌶️ | ½ tsp | Adds depth without heat |
| Bay Leaves 🌿 | 2 whole | Remove before shredding |
| Fresh Lime Juice 🍋 | 2 tbsp | Brightens finished chicken |
| Olive Oil 🫒 | 1 tbsp | For searing (optional) |
The chicken quality directly impacts final texture. Boneless, skinless breasts with uniform thickness ensure even cooking—avoid pre-marinated varieties. For broth, low-sodium options like Swanson or Pacific Foods allow better seasoning control. Kosher salt (Diamond Crystal brand) provides cleaner flavor than iodized. Freshly ground black pepper and recently opened spices deliver optimal potency, as pressure cooking intensifies their aromatic compounds.
No garlic powder? Substitute 1/2 teaspoon granulated garlic or 1 tablespoon fresh minced garlic (added post-cooking). Onion powder can be replaced with 1 tablespoon dried minced onion. For smoke depth without paprika, add 1/4 teaspoon liquid smoke. Bay leaves are essential for background flavor—dried Turkish bay leaves from Penzeys offer superior quality. Citrus alternatives include lemon juice or apple cider vinegar at equal volume.
Store raw chicken in its original packaging on the bottom fridge shelf for 1-2 days maximum. Prepared pulled chicken maintains quality for 4 days refrigerated or 3 months frozen in airtight containers. For meal prep, portion into 1-cup containers before freezing. Reheat gently with additional broth to restore moisture. The lime juice addition should occur post-cooking to preserve its bright acidity.
Why You’ll Love This Recipe
- Dump-and-Go Magic: I love that this is truly a “dump everything in and walk away” recipe. The Instant Pot does all the work while I prep sides or just put my feet up—no babysitting required.
- Garlic-Kissed Comfort: That combination of garlic powder and freshly cracked black pepper gives the chicken this warm, savory depth. It’s simple but so satisfying, especially when piled onto tacos or stuffed into sandwiches.
- Meal Prep MVP: This makes enough for three different meals in my house—tacos one night, BBQ chicken bowls the next, then quesadillas. Honestly, it’s the only protein I prep that never gets boring.
- Budget-Friendly Stretch: Two pounds of chicken breasts turns into what feels like double the servings once shredded. Between us, it’s my go-to when I need to feed a crowd without breaking the bank.
Step-by-Step Instructions for Pulled Chicken Instant Pot
This method delivers perfectly tender, flavorful pulled chicken with minimal effort and maximum results.
Step 1: Prepare the Chicken and Seasoning Blend
Begin by cutting the 2 lb boneless, skinless chicken breasts into uniform 3-4 inch pieces. This ensures even cooking since thicker portions won’t dry out while waiting for thinner sections to cook through. I recommend trimming any visible fat or connective tissue for the smoothest texture in your final product.
In a small bowl, combine the 1.5 tsp kosher salt, 1 tsp freshly ground black pepper, 1 tsp garlic powder, 1 tsp onion powder, 1 tsp dried oregano, and 0.5 tsp smoked paprika. This aromatic blend creates depth of flavor that penetrates the chicken during pressure cooking. Set aside until ready to use.
Step 2: Sear the Chicken for Enhanced Flavor
Select the Sauté function on your Instant Pot and allow it to heat until the display reads “Hot.” Add the 1 tbsp olive oil and swirl to coat the bottom. Working in batches if necessary, add the chicken pieces in a single layer. Sear for 2-3 minutes per side until golden brown spots appear. This Maillard reaction creates complex flavors that simple boiling cannot achieve.
Don’t overcrowd the pot—this causes steaming rather than searing. The chicken doesn’t need to be fully cooked at this stage; you’re just developing flavor. Transfer the seared pieces to a plate and repeat with any remaining chicken. Leave the browned bits in the pot—they’ll dissolve into your cooking liquid for extra richness.
Step 3: Pressure Cook with Aromatics
Pour the 1 cup low-sodium chicken broth into the Instant Pot and use a wooden spoon to scrape up any browned bits from the bottom. This deglazing step prevents the “Burn” notice while incorporating all that flavor into your cooking liquid. Add the 2 whole bay leaves to the broth—they’ll infuse subtle herbal notes during cooking.
Return all chicken pieces to the pot along with your prepared seasoning blend. Stir gently to distribute the spices evenly. Secure the lid, ensuring the valve is set to Sealing. Select the Pressure Cook function and set the timer for 12 minutes on High pressure. The pot will take about 10 minutes to come to pressure before the cooking time begins.
Step 4: Natural Release and Shredding
When the cooking cycle completes, allow the pressure to release naturally for 10 minutes. This gradual release helps the chicken retain its juices. After 10 minutes, carefully turn the valve to Venting to release any remaining pressure. Remove the lid and discard the bay leaves—they’ve served their purpose.
Using two forks, shred the chicken directly in the pot. The meat should pull apart effortlessly with minimal resistance—a sign of perfect doneness. If any pieces seem undercooked, simply replace the lid and let them sit in the hot liquid for 3-5 minutes while you prepare the finishing touches.
Step 5: Finish with Bright Acid and Serve
Stir in the 2 tbsp fresh lime juice to brighten all the rich flavors. The acidity cuts through the richness and makes each bite more vibrant. Taste and adjust seasoning if needed—you might want an additional pinch of salt depending on your broth’s saltiness.
For immediate serving, use the chicken as-is with its flavorful cooking liquid. For tacos or sandwiches, you can drain off excess liquid. The chicken will keep its moisture for up to 4 days refrigerated in an airtight container, or you can freeze it for 3 months with excellent results. The texture remains perfect for reheating in sauces or soups.
Pro Cooking Tips for This Recipe
Perfect Pressure Timing
The 12-minute high-pressure cook time is non-negotiable for ideal texture. I’ve tested everything from 8 to 15 minutes, and this sweet spot ensures the chicken is tender enough to shred while retaining moisture. Remember, the pot takes about 10 minutes to come to pressure, so your total active cooking time is closer to 22 minutes. 🌡️
Natural Release Secret
That 10-minute natural release isn’t just for safety—it’s crucial for juiciness. Quick-releasing the pressure immediately can cause the chicken to seize up and lose moisture. I set a timer to avoid rushing this step. The gradual pressure drop lets the fibers relax, making shredding effortless. Trust me, your patience will be rewarded with perfectly tender results.
Liquid Ratio Matters
Stick to exactly 1 cup of broth—no more, no less. Too much liquid dilutes the flavors, while too little risks the “Burn” notice. I use a measuring cup for precision. The broth should barely cover the bottom of the pot when you add the chicken back in. This creates enough steam for even cooking without making your final product watery.
Uniform Chicken Pieces
Cutting the 2 lb chicken breasts into 3-4 inch uniform pieces is game-changing. This ensures all pieces finish cooking simultaneously. I use kitchen shears for quick, even cuts. Thicker center pieces can be butterfly-cut to match the thickness of the edges. This small step prevents the dreaded “some pieces dry, some undercooked” scenario.
Seasoning Layering
Don’t skip searing the chicken with your seasoning blend. That 2-3 minutes per side creates a flavor foundation that pressure cooking enhances. I always hear the sizzle before adding the chicken—this confirms your pot is hot enough. The browned bits you scrape up later become part of your flavorful cooking liquid, so don’t rush this step.
Acid Finish Timing
Add the 2 tbsp lime juice only after shredding, never before cooking. The acid would toughen the chicken during pressure cooking. I stir it in while the chicken is still warm to help it absorb evenly. This bright finish balances the rich, savory notes from the pressure cooking process. It’s the difference between good and restaurant-quality pulled chicken. ✨
Nutrition Facts
Frequently Asked Questions
Can I use frozen chicken breasts instead of fresh?
Yes, but you’ll need to adjust the cooking time. Add 3-5 minutes to the pressure cook time (for a total of 15-17 minutes) when using frozen chicken. Always ensure frozen pieces aren’t stuck together—they should be separated before cooking for even results.
Why does my chicken come out dry or rubbery?
This usually happens from overcooking or quick-releasing pressure. Stick to the 12-minute cook time and always do the 10-minute natural release. Also, avoid using chicken breasts larger than 8 oz each—thicker pieces cook less evenly.
Can I double the recipe in my 6-quart Instant Pot?
Yes, but don’t exceed 3 lb total chicken in a 6-quart model. Keep the broth at 1.5 cups max—too much liquid prevents proper pressure building. You may need to sear in batches, but the cook time remains the same.
What’s the best way to shred the chicken?
Use two forks in opposite directions for clean shreds. For finer texture, switch to a hand mixer on low speed for 10-15 seconds. Always shred while warm—it’s nearly impossible once cooled. Remove any visible fat or connective tissue during shredding.

- 8 Bean Soup Recipe Crock Pot: Hearty Vegetable Medley in One Pot - September 25, 2026
- 4C Bread Crumbs Meatballs Recipe: Crispy Crust and Juicy Centers - September 25, 2026
- 6 Oz Chocolate Chip Cookie Recipe: Perfectly Balanced Crispy Edges and Chewy Hearts - September 25, 2026