
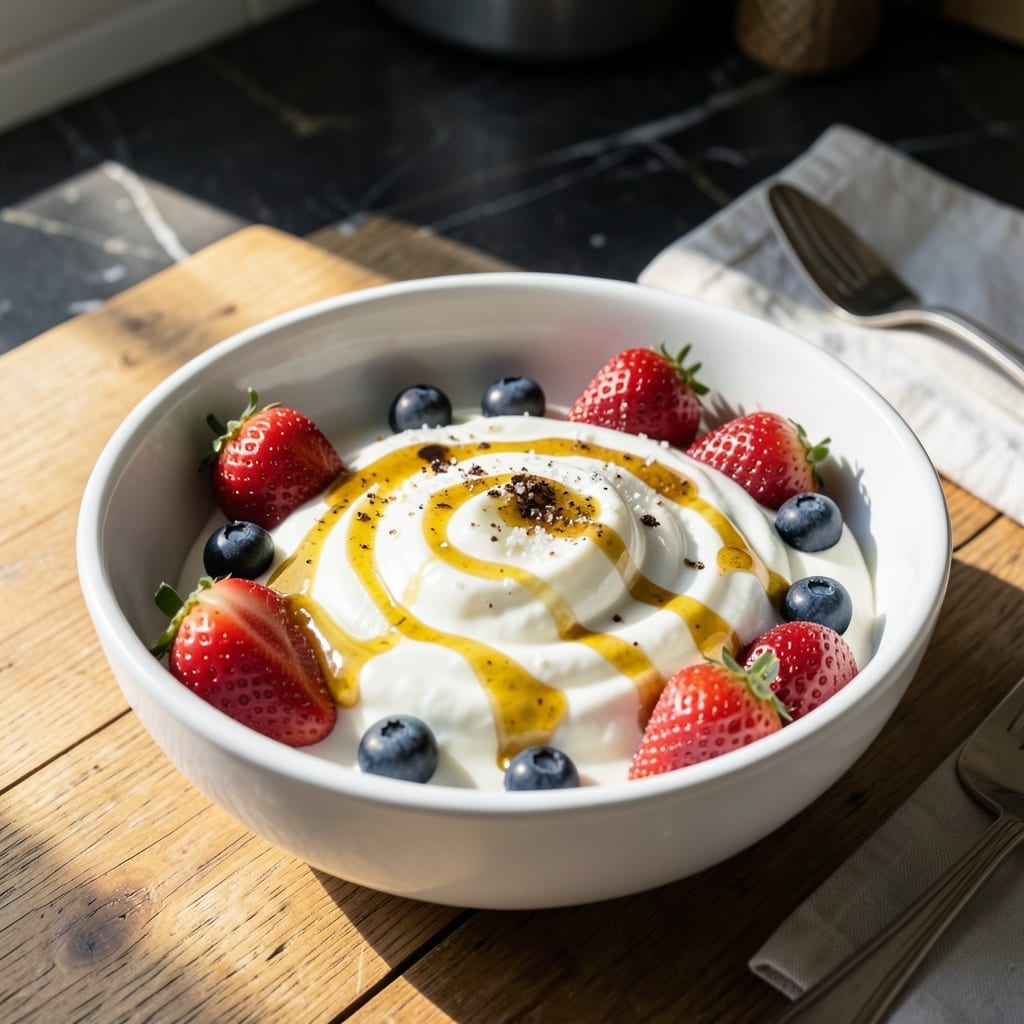
Homemade yogurt doesn’t have to be an all-day project. This method uses your quick pot to create thick, creamy yogurt with that perfect tang in just a few hours.
I’ve refined this process to ensure consistent results every time, with minimal hands-on effort. The key is precise temperature control during both heating and fermentation stages.
What you’ll get is smooth, rich yogurt that rivals any store-bought version. The texture is velvety, and the flavor is fresh and slightly tart—exactly what you want.
Once you try this quick method, you’ll never go back to buying yogurt again. The process is straightforward and the results are professional-quality.
Ingredients for Quick Pot Yogurt
Just a few ingredients transform into velvety yogurt with perfect tang.
| Ingredient | Amount | Notes |
|---|---|---|
| Whole Milk 🥛 | 8 cups | Full-fat for creaminess |
| Plain Yogurt 🥣 | ¼ cup | With live active cultures |
| Granulated Sugar 🍚 | 1 tbsp | Optional for sweetness |
| Vanilla Extract 🌿 | 1 tsp | Pure for best flavor |
| Honey 🍯 | 2 tbsp | Optional for serving |
| Fresh Fruit 🍓 | 1 cup | For topping, diced |
| Water 💧 | 4 cups | For cleaning quick pot |
The milk is everything here. Whole milk from a local dairy gives the richest texture, but any full-fat milk works. I grab mine from Whole Foods or Trader Joe’s—look for the latest expiration date. The starter yogurt needs live cultures (check the label). Fage or Siggi’s are reliable. Don’t use Greek yogurt as your starter—it’s too thick to distribute properly.
No yogurt starter? A splash of buttermilk works too. Want it thicker? Add a teaspoon of unflavored gelatin (bloomed in cold water) before fermenting. The sugar is optional but balances the tang—maple syrup or agave can swap in. For the fruit topping, use whatever’s in season (berries hold up best).
This keeps for 10-14 days in the fridge. The tang gets stronger the longer it sits. Portion into jars for grab-and-go breakfasts. Freezes for 1 month if you want to stock up (stir well after thawing).
Why You’ll Love This Recipe
- Set and Forget: I toss everything in the pot, press a button, and walk away—no stirring, no fuss.
- Vanilla Honey Bliss: The warm vanilla and honey swirl through the creamy yogurt like a cozy hug in a jar.
- Breakfast or Dessert: Honestly, I slather it on toast in the morning and drizzle it over fruit for dessert.
- Pocket Change Treat: A gallon of milk and a spoonful of yogurt starter makes a week’s worth for less than a coffee.
Step-by-Step Instructions for Quick Pot Yogurt
Here’s my streamlined method that delivers rich, velvety yogurt with minimal hands-on time.
Step 1: Prepare and Heat the Whole Milk
Pour all 8 cups Whole Milk into your quick pot. I always use full-fat for the creamiest texture, as the fat content contributes significantly to the final richness. Secure the lid and set the pot to the “Boil” function.
Allow the milk to heat until it reaches 180°F—you’ll see steam rising and tiny bubbles forming around the edges. This step pasteurizes the milk, creating the ideal environment for the cultures to thrive. Watch carefully; you don’t want it to boil over.
Step 2: Cool the Milk to the Perfect Temperature
Once heated, remove the inner pot and let the milk cool to 110-115°F. I speed this up by placing the pot in a sink filled with 4 cups Water and ice, stirring occasionally. This temperature range is critical—too hot will kill the cultures, too cool won’t activate them properly.
Use a clean thermometer to check the temperature. When it hits 115°F, you’ll notice the milk feels warm but not hot to the touch, like a comfortable bath. If you accidentally cool it too much, simply reheat briefly to reach the target temperature.
Step 3: Incorporate the Starter and Sweeten
Whisk in all 0.25 cup Plain Yogurt with live active cultures until fully dissolved. This is your starter—the heart of the fermentation process. Then add 1 tbsp Granulated Sugar and 1 tsp Vanilla Extract for a touch of sweetness and depth of flavor.
Stir gently but thoroughly to distribute the cultures evenly. You should see the mixture become slightly frothy on top. Pour this into clean, sterilized jars or back into the quick pot insert. The sugar isn’t strictly necessary, but I find it balances the tang beautifully.
Step 4: Ferment for Thick, Creamy Yogurt
Place the jars or inner pot back into the quick pot. Set to “Yogurt” mode for 8-10 hours. The longer it ferments, the tangier and thicker it becomes. I typically go for 9 hours for that perfect balance of creaminess and mild tang.
Resist the urge to check or stir during this time. The cultures need a stable environment to work their magic. You’ll know it’s working when you see the mixture starting to set around the edges after the first few hours.
Step 5: Chill and Serve with Toppings
After fermentation, transfer the jars to the refrigerator and let them chill for at least 4 hours. This stops the fermentation process and allows the yogurt to thicken further. The texture will transform from a loose custard to a firm, spoonable consistency.
Serve cold, topped with 2 tbsp Honey and 1 cup Fresh Fruit for a refreshing contrast. The honey adds a natural sweetness that pairs beautifully with the tart yogurt, while the fresh fruit provides a burst of color and texture. This makes about 4 servings of the creamiest homemade yogurt you’ve ever tasted.
Pro Tips For Making Quick Pot Yogurt
- Warm the Milk Slowly: Heat the whole milk to 180°F over medium-low heat—any faster and you risk scorching the bottom, which ruins the texture.
- Use Fresh Starter: Always use plain yogurt with live cultures that’s less than a week old; I learned this the hard way after my first batch failed with expired starter.
- Skip the Metal Spoon: Stir with a wooden or silicone spoon when mixing in the starter—metal can react with the acidity and give your yogurt a weird taste.
- Sweeten After Incubating: Add sugar, honey, or vanilla only after the yogurt sets—sweetening before incubation can interfere with the bacterial fermentation process.
Essential Equipment for This Recipe
Quick Pot Selection
The Instant Pot Duo is my go-to for this recipe—its consistent temperature control and dedicated yogurt function make it foolproof. I’ve also had great results with the Ninja Foodi, which offers similar precision. Look for models with at least 6-quart capacity to handle the 8 cups Whole Milk volume.
Thermometer Essentials
A reliable digital instant-read thermometer is non-negotiable for checking the 180°F heating and 110-115°F cooling stages. I use the ThermoWorks ThermoPop—it’s accurate within 1°F and responds in 3-4 seconds. Avoid cheap dial thermometers.
Jars and Containers
For fermentation, use wide-mouth mason jars (pint or quart size) or the quick pot’s inner pot if it fits. I prefer Ball or Kerr jars with new lids for airtight sealing. Sterilize them first by boiling for 10 minutes or running through a dishwasher cycle.
Cooling Setup
You’ll need a large bowl or sink for the ice bath to cool the milk quickly. I use a stainless steel mixing bowl that fits the inner pot perfectly. Have 4 cups Water and plenty of ice on hand—this step can’t wait.
Whisk and Utensils
A balloon whisk ensures smooth incorporation of the 0.25 cup Plain Yogurt starter. Avoid wooden spoons as they can harbor bacteria. Also keep a ladle and clean towels nearby for transferring the milk.
Optional Thickener
If you prefer Greek-style thickness, have cheesecloth or a fine-mesh strainer ready for straining after fermentation. This removes excess whey for a denser texture. 💡
Nutrition Facts
Frequently Asked Questions
Can I use low-fat milk instead of whole?
Yes, but the texture will be thinner. Whole milk’s fat content creates that rich, creamy consistency. For best results, stick with whole milk. If using low-fat, add 1/4 cup powdered milk to boost thickness.
How do I know when fermentation is complete?
The yogurt will pull away from the jar edges and look set, like firm custard. A clean spoon inserted should come out with yogurt clinging to it. Fermenting for 8-10 hours ensures proper tang and thickness.
Can I make this without a yogurt button?
Use the “Keep Warm” function or maintain 110-115°F with an oven light on. Check temperature often to ensure it stays in the right range for proper culture growth.
Why did my yogurt turn out runny?
This usually means the milk was too cool when adding the starter or fermentation was too short. Ensure milk reaches 110-115°F before adding cultures and ferment for the full 8-10 hours.

- 6 Oz Chocolate Chip Cookie Recipe: Perfectly Balanced Crispy Edges and Chewy Hearts - September 25, 2026
- 6-Inch Coffee Cake Recipe: Vanilla Bean Swirls and Buttery Streusel Topping - September 25, 2026
- 1 Hour Soup Recipe: Velvety Richness Without the Wait - September 25, 2026