
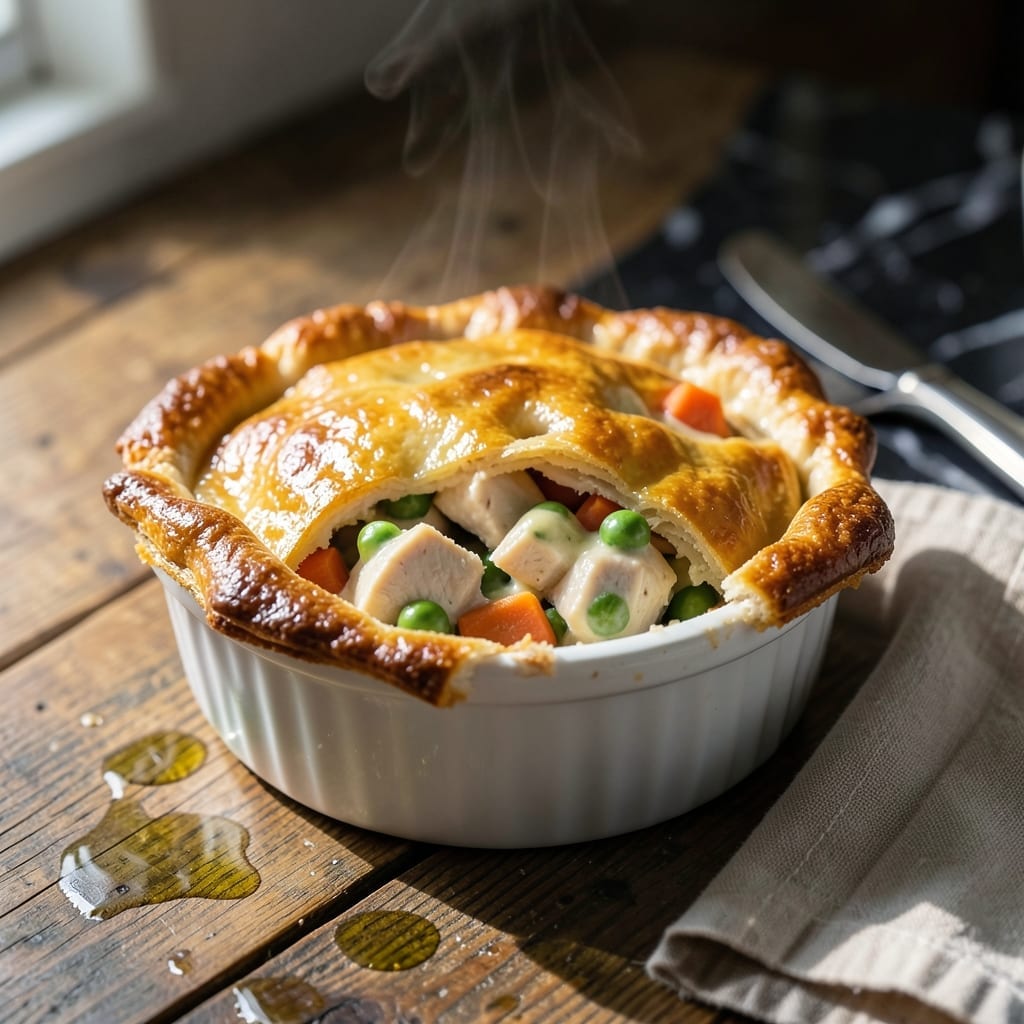
There’s something deeply satisfying about a golden-crusted pot pie, especially when it’s perfectly portioned for one. This recipe delivers all the warmth of the classic dish in an individual ramekin, making it ideal for cozy dinners or elegant presentations.
The beauty lies in its simplicity: a flaky crust encasing tender vegetables and rich, creamy filling. Each bite offers the same comforting flavors you love, but with the convenience of single-serving portions. The ramekin ensures even cooking and a perfect crust-to-filling ratio.
What sets this version apart is its versatility. You can customize the filling with your favorite proteins or seasonal vegetables while maintaining that signature comfort factor. The individual size also means everyone gets their own crispy, buttery top.
Ready in under an hour, this dish proves that great things truly do come in small packages. Here’s how to make it.
Ingredients for Ramekin Pot Pie
Flaky crust, tender filling, and cozy flavors in every individual ramekin portion.
| Ingredient | Amount | Notes |
|---|---|---|
| All-Purpose Flour 🌾 | 2 cups | Plus extra for dusting surface |
| Unsalted Butter 🧈 | ¾ cup | Cold and cubed for flakiness |
| Ice Water 💧 | ¼ cup | Plus extra as needed |
| Salt 🧂 | ½ tsp | Divided between crust and filling |
| Black Pepper 🌶️ | ¼ tsp | Freshly ground preferred |
| Chicken Breast 🍗 | 1 lb | Boneless, skinless, diced small |
| Carrots 🥕 | 2 whole | Peeled and diced small |
| Celery Stalks 🌿 | 2 whole | Diced small for texture |
| Yellow Onion 🧅 | 1 whole | Finely diced for even cooking |
| Garlic Cloves 🧄 | 2 cloves | Minced for aromatic base |
| Frozen Peas 🌱 | ½ cup | No need to thaw first |
| Chicken Broth 🍲 | 1 ¼ cups | Low-sodium preferred for control |
| Heavy Cream 🥛 | ½ cup | Full-fat for richness |
| Fresh Thyme Leaves 🌿 | 1 tbsp | Or 1 tsp dried thyme |
| Store-Bought Pie Crust 🥧 | 1 sheet | Or homemade if preferred |
The crust is everything here. Cold butter and ice water are non-negotiable for that flaky, golden finish. I always use Kerrygold for the butter—it’s got that rich, slightly tangy flavor that makes the crust taste next-level. For the all-purpose flour, King Arthur is my go-to (the good stuff, not the pre-sifted kind). The chicken should be fresh, not pre-cooked, so it stays juicy in the filling.
No fresh thyme? Dried thyme at one-third the amount works just fine. Swap the chicken for turkey or even mushrooms if you want a veggie version. Frozen mixed vegetables can replace the individual veggies in a pinch (the peas, carrots, and celery kind). Heavy cream is ideal, but half-and-half or whole milk gets you close. Skip the pre-diced mirepoix—it’s worth the extra minute to chop fresh.
The filling actually tastes better the next day once the flavors meld. Keeps 3-4 days in the fridge, reheats beautifully. You can freeze unbaked ramekins for up to 2 months (just thaw overnight before baking). Always bake on a sheet pan—catches any overflow and ensures even browning.
Why You’ll Love This Recipe
- Minimal Effort: I mix the flour, butter, and ice water in one bowl—no fancy techniques, just a flaky crust that comes together in minutes.
- Buttery Perfection: That golden crust made with real butter and a pinch of salt? It’s the kind of comfort I crave on chilly evenings.
- Portion Control: These individual ramekins mean I can bake just what I need, or prep a batch for easy grab-and-go lunches.
- Budget Friendly: All-purpose flour and butter keep it simple and affordable, and I’ll be real: it tastes way better than store-bought.
Step-by-Step Instructions for Ramekin Pot Pies
These individual portions deliver all the cozy appeal of classic pot pie with perfect crust-to-filling ratio.
Step 1: Prepare the Flaky Crust Topping
In a food processor, pulse the 2 cups All-Purpose Flour with 0.5 tsp Salt to combine. Add the 0.75 cup Unsalted Butter (cold and cubed) and pulse until the mixture resembles coarse crumbs with pea-sized butter pieces visible.
With the processor running, drizzle in the 0.25 cup Ice Water 1 tablespoon at a time until the dough just begins to come together. It should look shaggy but hold when pressed. Turn onto a lightly floured surface, divide into 4 equal portions, flatten into discs, wrap in plastic, and chill for 30 minutes while you prepare the filling.
Step 2: Sauté the Aromatic Base
In a large skillet over medium heat, melt 2 tablespoons of the reserved butter. Add the yellow onion (finely diced), carrots (peeled and diced small), and celery stalks (diced small). Cook for 5-7 minutes until the vegetables soften and the onion becomes translucent.
Add the minced garlic cloves and 1 tbsp Fresh Thyme Leaves, stirring for 30 seconds until fragrant. This builds the flavor foundation that makes the filling taste rich and complex. Be careful not to let the garlic brown—it should just release its aroma.
Step 3: Create the Creamy Chicken Filling
Increase heat to medium-high and add the diced chicken breast to the skillet. Cook for 5-6 minutes until the chicken is no longer pink and begins to brown lightly. Sprinkle with 0.25 tsp Black Pepper as it cooks.
Pour in the 1.25 cups Chicken Broth and 0.5 cup Heavy Cream, scraping up any browned bits from the bottom. Stir in the frozen peas (no need to thaw first). Simmer for 3-4 minutes until the mixture thickens slightly and coats the back of a spoon. Taste and adjust seasoning if needed.
Step 4: Assemble and Bake the Individual Pies
Divide the warm filling evenly among four 10-ounce ramekins. Roll out each chilled dough portion on a lightly floured surface to fit the ramekin tops. Place the dough over each ramekin, crimping the edges to seal. Cut a small slit in the center of each crust to allow steam to escape.
Bake at 375°F for 25-30 minutes until the crusts are golden brown and the filling is bubbling. The crust should be flaky and crisp, with the edges just beginning to pull away from the ramekin sides. Let cool for 5 minutes before serving—this gives the filling time to set slightly.
Pro Tips For Making Ramekin Pot Pie
- Chill the Dough: After mixing the flour, butter, and ice water, let the dough rest in the fridge for at least 30 minutes—this keeps the butter from melting too soon and guarantees a flaky crust.
- Use Ice-Cold Water: I learned this the hard way: warm water makes tough pastry. Stick to ice water to keep the butter solid and the texture perfect.
- Don’t Overwork It: Mix just until the dough comes together—over-handling develops gluten, and you’ll end up with a chewy, dense crust instead of a tender one.
- Salt the Flour: Add the salt directly to the flour before cutting in the butter. It distributes evenly and seasons the crust from the inside out.
Health Benefits of ramekin pot pie
Nutrient-Packed Vegetables
The carrots and celery in this dish provide dietary fiber and vitamin A, supporting digestion and eye health. Each ramekin delivers a serving of vegetables in a delicious, approachable format. I love how these ingredients make comfort food nutritious too. 💪
Lean Protein Boost
The chicken breast offers high-quality protein—about 25 grams per ramekin—essential for muscle repair and satiety. Unlike fried versions, this baked dish keeps the protein lean while delivering that comforting, hearty feel you crave in a pot pie.
B Vitamin Rich
Both chicken and peas are excellent sources of B vitamins, including B6 and niacin, which help convert food into energy. These nutrients also support brain function, making this meal as smart as it is delicious.
Calcium and Vitamin D
The heavy cream contributes calcium for bone health, while the butter in the crust provides a small dose of vitamin D. Together, they help maintain strong bones and teeth, adding nutritional value to every bite.
Antioxidant Herbs
Fresh thyme contains antioxidants like thymol, which support immune health. Even small amounts, like the 1 tablespoon used here, contribute to your daily intake. It’s a simple way to boost wellness without sacrificing flavor. ✨
Nutrition Facts
Frequently Asked Questions
Can I make these ahead of time?
Assemble the pies, cover, and refrigerate for up to 24 hours before baking. Or freeze unbaked ramekins for up to 2 months. Add 5-10 minutes to the bake time if cooking from frozen.
What if my crust isn’t browning?
If the tops aren’t golden after 25 minutes, brush with a little beaten egg or milk and return to the oven. Broil for 1-2 minutes at the end for extra color, watching closely to avoid burning.
Can I use store-bought crust?
Yes! Use 1 sheet of pie crust, cut into 4 rounds to fit your ramekins. For extra flakiness, brush the tops with melted butter before baking.
How do I prevent a soggy bottom?
Prevent sogginess by preheating your ramekins in the oven for 5 minutes before adding the filling. Also, ensure your filling is thick and not watery before assembling.

- 4C Bread Crumbs Meatballs Recipe: Crispy Crust and Juicy Centers - September 25, 2026
- 6 Oz Chocolate Chip Cookie Recipe: Perfectly Balanced Crispy Edges and Chewy Hearts - September 25, 2026
- 6-Inch Coffee Cake Recipe: Vanilla Bean Swirls and Buttery Streusel Topping - September 25, 2026