
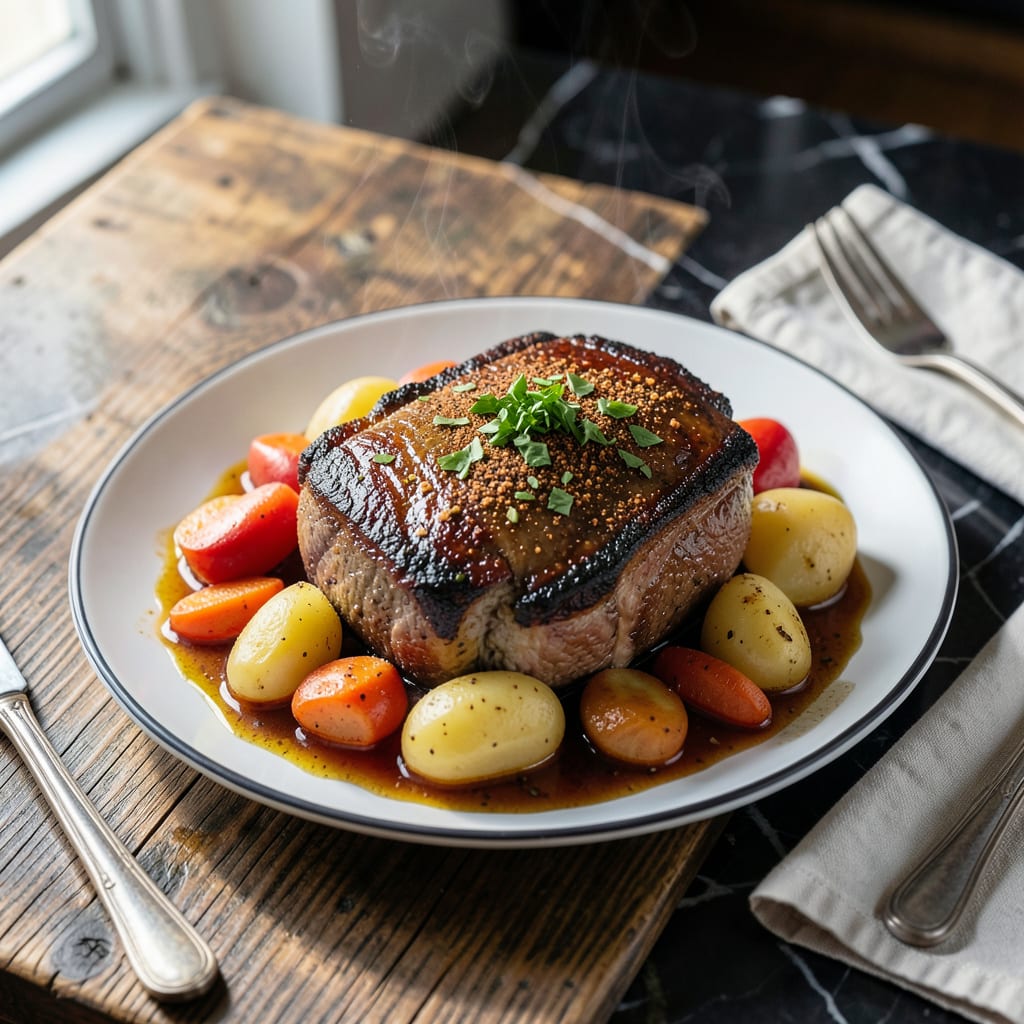
This Dutch oven pot roast transforms tough cuts into melt-in-your-mouth perfection with bold spices and slow cooking. The method is simple but precise, ensuring every bite delivers deep, rich flavor.
I’ve refined this recipe to balance tenderness with a robust crust, creating a dish that feels special yet approachable. The Dutch oven locks in moisture while the spices build layers of taste you won’t forget.
Ingredients for Recipe Rebel Pot Roast
Bold spices and a Dutch oven are all you need for this showstopper.
| Ingredient | Amount | Notes |
|---|---|---|
| Chuck Roast 🥩 | 3 lb | Well-marbled, boneless preferred |
| Kosher Salt 🧂 | 2 tsp | Diamond Crystal preferred |
| Black Pepper 🌶️ | 1 ½ tsp | Freshly ground preferred |
| Smoked Paprika 🌶️ | 2 tsp | For bold, deep flavor |
| Garlic Powder 🧄 | 1 ½ tsp | Not garlic salt |
| Onion Powder 🧅 | 1 ½ tsp | Adds savory depth |
| Dried Thyme 🍃 | 1 tsp | Crushed between fingers |
| Dried Rosemary 🌿 | 1 tsp | Crushed between fingers |
| Olive Oil 🫒 | 2 tbsp | Divided for searing and cooking |
| Yellow Onion 🧅 | 1 whole | Large, roughly chopped |
| Carrots 🥕 | 4 whole | Peeled, cut into chunks |
| Celery Stalks 🥬 | 3 whole | Cut into large pieces |
| Beef Broth 🥣 | 2 cups | Low-sodium preferred |
| Red Wine 🍷 | 1 cup | Bold, dry variety |
| Tomato Paste 🍅 | 2 tbsp | For richness and depth |
[recipeingredientscaler]
The chuck roast is non-negotiable here—look for good marbling (those white fat streaks mean flavor and tenderness). Most grocery stores have it pre-cut, but ask the butcher for a whole piece if you want to control the size. Costco has great prices for larger roasts if you’re feeding a crowd. The spices? Penzeys or McCormick both work—just make sure they’re fresh.
No red wine? Beef broth with a splash of balsamic vinegar gets you 90% there. Fresh out of tomato paste? Ketchup in a pinch (use half the amount). The herbs can be swapped—fresh rosemary and thyme at double the quantity if you’ve got them. For the broth, Better Than Bouillon is my go-to for depth without the salt overload.
Leftovers taste even better the next day. Store in the fridge for up to 4 days or freeze for 3 months. Reheat gently on the stove with a splash of water to keep it juicy. That crust? Worth saving for sandwiches.
Why You’ll Love This Recipe
- I’ll be real: the flavors taste even better the next day in sandwiches or over mashed potatoes.
- Set and Forget: I toss the chuck roast with salt, pepper, and smoked paprika, then let the slow cooker do the work.
- Smoky Depth: The smoked paprika and garlic powder give it this rich, layered flavor that’s way more interesting than plain roast.
- Feeds the Crew: One pot, one meal—perfect for Sunday dinners or when I need to stretch a budget.
Step-by-Step Instructions for Dutch Oven Pot Roast
This method transforms tough cuts into fall-apart tender perfection with minimal effort.
Step 1: Season and Sear the Chuck Roast
Pat the 3 lb Chuck Roast dry with paper towels—this is non-negotiable for a good sear. Rub it all over with the 2 tsp Kosher Salt, 1.5 tsp Black Pepper, 2 tsp Smoked Paprika, 1.5 tsp Garlic Powder, 1.5 tsp Onion Powder, 1 tsp Dried Thyme, and 1 tsp Dried Rosemary.
Heat 1 tbsp Olive Oil in a Dutch oven over medium-high heat until shimmering. Sear the roast on all sides for 3-4 minutes per side until deeply browned. You’ll know it’s ready to flip when it releases easily from the pot. Transfer to a plate.
Step 2: Sauté the Aromatics and Deglaze
In the same pot, add the remaining 1 tbsp Olive Oil. Toss in the roughly chopped Yellow Onion, 4 whole Carrots (peeled and chunked), and 3 whole Celery Stalks (cut into large pieces). Cook for 5 minutes, stirring occasionally, until the onion starts to soften and brown.
Stir in the 2 tbsp Tomato Paste and cook for 1 minute until it darkens slightly. Pour in the 1 cup Red Wine, scraping up all the browned bits from the bottom—this is where the flavor lives. Let it simmer for 2 minutes until the liquid reduces by half.
Step 3: Braise Until Fork-Tender
Return the seared roast to the pot. Pour in the 2 cups Beef Broth—it should come about halfway up the meat. Bring to a simmer, then cover and transfer to a preheated 325°F oven. Braise for 2.5 to 3 hours until the meat is fork-tender.
Check at the 2.5-hour mark—if a fork doesn’t slide in with zero resistance, give it more time. The liquid should be bubbling gently, not boiling. If it’s too low, add a splash of broth or water.
Step 4: Rest and Serve
Carefully transfer the roast to a cutting board. Skim any excess fat from the braising liquid, then arrange the carrots, celery, and onion around the meat. Tent loosely with foil and let rest for 15 minutes—this keeps it juicy.
Slice or shred the roast against the grain and serve with the vegetables and braising liquid spooned over the top. The sauce should be rich, slightly thickened, and packed with the deep flavors of the spices and wine. This is comfort food at its finest.
Pro Tips For Making Recipe Rebel Pot Roast
- Sear the Chuck: I learned this the hard way—sear that chuck roast on all sides in a screaming hot pan with a little oil until it’s deeply browned. Sounds like extra work, but it builds the flavor base that makes this pot roast taste like it simmered all day in a fancy restaurant kitchen.
- Season Aggressively: Don’t be shy with the kosher salt, black pepper, and smoked paprika. I used to under-season and ended up with bland meat; now I coat the roast like I’m dusting it for fingerprints, especially with the smoked paprika for that signature depth.
- Don’t Rush the Braise: After browning, let it cook low and slow—think 3 to 4 hours at 325°F. I tried speeding it up once with higher heat, and the meat turned out tough and stringy. Patience is the thing that matters most here.
- Add Liquid Last: Sounds weird, but it works: deglaze the pan with just a cup of beef broth or water after searing, then add the roast back in. This keeps the spices from washing away and creates a richer sauce without diluting the flavors.
Flavor Customization for These Flavors
Spice Level Adjustments
For a milder version, reduce the smoked paprika to 1 tsp and use sweet paprika instead. I often do this when cooking for kids or sensitive palates. It still delivers depth without the boldness. 💡
Herb Variations
Swap the dried thyme and rosemary for 1 tsp dried oregano and 1 tsp dried sage for an Italian-inspired twist. Fresh herbs work too—just double the quantity and add them at the end.
Liquid Swaps
Replace the red wine with 1 cup apple cider for a sweeter, fruitier profile. Or use 1 cup dark beer for a malty depth—Guinness works wonderfully here. Both options still build rich flavor.
Vegetable Options
Add 2 sliced parsnips with the carrots for extra sweetness, or swap celery for 1 fennel bulb (chopped) for a subtle licorice note. I love adding 8 oz mushrooms for an earthy touch. 🌟
Crust Enhancement
For an extra-flavorful crust, add 1 tbsp brown sugar or 1 tbsp coffee grounds to the spice rub. Both create a deeper, more complex sear that pairs beautifully with the Dutch oven method.
Sauce Boost
Stir 1 tbsp balsamic vinegar or 1 tbsp soy sauce into the braising liquid before serving. This adds a tangy or umami punch that elevates the entire dish to restaurant-level richness.
Nutrition Facts
Frequently Asked Questions
Can I use a different cut of beef?
Stick with tough, well-marbled cuts like brisket or round roast for best results. Chuck is ideal because the fat renders down during the long 2.5-3 hour braise, creating that signature tenderness.
What if I don’t have a Dutch oven?
A heavy pot with a tight lid works too. Just ensure it’s oven-safe up to 325°F. For stovetop only, use low heat and check liquid levels more often.
How do I know when it’s done?
Test with a fork at the 2.5-hour mark. It should slide in with zero resistance. If not, give it more time—the meat won’t dry out at this temperature.

- 4C Bread Crumbs Meatballs Recipe: Crispy Crust and Juicy Centers - September 25, 2026
- 6 Oz Chocolate Chip Cookie Recipe: Perfectly Balanced Crispy Edges and Chewy Hearts - September 25, 2026
- 6-Inch Coffee Cake Recipe: Vanilla Bean Swirls and Buttery Streusel Topping - September 25, 2026