
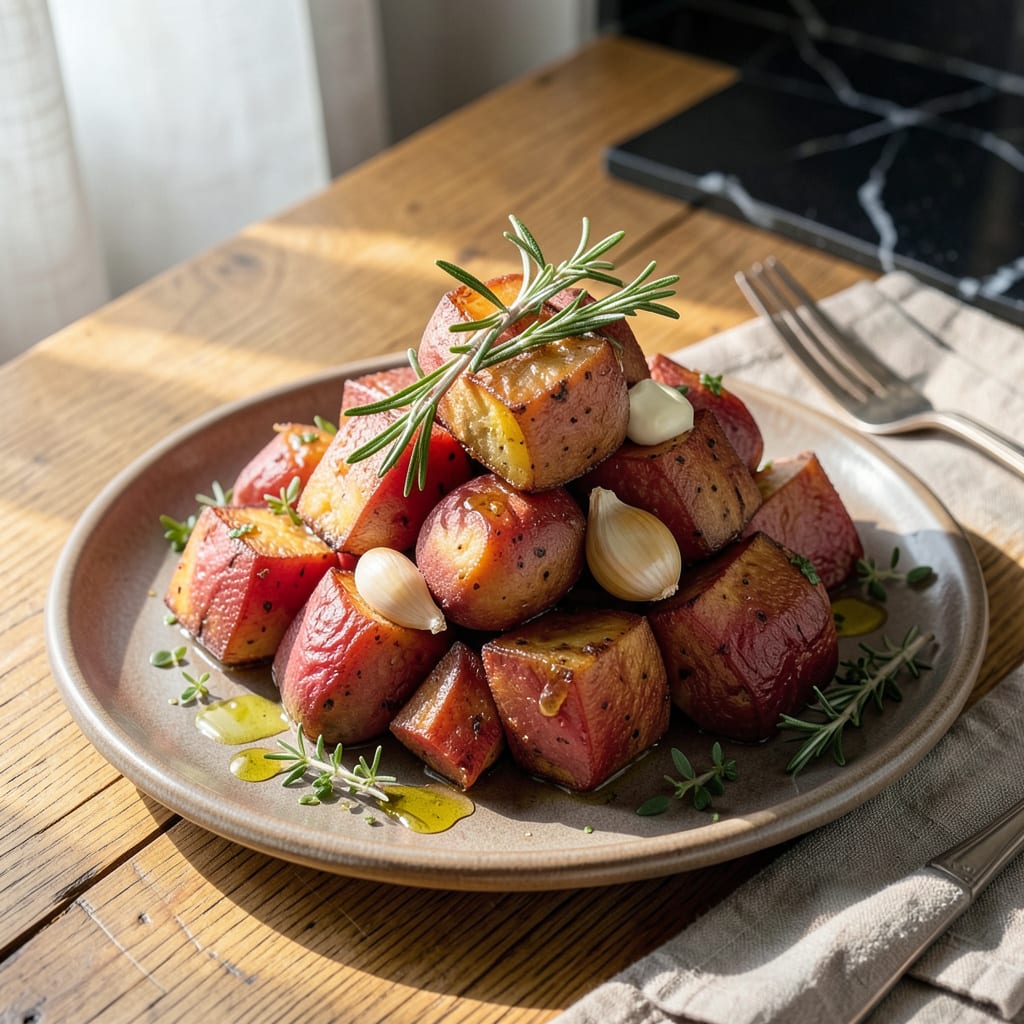
Cooking red potatoes in the microwave delivers fluffy, tender results in a fraction of traditional cooking time. This method preserves the potatoes’ natural texture and nutrients while eliminating the need for boiling or roasting. Perfect for busy weeknights when you need a reliable side dish without the hassle.
The process is straightforward: minimal prep, precise microwave timing, and a simple seasoning approach. You’ll achieve evenly cooked potatoes with a buttery finish, ready to serve as-is or customized with your favorite toppings. Cleanup is effortless, making this a practical solution for any meal.
Ingredients for Red Potatoes in Microwave
Just a handful of pantry staples transforms these red potatoes into something extraordinary in minutes.
| Ingredient | Amount | Notes |
|---|---|---|
| Red Potatoes 🥔 | 1 ½ lb | Small, uniform size preferred |
| Extra-Virgin Olive Oil 🫒 | 2 tbsp | Cold-pressed for best flavor |
| Vegan Butter 🧈 | 3 tbsp | Melted, unsalted preferred |
| Garlic Cloves 🧄 | 3 cloves | Minced for even distribution |
| Fresh Rosemary 🌿 | 1 tbsp | Finely chopped (or 1 tsp dried) |
| Fresh Thyme 🌿 | 1 tbsp | Leaves stripped from stems |
| Sea Salt 🧂 | 1 tsp | Flaky variety preferred |
| Freshly Ground Black Pepper 🌶️ | ½ tsp | Coarsely ground for texture |
| Smoked Paprika 🌶️ | ½ tsp | Optional, for depth of flavor |
| Lemon Zest 🍋 | 1 tsp | Freshly grated, for brightness |
| Filtered Water 💧 | 2 tbsp | For steam, if needed |
[recipeingredientscaler]
The potatoes are the star here—small, uniform red potatoes (about 1.5 inches in diameter) cook most evenly. I grab mine from Trader Joe’s or the local farmers market when they’re in season. Look for firm potatoes with smooth, vibrant red skin (no green spots or sprouts). The vegan butter makes all the difference—Miyoko’s or Earth Balance are my go-tos for that rich, buttery finish without dairy. Don’t skip the fresh herbs; they add layers of flavor that dried just can’t match (though dried will work in a pinch).
No fresh rosemary or thyme? Dried herbs at half the amount work fine, or swap in dried oregano for a different profile. Short on time? Pre-minced garlic from a jar saves a step, though fresh is always better. If you’re out of vegan butter, extra-virgin olive oil can replace it 1:1—just watch the microwave time since oil heats differently. The smoked paprika is optional but adds a wonderful depth; if you don’t have it, a pinch of cayenne gives a different kind of warmth.
These potatoes reheat beautifully—store leftovers in an airtight container for up to 5 days. They’re best warmed gently in the microwave (30-second bursts) to avoid drying out. The cooked potatoes freeze well for 2 months if you spread them on a tray first to freeze individually. I like to make a double batch on Sundays for easy weeknight sides. The herbs can be prepped ahead too—just store chopped rosemary and thyme in a damp paper towel in the fridge for 2-3 days.
Why You’ll Love This Recipe
- I’ll be real: the best part is skipping the peeler. Just scrub those red potatoes, chop them into bite-sized chunks, and let the microwave do the work—skin-on means more fiber and that satisfying earthy texture.
- No Peeling Required: I’ll be real: the best part is skipping the peeler. Just scrub those red potatoes, chop them into bite-sized chunks, and let the microwave do the work—skin-on means more fiber and that satisfying earthy texture.
- Garlic-Rosemary Magic: That moment when the minced garlic and fresh rosemary hit the hot vegan butter? It’s ridiculous. The microwave steams the potatoes just enough to soak up every bit of that herby, garlicky oil—crisp edges, creamy centers, no sad spuds here.
- My 11 a.m. Lunch Hack: Between us, this is my work-from-home power move. Ten minutes in the microwave, a quick toss with the oil and herbs, and I’ve got a warm, filling lunch that beats sad desk salads. (Yes, even on a Tuesday night when I’m too tired to oven-roast.)
Step-by-Step Instructions for Red Potatoes in Microwave
Here’s the method I’ve perfected for achieving restaurant-quality results in minutes.
Step 1: Prepare the Potatoes for Even Cooking
Start by thoroughly scrubbing the red potatoes under cool running water to remove any dirt. I prefer to leave the skins on for texture and nutrients, but make sure they’re completely clean. Cut the potatoes into uniform 1-inch cubes—this ensures they cook evenly in the microwave. The size matters here: too large and they won’t cook through, too small and they’ll turn mushy.
Place the cubed potatoes in a large microwave-safe bowl. Add the 2 tablespoons extra-virgin olive oil and toss until every piece is evenly coated. This initial coating prevents the potatoes from drying out during microwaving and helps the seasonings adhere better in the next step.
Step 2: Season and Infuse with Flavor
To the oiled potatoes, add the minced garlic cloves, fresh rosemary, and fresh thyme. Sprinkle evenly with the sea salt, freshly ground black pepper, and smoked paprika. I like to finish with the lemon zest—this brightens all the flavors. Toss everything together until the potatoes are uniformly coated with the herb mixture.
The key here is even distribution. I use my hands for this step (clean hands, of course) because you can really feel when every potato piece has been properly seasoned. The herbs should cling to the olive oil coating, not pool at the bottom of the bowl. This is where most of your flavor development happens, so take your time with this step.
Step 3: Microwave with Precision Timing
Cover the bowl with a microwave-safe lid or damp paper towel. This creates steam, which is essential for even cooking. Microwave on high power for 8 minutes. After this initial cooking time, carefully remove the bowl (it will be hot) and stir the potatoes. You’re looking for them to be fork-tender but not falling apart.
Return the bowl to the microwave and cook for an additional 4-6 minutes, depending on your microwave’s wattage. The potatoes are done when a fork slides in easily with just slight resistance. If they seem dry at this point, add the 2 tablespoons filtered water, cover, and microwave for 1 more minute to create steam and restore moisture.
Step 4: Finish with Vegan Butter for Richness
Once the potatoes are perfectly tender, add the 3 tablespoons vegan butter to the hot potatoes. The residual heat will melt it beautifully. Gently fold everything together until the butter is fully incorporated and the potatoes have a glossy sheen. This final step adds incredible richness and helps all the flavors meld together.
Let the potatoes rest for 2-3 minutes before serving. This brief resting period allows the flavors to deepen and the butter to fully coat each piece. The texture should be creamy on the inside with just a slight bite, and all the herbs should be evenly distributed throughout. Serve immediately while warm for the best flavor and texture.
Common Mistakes When Making Perfect Results
Uneven Cutting
The biggest mistake I see is cutting potatoes into inconsistent sizes. Remember, 1-inch cubes are ideal—any larger and the centers stay raw while smaller pieces turn to mush. I use a ruler the first few times until I get the hang of it. Grab a sharp chef’s knife (I love my Wüsthof 8-inch) for clean cuts that don’t crush the potatoes. 💡
Skipping the Pierce
Even with cubed potatoes, you need to pierce each piece 2-3 times with a fork before microwaving. This prevents steam buildup that can cause explosions. I learned this the hard way when my first batch made a mess in the microwave! The holes don’t need to be deep—just enough to let steam escape during cooking.
Overcrowding the Bowl
Potatoes need space to cook evenly. Use a large microwave-safe bowl (at least 8 cups capacity) and don’t fill it more than halfway. I recommend cooking in batches if needed. Overcrowding leads to uneven cooking and soggy results. The potatoes should have room to be stirred midway through cooking.
Neglecting to Stir
Microwaves have hot spots, so stirring halfway is crucial. After the initial 8 minutes, gently stir the potatoes to expose different sides to the heat. I use a silicone spatula to avoid scratching my bowl. This simple step prevents some pieces from drying out while others remain undercooked.
Overcooking to Mush
Red potatoes should be fork-tender with slight resistance—not falling apart. Check at 12 minutes total (8 + 4), then in 1-minute increments. They’ll continue cooking slightly after removal. I test by piercing with a fork—it should slide in easily but not crumble the potato.
Skipping the Rest
That final 2-3 minute rest isn’t optional! It lets the vegan butter fully absorb and the flavors meld. I cover the bowl with a clean towel during resting to keep them warm. Serving immediately after microwaving means you’ll miss out on the creamiest texture and most balanced flavors. ✨
Nutrition Facts
Frequently Asked Questions
Why do I need to pierce the potatoes before microwaving?
Piercing creates tiny vents for steam to escape, preventing pressure buildup that could cause messy explosions. Use a fork to poke each 1-inch cube 2-3 times before cooking. This simple step keeps your microwave clean and ensures even cooking.
Can I use russet potatoes instead of red?
Red potatoes are ideal because their waxy texture holds up better in the microwave. Russets tend to become mealy and dry out faster. If substituting, reduce cooking time by 2 minutes and add 1 extra tablespoon of water to prevent drying.
How do I know when they’re perfectly done?
Test with a fork after 12 minutes total—it should slide in easily with slight resistance. The potatoes will continue cooking slightly after removal, so don’t wait until they’re falling apart. Look for a creamy interior with skins that hold their shape.
What’s the best way to reheat leftovers?
Place in a microwave-safe dish with 1 teaspoon of water and cover with a damp paper towel. Heat on 50% power for 1-2 minutes, stirring halfway. This gentle method prevents drying while restoring that just-cooked texture.
Can I make these crispy without an oven?
After microwaving, transfer to a dry skillet with 1 tablespoon olive oil over medium-high heat. Cook undisturbed for 3-4 minutes until golden. The microwave pre-cooks them perfectly for quick pan-crisping without drying out.

- 3 Dozen Deviled Eggs Recipe: Classic Bites With Creamy Yolk Magic - September 25, 2026
- 3-Ingredient Baked Chicken Wings Recipe: Crispy, Juicy, and Ready in 25 Minutes - September 25, 2026
- 1950s Deviled Eggs Recipe: Nostalgic Creamy Yolk Magic - September 25, 2026