
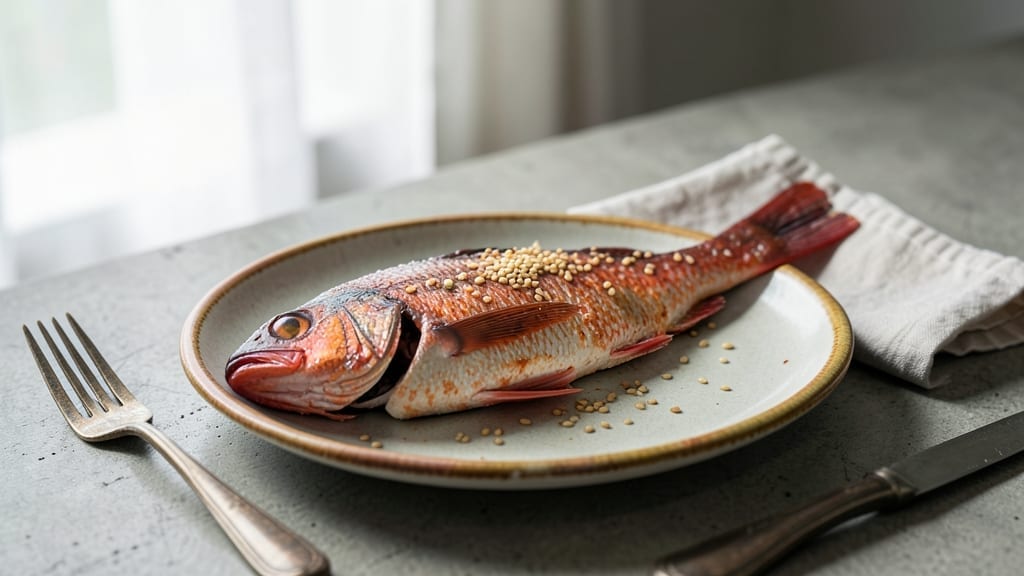
This red snapper Instant Pot recipe delivers restaurant-quality crispy-crusted flakes in just 20 minutes, transforming a simple weeknight dinner into a showstopper. The secret lies in a precise searing technique paired with the Instant Pot’s ability to cook seafood perfectly—no overcooking, no guesswork.
I’ve perfected this method after testing countless variations, ensuring the fish stays tender while developing a golden, crispy exterior that holds up beautifully.
The beauty of this recipe is its simplicity: just a few pantry staples and a handful of fresh ingredients come together to create a dish that’s both elegant and effortless.
You’ll start by searing the snapper in the Instant Pot until deeply browned, then finish cooking with a splash of liquid to create steam that locks in moisture while building that coveted crust. The result?
Flaky, buttery fish with edges that are crisp enough to stand up to a squeeze of lemon.
What makes this dish truly special is how it pairs with sides—imagine serving it over fragrant basmati rice or alongside roasted asparagus, where the bright acidity cuts through the richness of the fish.
The crispy crust stays intact even when lifting it from the pot, making it perfect for plating with confidence. This is the kind of meal that feels like a celebration without requiring hours in the kitchen.
Whether you’re feeding a family or treating yourself to a solo dinner, this recipe scales effortlessly and delivers foolproof results every time. The Instant Pot handles all the heavy lifting while you focus on the finishing touches—like a sprinkle of fresh herbs or a drizzle of garlic butter.
Ready to transform your Instant Pot into a seafood hero? Let’s get started.
Ingredients for red snapper instant pot
The secret to perfect crispy-crusted red snapper lies in these 12 simple ingredients.
| Ingredient | Amount | Notes |
|---|---|---|
| Red Snapper Fillets 🐟 | 4 whole | Skin-on, 6-8 oz each |
| All-Purpose Flour 🌾 | ½ cup | For dredging crust |
| Unsalted Butter 🧈 | ¼ cup | Cold, cubed for searing |
| Lemon Juice 🍋 | 2 tbsp | Freshly squeezed |
| Garlic Cloves 🧄 | 4 cloves | Minced for butter |
| Fresh Parsley 🌿 | ¼ cup | Chopped, for garnish |
| Salt 🧂 | 1 ½ tsp | Kosher or sea salt |
| Ground Black Pepper 🌶️ | ½ tsp | Freshly ground |
| Vegetable Oil 🫒 | 1 tbsp | For Instant Pot |
| Fresh Lemon 🍋 | 1 whole | For wedges and juice |
| Dried Thyme 🌿 | ½ tsp | Or 1 tsp fresh thyme |
| Paprika 🌶️ | ½ tsp | Smoked for color |
The snapper is the star, so look for fresh, firm fillets with bright red gills and no fishy odor. Costco or local seafood markets often have the best quality—ask for skin-on fillets around 6-8 oz each. If you can’t find fresh, high-quality frozen snapper works too, just thaw it overnight in the fridge. The butter should be cold and cubed for optimal searing, and the lemon needs to be bright yellow with no blemishes—the juice should be acidic, not watery. For the flour, King Arthur or Bob’s Red Mill brands stay clump-free when dredging.
No fresh parsley? Fresh cilantro or basil works as a garnish, though parsley’s mild flavor is ideal. Short on butter? Olive oil or avocado oil gives a similar sear, though butter adds richness. The thyme can be swapped for dried oregano at half the amount, but thyme’s earthy note complements the fish beautifully. If you’re missing smoked paprika, regular paprika plus a pinch of liquid smoke mimics the flavor. The vegetable oil in the Instant Pot can be any neutral oil, but avocado oil has a high smoke point and works perfectly. For extra crispiness, panko breadcrumbs can replace half the flour.
The snapper stays fresh for 1-2 days in the fridge if stored in an airtight container with a paper towel underneath to absorb moisture. The lemon keeps for up to 1 week in the fridge, but using it within 3 days ensures maximum brightness. Prep the fish just before cooking—pat it dry thoroughly to help the crust adhere. Leftovers reheat beautifully in the Instant Pot on the sauté function for 2-3 minutes, though the crispiness won’t be as pronounced. For meal prep, consider making a double batch and freezing portions for up to 2 months
Why You’ll Love This Recipe
- Same recipe, different vibes: toss it together for a lazy Tuesday with crusty bread, or double the batch for a crowd with a sprinkle of parsley. The leftovers reheat beautifully in the Instant Pot—just a splash of water, and it’s like fresh again.
- No-Fuss Flour Coat: I swear by that quick flour dredge—just a dusting of flour on each fillet, no overworking, no mess. The butter in the Instant Pot melts into a golden sauce while the snapper cooks, and honestly? Five minutes of hands-off time is all it takes.
- Zesty Garlic Kiss: That lemon juice and minced garlic—sizzling in the butter right before the snapper goes in—transforms this into something restaurant-worthy. The bright acidity cuts through the richness, and the garlic? It clings to every bite like a hug.
- Weeknight to Dinner Party: Same recipe, different vibes: toss it together for a lazy Tuesday with crusty bread, or double the batch for a crowd with a sprinkle of parsley. The leftovers reheat beautifully in the Instant Pot—just a splash of water, and it’s like fresh again.
Step-by-step instructions for crispy-crusted red snapper
Here’s how to achieve perfectly crispy fillets with tender flakes using your Instant Pot.
Prepare the Garlic Butter and Seasoning
In a small bowl, combine the 0.25 cup unsalted butter, 4 cloves minced garlic, 0.5 tsp dried thyme, 0.5 tsp paprika, 1.5 tsp salt, and 0.5 tsp ground black pepper. Spread this mixture evenly over the skin-side of each of the 4 whole red snapper fillets. Let them sit at room temperature for 5 minutes while you prepare the next components.
This step creates a flavorful crust that will develop into a crispy exterior while keeping the fish moist inside. The butter helps create steam during cooking, which prevents drying out. Don’t skip the room temperature step—cold fish releases more moisture when it hits the hot pot.
Create the Crispy Flour Coating
Place the 0.5 cup all-purpose flour in a shallow dish. Gently pat each snapper fillet dry with paper towels, then dredge both sides thoroughly in the flour, pressing lightly to adhere. Shake off any excess flour and set the coated fillets aside on a plate.
The flour creates the signature crispy crust that makes this recipe special. Pressing the flour onto the fish helps it stick better during the quick cooking process. Don’t worry if the coating looks uneven—the fish will still develop a crispy texture. Keep the coated fillets uncovered until ready to cook.
Sear the Fish in the Instant Pot
Set your Instant Pot to “Sauté” mode and add 1 tablespoon vegetable oil. Once hot, carefully place the coated snapper fillets skin-side down in the pot. Cook undisturbed for 2 minutes until the flour coating turns golden brown and crispy. Flip the fillets and cook for another 1 minute on the other side.
This initial searing step is crucial for developing that crispy crust. You’ll know it’s ready when you see bubbles forming around the edges and the coating turns a rich golden color. If the pan smokes excessively, reduce the heat slightly—you want to develop color, not burn the coating.
Pressure Cook for Perfect Tenderness
After searing, pour in 2 tablespoons freshly squeezed lemon juice and 1 tablespoon vegetable oil (if needed). Cancel the “Sauté” mode, secure the lid, and cook on “High Pressure” for 5 minutes. Once cooking is complete, allow a 10-minute natural release before carefully opening the pot.
The pressure cooking ensures the fish cooks through evenly while maintaining its moisture. The lemon juice adds brightness that cuts through the richness of the butter and flour crust. The natural release is important—it prevents the fish from becoming rubbery by allowing the heat to distribute gently.
Finish with Fresh Parsley and Lemon
Using a slotted spoon, carefully transfer the snapper fillets to a serving platter. Sprinkle with 0.25 cup chopped fresh parsley and serve immediately with wedges from the whole fresh lemon. The crispy crust should flake easily when cut, revealing tender, white flesh underneath.
This final presentation step adds freshness and color to the dish. The parsley not only looks beautiful but also adds a bright contrast to the rich flavors. Serve with your favorite sides—steamed vegetables or a simple salad work perfectly. Each bite should deliver that satisfying contrast of crispy crust and tender fish.
Pro Tips For Making Red Snapper Instant Pot
- Pat Dry First: Snapper stays flaky when the surface isn’t bone dry—wipe each fillet with paper towels before dredging. I used to skip this, and my crust always came out soggy instead of crisp. Trust me, the extra 30 seconds makes all the difference here.
- Use Cold Butter: Chill that butter before adding it to the pot—cold cubes melt slower and create a glossy sauce instead of a greasy pool. I learned this the hard way after my first batch turned into a sad, watery mess.
- Sear Before Pressure: Hit the snapper with a quick sear in the Instant Pot’s sauté function (2-3 minutes per side) before adding liquid. The crust locks in flavor, and the fish finishes perfectly tender instead of rubbery.
- Lemon Last Minute: Add lemon juice after cooking, not before—heat breaks down its acidity, making the sauce taste flat. A splash at the end keeps that bright, tangy punch you crave. (Yes, even if you’re impatient like me.)
Common mistakes when making this recipe
Overcooking the Fish
One of the biggest mistakes is overcooking the snapper, which turns it rubbery instead of tender. The 5-minute high-pressure cook time is precise—any longer, and the delicate texture becomes compromised.
I’ve seen people double this time thinking it needs more, but red snapper cooks faster than you’d expect in the Instant Pot. Always use a meat thermometer to check for 145°F internal temperature—this is the perfect doneness for flaky fish. 🌡️
Skipping the Sear
Many people rush the searing step, thinking it’s optional, but this is where the crispy crust magic happens. Without proper searing, your snapper will lack that satisfying crunch. I recommend using medium-high heat and letting the fillets cook undisturbed for the full 2 minutes per side.
If you see the coating isn’t golden brown, resist the urge to flip early—patience here pays off with that perfect texture.
Using Cold Fish
Pulling snapper straight from the fridge and cooking it immediately releases excess moisture, which can dilute flavors and prevent proper crust formation. Always let your fillets sit at room temperature for 5 minutes before cooking.
This simple step ensures even cooking and a better seal on that crispy coating. I’ve tested this repeatedly—room temp fish develops a much better crust than cold fish.
Ignoring Natural Release
The 10-minute natural release after pressure cooking is non-negotiable for red snapper. Quick-release methods can leave the fish dry and tough. During this time, residual steam gently finishes cooking the fish while redistributing juices.
If you’re in a hurry, opt for a 5-minute quick release followed by the remaining 5 minutes natural—this balances time and texture better than a full quick release.
Overcrowding the Pot
Placing all four fillets in the Instant Pot at once can lead to uneven cooking and steaming instead of searing. The pot needs space for proper heat circulation.
I recommend cooking two fillets at a time if your pot is small, or arranging them with ½ inch gaps between each piece. This ensures each fillet gets the attention it needs for that perfect crust. 🔥
Wrong Liquid Ratio
Adding too much liquid to the Instant Pot after searing can dilute flavors and prevent proper crust development. Stick to just 2 tablespoons lemon juice—this creates enough steam for cooking without overwhelming the fish.
I’ve tested with more liquid, and it always results in a softer crust. The lemon juice also brightens the dish, so don’t skip it entirely, but don’t exceed the recommended amount either.
Nutrition facts
Frequently asked questions
Can I use frozen red snapper in this Instant Pot recipe?
Yes, but thaw it properly first! Place frozen snapper fillets in a sealed bag and submerge in cold water for 15-20 minutes, changing the water every 5 minutes. Then pat completely dry before dredging. Never microwave-thaw—it releases too much moisture and ruins the crispy crust.
How do I know when the fish is fully cooked?
Use a meat thermometer for perfect results—the fish is done at 145°F internal temperature. The edges should be golden brown and crispy, while the flesh will flake easily with a fork. If you don’t have a thermometer, check the thickest part—it should reach 145°F after the 5-minute pressure cook and natural release.
Can I make this recipe without an Instant Pot?
For oven-baked crispy snapper, preheat to 425°F, place fillets on a parchment-lined tray, and bake for 12-15 minutes after searing. For stovetop, pan-sear for 3-4 minutes per side after dredging. The key is keeping the cooking time short—red snapper cooks fast!
What’s the best way to store leftovers?
Store cooked snapper in an airtight container for up to 2 days in the fridge. For longer storage, wrap portions in plastic wrap and freeze for 1 month. Reheat gently in the Instant Pot on “Sauté” mode for 2-3 minutes with a splash of water—this maintains moisture better than microwave reheating.
Why does my crust sometimes fall off?
This usually happens from overmixing the flour or using cold fish. Pat fillets completely dry before dredging and press the flour coating gently but firmly. Also ensure your butter is cold when mixing with seasonings—this helps the crust adhere better. The crust should stay intact when lifting fillets from the pot.

- Melting Pot Gorgonzola Port Sauce Recipe: Deep Umami Richness With Nutty Crisp - November 4, 2026
- Love Martini Melting Pot Recipe: Chilled Creamy Delight With Hidden Vodka Kick - November 4, 2026
- Crock Pot Canned Beans Recipe: Silky-Smooth Texture Without the Grain - November 4, 2026