
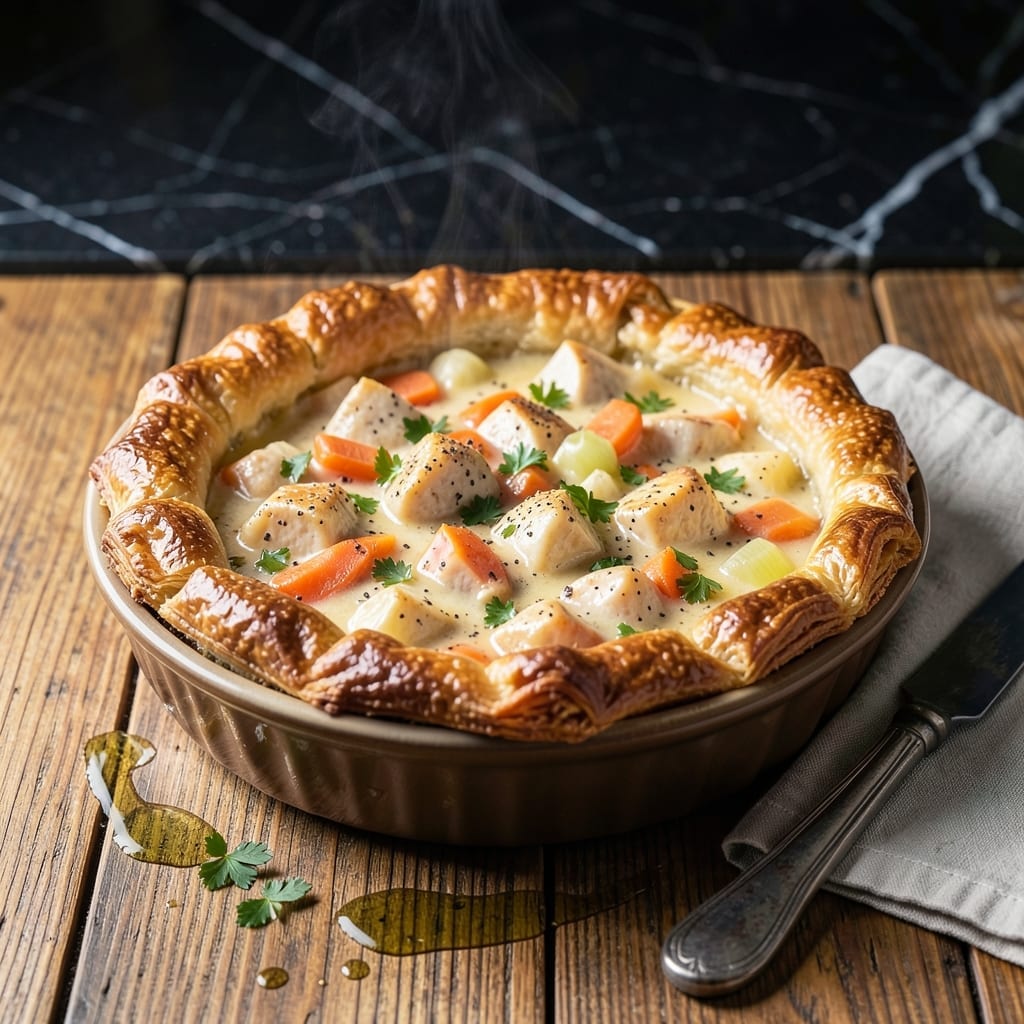
There’s nothing quite like a homemade pot pie to bring warmth and comfort to the dinner table. This skillet version captures all the cozy flavors of the classic dish with a rustic, approachable twist.
I’ve streamlined the process to make it achievable for any home cook, using simple ingredients and a straightforward method. The flaky crust and creamy filling come together beautifully in one pan, minimizing cleanup without sacrificing quality.
The filling is rich and velvety, packed with tender vegetables and hearty chunks of chicken. Topped with a golden crust, this dish delivers the ultimate comfort food experience.
Perfect for family dinners or when you need a satisfying meal that feels like a hug on a plate. The results speak for themselves.
Ingredients for Ree Drummond Pot Pie
Simple, hearty ingredients create that cozy, comforting classic in one skillet.
| Ingredient | Amount | Notes |
|---|---|---|
| Chicken Breast 🍗 | 1 ½ lb | Boneless, skinless, cubed |
| All-Purpose Flour 🌾 | ½ cup | For thickening filling |
| Unsalted Butter 🧈 | ½ cup | Divided for filling and crust |
| Yellow Onion 🧅 | 1 whole | Diced, medium size |
| Carrots 🥕 | 2 whole | Peeled and diced |
| Celery Stalks 🌿 | 2 whole | Diced, with leaves |
| Frozen Peas 🌱 | 1 cup | No need to thaw |
| Garlic Cloves 🧄 | 3 cloves | Minced finely |
| Chicken Broth 🥣 | 1 ½ cups | Low-sodium preferred |
| Whole Milk 🥛 | ½ cup | Full-fat for creaminess |
| Fresh Thyme 🌿 | 1 tbsp | Chopped, or 1 tsp dried |
| Salt 🧂 | 1 tsp | Kosher or sea salt |
| Black Pepper 🌶️ | ½ tsp | Freshly ground preferred |
| Refrigerated Pie Crust 🥧 | 1 package | 2 crusts, for top and bottom |
| Large Egg 🥚 | 1 whole | For egg wash on crust |
The chicken is the backbone here—Perdue or Tyson boneless breasts work well, or grab a rotisserie chicken for shortcut. Costco sells pre-cubed chicken that saves time. For the crust, Pillsbury refrigerated pie crusts are foolproof (Ree herself uses them). Fresh thyme is ideal, but dried works at one-third the amount. Look for vibrant orange carrots and crisp celery—limp veggies won’t give that perfect texture.
No chicken broth? Vegetable broth plus a pinch of poultry seasoning gets you close. Out of milk? Half-and-half makes it richer, or unsweetened almond milk in a pinch. Swap the peas for frozen corn or green beans. If you’re avoiding dairy, olive oil can replace butter in the filling (crust will need a different approach). Fresh herbs can be parsley or rosemary instead of thyme.
The filling keeps 3-4 days in the fridge, but the crust is best fresh. Bake, cool, then freeze uncooked pot pies for up to 3 months. Reheat in the oven to keep that flaky texture. Always bring broth to room temp before thickening for smooth results.
Why You’ll Love This Recipe
- One Pan Wonder: I love that everything—chicken, carrots, onions—simmers in one skillet before the crust goes on top.
- Buttery Crust: The flaky, buttery topping made with flour and cold butter is what makes this pot pie irresistible.
- Feeds the Family: This dish is my go-to for Sunday supper, and there’s always enough for leftovers the next day.
- Budget Friendly: Chicken breast and basic pantry staples keep the cost low without sacrificing flavor.
Step-by-Step Instructions for Chicken Pot Pie
Here’s the method. Straightforward, tested, works every time.
Step 1: Cook the Chicken and Vegetables
In a large skillet, melt ¼ cup unsalted butter over medium heat. Add the 1.5 lb chicken breast (cubed) and cook for 5-6 minutes until no longer pink. Remove the chicken and set aside.
In the same skillet, add the 1 whole yellow onion (diced), 2 whole carrots (peeled and diced), and 2 whole celery stalks (diced). Cook for 5 minutes until the vegetables begin to soften. Add the 3 cloves garlic cloves (minced) and cook for 1 additional minute until fragrant.
Step 2: Make the Creamy Filling
Sprinkle the 0.5 cup all-purpose flour over the vegetables and stir to coat. Gradually pour in the 1.5 cups chicken broth and 0.5 cup whole milk, stirring constantly to avoid lumps.
Add the 1 cup frozen peas, 1 tbsp fresh thyme, 1 tsp salt, and 0.5 tsp black pepper. Cook for 3-4 minutes until the mixture thickens and begins to bubble. Return the chicken to the skillet and stir to combine.
Step 3: Assemble and Bake the Pot Pie
Preheat the oven to 375°F. Unroll 1 package refrigerated pie crust and place one crust in a 9-inch pie dish, pressing it gently against the bottom and sides. Pour the chicken and vegetable filling into the crust.
Top with the second pie crust, crimping the edges to seal. Cut a few slits in the top crust to allow steam to escape. In a small bowl, beat the 1 whole large egg and brush it over the top crust for a golden finish.
Step 4: Bake to Golden Perfection
Bake for 30-35 minutes or until the crust is golden brown and the filling is bubbly. If the edges begin to brown too quickly, cover them with foil or a pie shield.
Remove from the oven and let it rest for 10 minutes before slicing. This allows the filling to set, making it easier to serve. Each slice should reveal a creamy, hearty filling encased in a flaky, golden crust.
Pro Tips For Making Ree Drummond Pot Pie
- Precook the Chicken: Poach the chicken breast in salted water for 12-15 minutes until just done—I learned this the hard way after biting into dry chunks in my first few attempts.
- Chill the Dough: Let the flour-butter crust rest in the fridge for at least 30 minutes; after skipping this once, my crust shrank and toughened like a sad pancake.
- Sweat the Veggies: Cook the onion and carrots in butter for 8-10 minutes until soft, not just translucent—this builds the base flavor that makes the filling taste rich instead of raw.
- Use Cold Butter: Cut the unsalted butter into the flour while it’s ice-cold; sounds fussy, but it’s the only way to get that flaky, sky-high crust Ree’s known for.
Pro Cooking Tips for Great ree drummond pot pie
Perfect Crust Tips
For that perfect golden crust, I always dock the bottom crust by pricking it with a fork before adding the filling. This prevents air bubbles from forming. I also chill the assembled pie for 15 minutes before baking to help the crust hold its shape. 💡
Filling Consistency
To avoid a runny filling, cook the mixture until it’s thick enough to coat the back of a spoon. If it seems too thin, mix 1 tbsp cornstarch with 1 tbsp cold water and stir it in. The filling should mound slightly when spooned.
Even Baking
Rotate the pie dish 180° halfway through baking for even browning. If the top crust browns too quickly, tent it loosely with foil. I check for doneness at 30 minutes and add 5-minute increments as needed.
Venting Steam
Cut 4-5 slits in the top crust to allow steam to escape. Without proper venting, the filling may bubble over or the crust may become soggy. I use a sharp knife to create decorative cuts that also serve this functional purpose.
Resting Time
Let the pie rest for 10-15 minutes after baking. This allows the filling to set, making it easier to slice. Skipping this step often results in a filling that runs out when you cut into it. 🔥
Skillet Alternative
For a rustic look, I sometimes make individual pot pies in 6-inch cast iron skillets. Just divide the filling and top with crust rounds. Bake at 375°F for 20-25 minutes until golden and bubbly.
Nutrition Facts
Frequently Asked Questions
Can I use store-bought rotisserie chicken?
It saves time and adds great flavor. Shred about 3 cups of cooked chicken to replace the raw in the recipe. Skip the initial cooking step and add it directly to the filling.
How do I prevent a soggy bottom crust?
Blind-bake the bottom crust for 8-10 minutes before adding filling. Also, let the filling cool slightly before assembling to reduce steam. This keeps the crust crisp.
Can I make this ahead of time?
Yes! Assemble the pie (without egg wash) and refrigerate for up to 24 hours. Or freeze unbaked for 2 months. Add 5-10 minutes to baking time if cooking from cold.
What if my filling is too thin?
Mix 1 tbsp cornstarch with 1 tbsp cold water and stir into the filling. Cook for 2-3 minutes until thickened. The filling should coat the back of a spoon.

- 4C Bread Crumbs Meatballs Recipe: Crispy Crust and Juicy Centers - September 25, 2026
- 6 Oz Chocolate Chip Cookie Recipe: Perfectly Balanced Crispy Edges and Chewy Hearts - September 25, 2026
- 6-Inch Coffee Cake Recipe: Vanilla Bean Swirls and Buttery Streusel Topping - September 25, 2026