
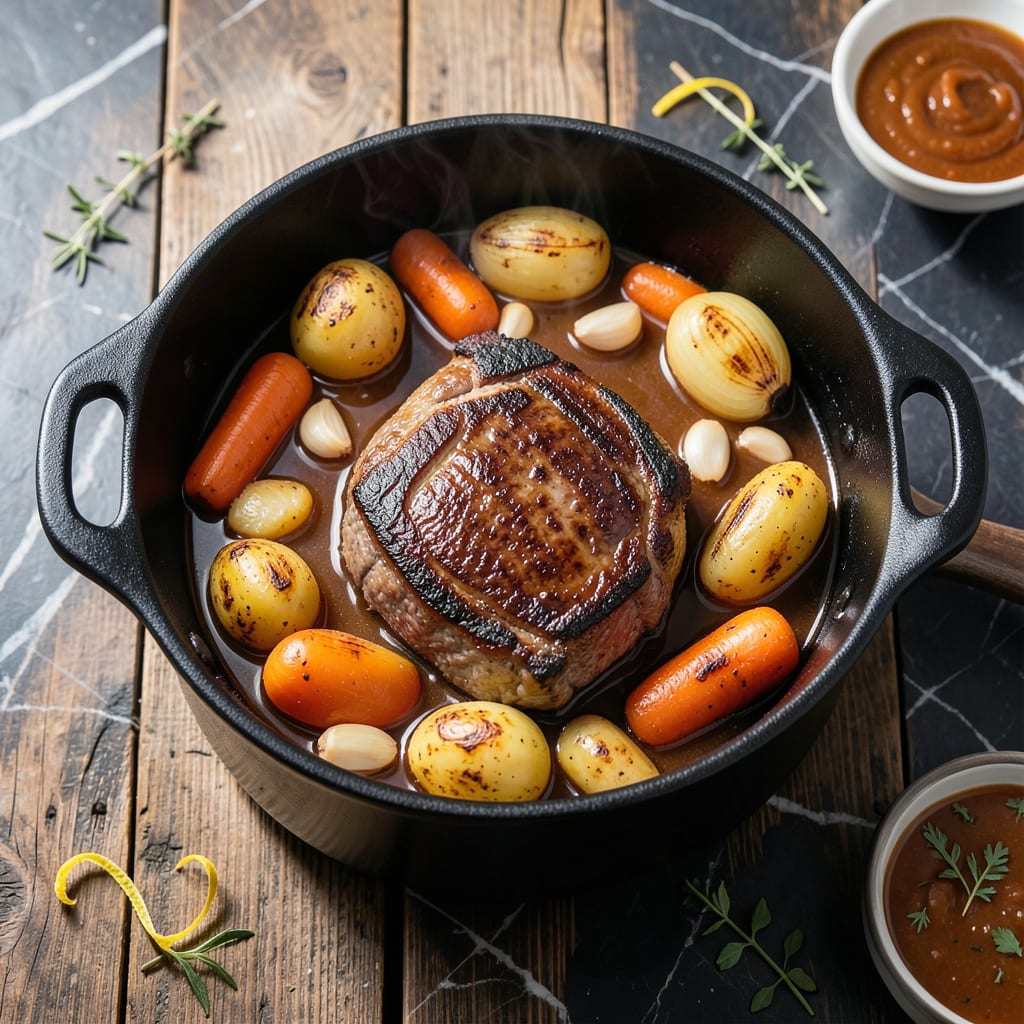
This Saladmaster pot roast delivers fork-tender beef with richly flavored root vegetables, all cooked perfectly in one pot. The stainless steel design ensures even heat distribution for consistent results every time.
The long, slow cooking process transforms tough cuts into tender perfection while carrots and potatoes absorb the savory braising liquid. This method guarantees a meal that tastes like it simmered all day.
Ingredients for Saladmaster Pot Roast
Fork-tender beef and root vegetables come together in one pot for a hearty, flavorful meal.
| Ingredient | Amount | Notes |
|---|---|---|
| Chuck Roast 🥩 | 3 lb | Well-marbled, boneless preferred |
| Carrots 🥕 | 4 whole | Large, peeled and cut into chunks |
| Yukon Gold Potatoes 🥔 | 1 ½ lb | Peeled and quartered |
| Yellow Onions 🧅 | 2 whole | Medium, quartered |
| Garlic Cloves 🧄 | 6 cloves | Smashed, peeled |
| Beef Broth 🥘 | 2 cups | Low-sodium preferred |
| Tomato Paste 🍅 | 2 tbsp | For depth of flavor |
| Worcestershire Sauce 💧 | 1 tbsp | Adds umami complexity |
| Dried Thyme 🌿 | 1 tsp | Crushed between fingers |
| Dried Rosemary 🌿 | 1 tsp | Crushed between fingers |
| Bay Leaves 🍃 | 2 whole | Removed before serving |
| Olive Oil 🫒 | 2 tbsp | For searing roast |
| Kosher Salt 🧂 | 1 ½ tsp | Diamond Crystal preferred |
| Black Pepper 🌶️ | 1 tsp | Freshly ground preferred |
The chuck roast is non-negotiable here. Well-marbled cuts (look for visible fat streaks) ensure that fall-apart texture the Saladmaster excels at delivering. Whole Foods or Costco have excellent pre-packaged options, but your local butcher can provide a custom-cut piece with the perfect fat ratio. Avoid leaner cuts like round—they’ll stay tough no matter how long you cook them.
No Yukon Golds? Russet potatoes hold up well too, though they’ll be slightly drier. Out of fresh thyme? Dried at one-third the amount. For the Worcestershire, Annie’s makes a quality vegetarian version if that’s a concern. The tomato paste can come from those Trader Joe’s squeeze tubes—no can-opening required. Beef broth can be swapped for water in a pinch, but the flavor depth will suffer.
This reheats beautifully, with flavors deepening overnight. Store leftovers in an airtight container for up to 4 days in the fridge or freeze for 3 months. The potatoes may soften further, but the beef stays impossibly tender (worth the extra minute to skim the fat before storing).
Why You’ll Love This Recipe
- I’ll be real: the leftovers taste even better the next day, and they stretch for lunches all week.
- One Pot Wonder: I toss in the chuck roast, carrots, potatoes, and onions, then let the SaladMaster do its thing—minimal hands-on time.
- Melt-in-Your-Mouth Good: The garlic and slow-cooked beef create a depth of flavor that’s rich and satisfying without being heavy.
- Feeds a Crowd: Honestly, it’s my go-to for Sunday dinners or when the whole family’s over—always a hit.
Step-by-Step Instructions for Saladmaster Pot Roast
Master the technique that transforms tough cuts into melt-in-your-mouth perfection with vegetables.
Step 1: Sear the Chuck Roast to Develop Flavor
Heat the 2 tbsp olive oil in your Saladmaster pot over medium-high heat until shimmering. Pat the 3 lb chuck roast dry with paper towels, then season aggressively on all sides with the 1.5 tsp kosher salt and 1 tsp black pepper.
Sear the roast for 4-5 minutes per side until a deep mahogany crust forms. Don’t rush this—you want a uniform, rich brown color across the entire surface. This creates the fond that will become the base of your braising liquid. Remove the meat and set aside.
Step 2: Build the Aromatic Foundation
In the same pot, add the 2 whole yellow onions, 4 whole carrots, and 1.5 lb Yukon Gold potatoes. Cook for 5 minutes, stirring occasionally, until the onions begin to soften and develop light caramelization.
Add the 6 cloves garlic cloves, 2 tbsp tomato paste, 1 tbsp Worcestershire sauce, 1 tsp dried thyme, and 1 tsp dried rosemary. Cook for 2 minutes, stirring constantly, until the tomato paste darkens slightly and the herbs become fragrant. This builds layers of umami and complexity.
Step 3: Deglaze and Begin the Braise
Pour in the 2 cups beef broth, using a wooden spoon to scrape up all the browned bits from the bottom of the pot. Add the 2 whole bay leaves and return the seared chuck roast to the pot, nestling it among the vegetables.
Bring the liquid to a gentle simmer, then reduce heat to low. Cover the pot and maintain a slow, steady simmer. This controlled environment is what makes Saladmaster ideal for this method—even heat distribution prevents hot spots that can toughen the meat.
Step 4: Braise to Fork-Tender Perfection
Cook covered for 3 to 3.5 hours, turning the roast every 45 minutes to ensure even cooking. You’ll know it’s ready when the meat yields easily to a fork and the internal temperature reaches 195-200°F.
The vegetables should be tender but not mushy, having absorbed the rich beefy flavor of the braising liquid. If the liquid reduces too much during cooking, add ¼ cup water to maintain the proper level. This long, slow cook time transforms the connective tissue into gelatin, creating that signature tenderness.
Step 5: Rest and Serve
Remove the 2 whole bay leaves and transfer the chuck roast to a cutting board. Let it rest for 15 minutes before slicing against the grain. This resting period allows the juices to redistribute throughout the meat.
Serve the sliced pot roast with the braised vegetables and a generous spoonful of the cooking liquid. The sauce should be rich and velvety, coating the meat and vegetables beautifully. Each bite should deliver tender beef that falls apart at the touch of a fork, surrounded by flavorful root vegetables.
Pro Tips For Making Saladmaster Pot Roast
- Sear the Chuck First: I learned this the hard way—browning the chuck roast in the Saladmaster pan before adding liquids locks in way more flavor than just dumping everything in at once. Use medium-high heat and don’t rush it; let it develop a deep crust, about 3-4 minutes per side.
- Cut Potatoes Evenly: Sounds obvious, but I used to hack Yukon Golds into random chunks and ended up with some mushy and some undercooked. Aim for 1.5-inch pieces so they all finish at the same time, around 45-60 minutes into the cook.
- Skip the Cold Water: After burning a batch, I finally realized adding cold liquid to a hot Saladmaster pan can cause warping or uneven cooking. Always use warm water or broth to start the braise—it keeps the temperature steady and the roast happy.
- Garlic Last Minute: My grandmother swore by this, and she was right: adding whole garlic cloves in the last 30 minutes prevents them from turning bitter or falling apart. They’ll still infuse the dish but stay sweet and intact for serving.
Flavor Customization for This saladmaster pot roast
Herb Variations
Swap the dried herbs for 3 sprigs fresh rosemary and 5 sprigs fresh thyme tied with kitchen twine. Remove them before serving. I love how fresh herbs brighten the dish with a more vibrant aroma. 🌿
Spicy Kick
Add 1 tsp crushed red pepper flakes with the tomato paste, or include 1 chopped chipotle in adobo for smoky heat. This works beautifully if you enjoy a little warmth with your pot roast.
Umami Boost
Stir in 1 tbsp soy sauce or 1 tbsp fish sauce with the Worcestershire for deeper savory notes. The soy adds richness, while fish sauce enhances the meaty flavor without overpowering.
Wine Infusion
Replace ½ cup beef broth with ½ cup dry red wine like Cabernet Sauvignon for acidity and complexity. The alcohol cooks off, leaving behind a subtle fruitiness that pairs perfectly with beef. 🍷
Mushroom Addition
Brown 8 oz cremini mushrooms with the onions for an earthy depth. Their meaty texture soaks up the braising liquid, adding another layer of flavor to this hearty dish.
Coffee Depth
Mix 1 tbsp instant coffee into the beef broth for a rich, slightly bitter note that amplifies the caramelized flavors. It’s a trick I picked up from professional chefs—trust me, it works.
Nutrition Facts
Frequently Asked Questions
Do I need to sear the meat first?
Yes! Searing over medium-high heat for 4-5 minutes per side creates a flavorful crust. This step builds the fond that deepens your braising liquid’s taste.
Can I use a different cut of beef?
Stick with well-marbled cuts like chuck. Leaner options won’t achieve the same fork-tender result, even with long cooking. The fat content is key for that melt-in-your-mouth texture.
How do I know when it’s done?
The meat should reach 195-200°F internally and yield easily to a fork. After 3 to 3.5 hours of braising, test by twisting a fork – it should pull apart with no resistance.
What if my liquid evaporates too much?
Add ¼ cup water as needed to maintain the proper level. The Saladmaster’s even heat helps prevent this, but it’s normal to need a little extra during the long cook.

- 4C Bread Crumbs Meatballs Recipe: Crispy Crust and Juicy Centers - September 25, 2026
- 6 Oz Chocolate Chip Cookie Recipe: Perfectly Balanced Crispy Edges and Chewy Hearts - September 25, 2026
- 6-Inch Coffee Cake Recipe: Vanilla Bean Swirls and Buttery Streusel Topping - September 25, 2026