
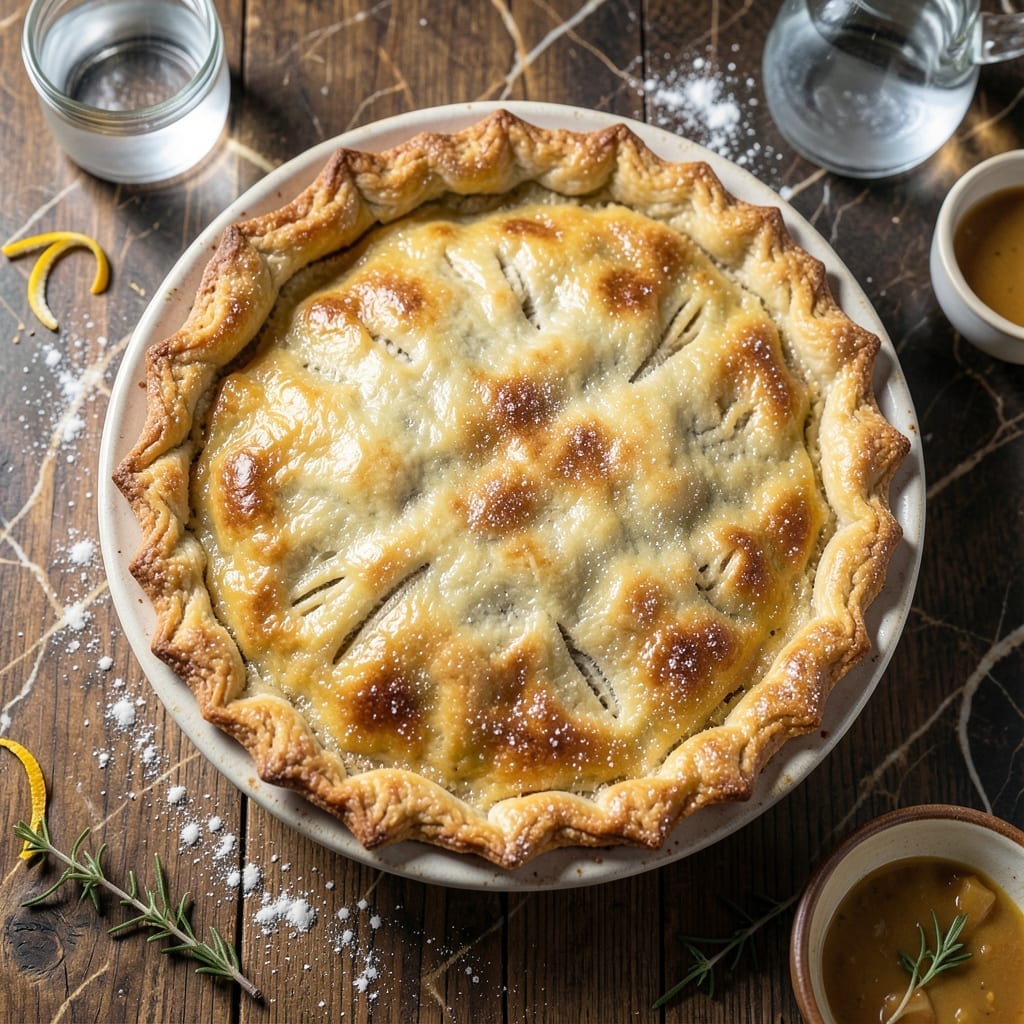
This savory pot pie crust delivers the perfect foundation for hearty fillings with its flaky, buttery layers. I developed this recipe to create a sturdy yet tender base that holds up to rich stews without getting soggy.
The secret is using ice-cold butter and minimal handling to create visible layers. A touch of vinegar in the dough prevents gluten from overdeveloping, ensuring a tender texture that still maintains structure.
With just 6 ingredients and 15 minutes of active prep, you’ll have a golden crust that bakes to perfect flakiness. The recipe makes enough for a top and bottom crust, ideal for classic chicken or beef pot pies.
Blind bake the bottom crust for extra crispness, or fill and bake directly for a seamless one-step process. This technique guarantees professional results every time.
Ingredients for Savory Pot Pie Crust
Six simple ingredients create a flaky, sturdy crust for your favorite pot pie.
| Ingredient | Amount | Notes |
|---|---|---|
| All-Purpose Flour 🌾 | 2 ½ cups | Plus extra for dusting |
| Unsalted Butter 🧈 | 1 cup | Ice-cold, cubed |
| Ice Water 💧 | ½ cup | Plus 1 tbsp as needed |
| White Vinegar 🍶 | 1 tbsp | Prevents gluten overdevelopment |
| Salt 🧂 | 1 tsp | Fine sea salt preferred |
| Granulated Sugar 🍚 | 1 tsp | Optional, for color |
The butter is non-negotiable here. Use European-style butter with at least 82% fat content for the best layers—Plugrá or Kerrygold work beautifully. Ice-cold temperature is critical, so cube it and freeze for 10 minutes before starting. Most grocery stores carry suitable butter, but Whole Foods has excellent options. The vinegar might seem odd, but it’s the secret to that tender texture without sacrificing flakiness.
No vinegar? Lemon juice works at the same amount. Out of all-purpose flour? Pastry flour at a 1:1 ratio gives even better results. If you’re watching sodium, use unsalted butter and adjust salt to taste. The sugar is optional but helps with browning—skip it for a purely savory crust. Water temperature matters: use the coldest possible to keep the butter from melting prematurely.
The dough keeps in the fridge for 2-3 days or freezes beautifully for up to 3 months. Wrap it tightly in plastic and store in an airtight container. For best results, let it warm slightly before rolling—about 10 minutes on the counter should do it.
Why You’ll Love This Recipe
- No-Fuss Dough: Honestly, the vinegar and ice water make this crust come together in minutes—no chilling, no stress.
- Buttery Crisp: That flaky, golden crust with pockets of melting butter? Pure satisfaction with every bite.
- Fills Any Pie: I use it for chicken pot pie, veggie fillings, even hand pies. Between us, it’s my go-to for any savory bake.
- Budget Stretch: All-purpose flour and butter keep it cheap, and leftovers reheat like a dream. I’ll be real: it’s my secret weapon for feeding a crowd.
Step-by-Step Instructions for Savory Pot Pie Crust
This method delivers flaky, golden layers that hold up beautifully against rich fillings.
Step 1: Prepare the Dry Ingredients
In a large mixing bowl, whisk together the 2.5 cups All-Purpose Flour, 1 tsp Salt, and 1 tsp Granulated Sugar until thoroughly combined. The sugar is optional but helps achieve a deeper golden color as the crust bakes.
Make sure there are no lumps in the flour mixture. I use fine sea salt here because it distributes more evenly than coarse varieties, ensuring consistent seasoning throughout the crust. Set this bowl aside while you prepare the wet ingredients.
Step 2: Cut in the Cold Butter
Add the 1 cup Unsalted Butter (ice-cold and cubed) to the flour mixture. Using a pastry cutter or your fingers, work the butter into the flour until the mixture resembles coarse crumbs with some pea-sized butter pieces still visible.
Don’t overwork it—you want those butter pieces to remain intact. As the crust bakes, these cold butter bits will create steam, which makes the layers flaky. If the butter starts to soften, pause and chill the mixture for 10 minutes before continuing.
Step 3: Add the Liquid Ingredients
Create a well in the center of the flour-butter mixture. Pour in the 0.5 cup Ice Water and 1 tbsp White Vinegar all at once. The vinegar tenderizes the gluten, preventing the crust from becoming tough.
Use a fork to gently stir the mixture, just until the dough begins to come together. It will look shaggy and uneven—that’s exactly what you want. Avoid overmixing, as this develops gluten and results in a dense crust.
Step 4: Chill and Rest the Dough
Turn the dough out onto a lightly floured surface and gently shape it into a disc. Wrap it tightly in plastic wrap and refrigerate for at least 1 hour, or up to 2 days.
Chilling firms up the butter, making the dough easier to roll out. It also allows the gluten to relax, which prevents shrinkage during baking. The longer you chill, the more relaxed the dough becomes, so don’t rush this step.
Step 5: Roll Out and Fit to Pie Dish
On a lightly floured surface, roll out the chilled dough to a 12-inch circle, about ⅛-inch thick. Transfer it to a 9-inch pie dish, pressing it gently into the bottom and up the sides without stretching.
Trim the excess dough, leaving a ½-inch overhang for crimping. This crust is sturdy enough to hold hearty fillings without becoming soggy. Dock the bottom with a fork to prevent air bubbles from forming during baking.
Pro Tips For Making Savory Pot Pie Crust
- Chill the Butter: Cut your unsalted butter into small cubes and refrigerate for 15 minutes before mixing—I learned this the hard way after my first three crusts came out tough and flat.
- Use Ice Water: Fill a glass with water and ice cubes, then measure from that—sounds weird, but it works: the colder the water, the flakier the crust.
- Skip Overworking: Mix just until the dough comes together, even if it looks shaggy—my grandmother swore by this, and she was right: overworking makes it dense.
- Add Vinegar Last: Stir in the white vinegar at the very end, after the water—this isn’t the prettiest method, but it’s the tastiest, and it keeps the crust from getting gummy.
Health Benefits of These Flavors
Heart-Healthy Fats
While this crust isn’t a health food, the unsalted butter provides a source of vitamin A and some conjugated linoleic acid, which may support heart health in moderation. I always opt for European-style butter like Kerrygold for its richer nutrient profile. 💪
Minimal Added Sugar
The recipe includes just 1 tsp granulated sugar, far below the American Heart Association’s daily limit of 25g for women and 36g for men. You can skip it entirely for a purely savory version without affecting texture.
Gluten Considerations
Using all-purpose flour means this contains gluten, but the white vinegar helps prevent overdevelopment of gluten strands, making the crust easier to digest for some with mild sensitivities. For gluten-free needs, try a 1:1 gluten-free flour blend.
Portion Control
Each serving of crust (about 1/8 of the double crust) contains roughly 250-300 calories, primarily from healthy fats. Pairing with vegetable-heavy fillings balances the meal’s nutritional profile beautifully.
Sodium Awareness
With only 1 tsp salt in the entire recipe, the sodium content is reasonable at about 200mg per serving. Using fine sea salt ensures even distribution, so every bite is perfectly seasoned without excess. 💛
Homemade Advantage
Making your own crust lets you control every ingredient, avoiding the preservatives and hydrogenated oils often found in store-bought versions. I notice my homemade versions leave me feeling more satisfied with smaller portions.
Nutrition Facts
Frequently Asked Questions
Can I make the dough ahead of time?
Yes! The dough stays fresh in the fridge for 2-3 days or freezes well for up to 3 months. Wrap it tightly in plastic to prevent drying out.
Why does the recipe include vinegar?
The white vinegar tenderizes the gluten, preventing a tough crust. It’s a baker’s trick for flaky, easy-to-work dough without affecting flavor.
What’s the best way to prevent a soggy bottom?
Blind bake the bottom crust for 10-12 minutes before adding wet fillings. This creates a barrier to keep moisture from seeping in.
Can I use a food processor for mixing?
but pulse just until pea-sized butter pieces remain. Over-processing warms the butter, which ruins the flaky texture.

- 4C Bread Crumbs Meatballs Recipe: Crispy Crust and Juicy Centers - September 25, 2026
- 6 Oz Chocolate Chip Cookie Recipe: Perfectly Balanced Crispy Edges and Chewy Hearts - September 25, 2026
- 6-Inch Coffee Cake Recipe: Vanilla Bean Swirls and Buttery Streusel Topping - September 25, 2026