
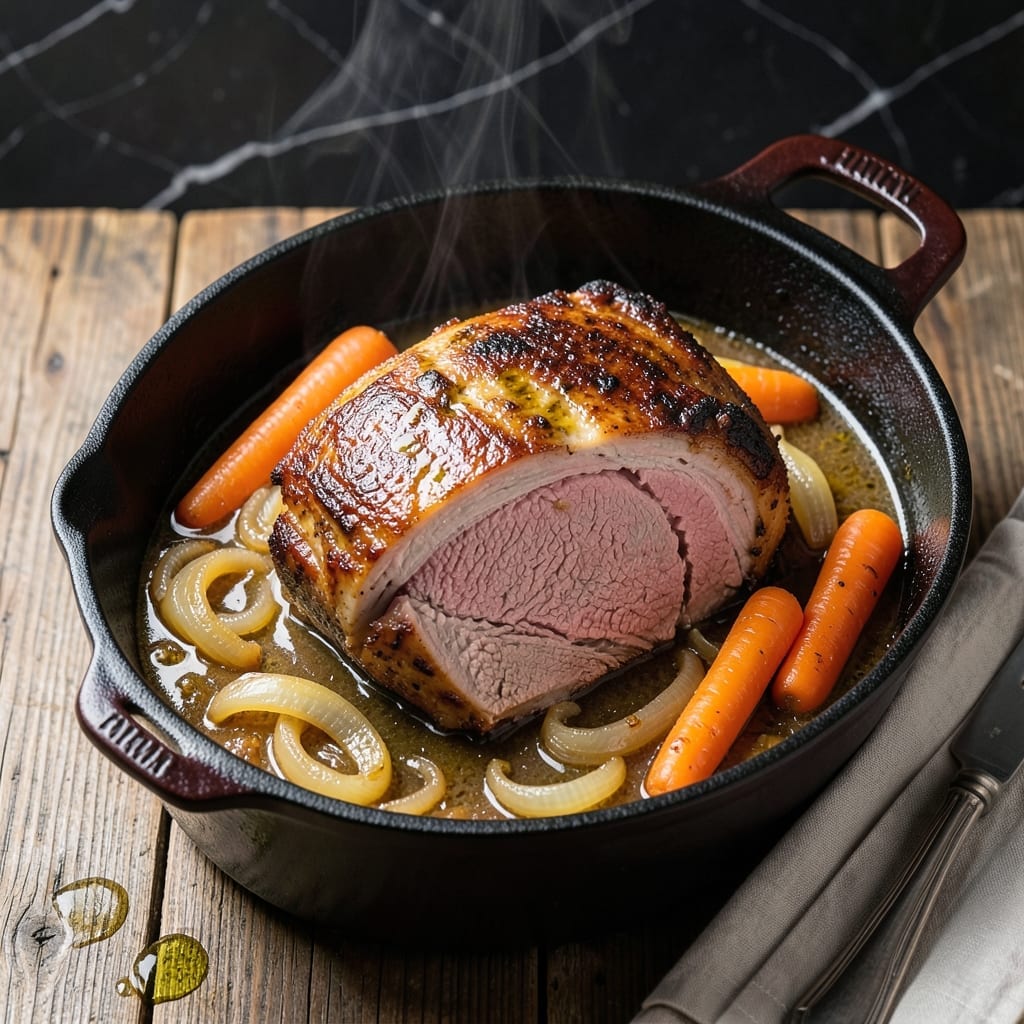
There’s something special about a slow-cooked pot roast that turns an ordinary Sunday into a memorable family gathering. This shoulder roast version delivers melt-in-your-mouth tenderness with deep, rich flavors.
The secret lies in low, steady heat that breaks down tough fibers while allowing the meat to absorb every savory note from the braising liquid. Simple ingredients transform into a meal that feels like a warm embrace.
As the roast cooks, your kitchen will fill with an aroma that promises comfort and satisfaction. The result is a dish that’s both hearty and elegant, perfect for sharing with loved ones.
Pair it with mashed potatoes or crusty bread to soak up every last drop of the flavorful juices. This is Sunday supper at its finest.
Ingredients for Shoulder Roast Pot Roast
Simple staples and a slow cooker are all you need for this Sunday masterpiece.
| Ingredient | Amount | Notes |
|---|---|---|
| Beef Shoulder Roast 🥩 | 3 lb | Chuck roast preferred for tenderness |
| Olive Oil 🫒 | 2 tbsp | For searing the roast |
| Kosher Salt 🧂 | 1 ½ tsp | Divided for seasoning |
| Black Pepper 🌶️ | 1 tsp | Freshly ground preferred |
| Onion 🧅 | 1 whole | Large, yellow or white, chopped |
| Carrots 🥕 | 3 whole | Medium, cut into chunks |
| Celery Stalks 🥬 | 3 whole | Cut into large pieces |
| Garlic Cloves 🧄 | 4 cloves | Smashed or minced |
| Beef Broth 🥣 | 2 cups | Low-sodium preferred |
| Red Wine 🍷 | 1 cup | Dry variety for depth |
| Tomato Paste 🍅 | 2 tbsp | For richness and umami |
| Dried Thyme 🌿 | 1 tsp | Or 1 tbsp fresh thyme |
| Bay Leaves 🍃 | 2 whole | For aromatic depth |
| All-Purpose Flour 🌾 | 2 tbsp | For thickening the gravy |
The beef is everything here. Chuck roast from Costco is my go-to—it’s well-marbled and breaks down beautifully. Look for pieces with good fat streaking (that’s flavor). Most butchers at Whole Foods or your local grocery will cut it to size if you ask nicely. Don’t trim the fat—it renders down and keeps the meat moist during the long cook.
Swapping beef broth? Mushroom broth adds a nice earthy note. No red wine? Beef broth plus 1 tbsp balsamic vinegar works in a pinch. Fresh thyme is great if you’ve got it (use 3 sprigs), but dried is totally fine. The tomato paste can be swapped for ketchup if that’s all you have—just cut the amount in half. Baby carrots? Yeah, those work too.
Leftovers keep for 4-5 days in the fridge and actually taste better the next day. Freeze portions for up to 3 months (slice before freezing for easy reheating). The gravy thickens as it cools—just add a splash of water or broth when reheating.
Why You’ll Love This Recipe
- Set and Forget: I toss the beef shoulder with olive oil, salt, pepper, and onion, then let it do its thing in the oven. Honestly, it’s the easiest hands-off meal I make.
- Feeds the Crew: Leftovers? More like a second dinner. This pot roast stretches for sandwiches or tacos the next day—my kids fight over the last scraps.
- Budget Hero: Beef shoulder is cheaper than chuck, but just as flavorful. Between us, it’s my secret for a hearty meal that doesn’t break the bank.
Step-by-Step Instructions for Shoulder Roast Pot Roast
Here’s how I turn tough beef into fork-tender perfection every Sunday without fail.
Step 1: Sear the Beef Shoulder Roast
Pat the 3 lb Beef Shoulder Roast dry with paper towels—this is non-negotiable for a proper sear. Season it generously with 1.5 tsp Kosher Salt and 1 tsp Black Pepper, pressing the seasoning into the meat so it sticks. Heat the 2 tbsp Olive Oil in a Dutch oven over medium-high heat until it shimmers.
Sear the beef on all sides for 3-4 minutes per side until deeply browned. You want a dark, rich crust—this builds the flavor foundation. Don’t rush it; if the oil smokes, reduce the heat slightly. Transfer the roast to a plate and set aside.
Step 2: Sauté the Aromatics
In the same pot, add the chopped 1 whole Onion, 3 whole Carrots (cut into chunks), and 3 whole Celery Stalks (cut into large pieces). Cook for 5 minutes over medium heat, stirring occasionally, until the vegetables start to soften and brown slightly.
Stir in the 4 cloves Garlic Cloves and cook for 30 seconds until fragrant. Add the 2 tbsp Tomato Paste and cook for 1-2 minutes, stirring constantly, until it darkens slightly. This step deepens the umami flavor of the dish.
Step 3: Deglaze and Braise
Pour in the 1 cup Red Wine, scraping the bottom of the pot to release all those browned bits—this is where the magic happens. Let it simmer for 2-3 minutes until the liquid reduces by half. Stir in the 2 cups Beef Broth, 1 tsp Dried Thyme, and 2 whole Bay Leaves.
Return the beef to the pot, along with any accumulated juices. The liquid should come about halfway up the roast. Cover and transfer to a preheated 325°F oven. Braise for 2.5 to 3 hours, turning the roast halfway through, until it’s fork-tender and falls apart easily.
Step 4: Thicken the Gravy and Serve
Remove the roast and vegetables to a serving platter and cover loosely with foil. Skim any excess fat from the braising liquid. In a small bowl, whisk the 2 tbsp All-Purpose Flour with 2 tablespoons of the braising liquid until smooth. Stir this slurry into the pot and simmer over medium heat for 3-5 minutes until the gravy thickens.
Taste and adjust seasoning if needed. Pour the gravy over the beef and vegetables. Serve hot with mashed potatoes or crusty bread to soak up every last bit. This dish tastes even better the next day, so don’t stress if you have leftovers.
Pro Tips For Making Shoulder Roast Pot Roast
- Sear the Beef Hard: I learned this the hard way—get that shoulder roast screaming hot in the oil until it’s deeply browned all over, about 3-4 minutes per side. It builds a flavor base that simmering alone can’t match.
- Salt the Meat Overnight: After a few tough roasts, I started salting the beef shoulder with kosher salt the night before. It seasons deep into the meat and keeps it juicier during the long cook.
- Don’t Crowd the Pot: Skip the urge to add all the onions at once—sear them in batches if needed so they caramelize instead of steam. A packed pot just boils everything, and you lose that rich color.
- Use a Meat Thermometer: I used to guess and ended up with dry or undercooked roast. Now I pull it at 195–200°F internal temp for fall-apart tenderness—no more hoping it’s done.
Make-Ahead Tips for Leftovers
Prep the Night Before
Chop all your vegetables the evening prior and store them in an airtight container in the fridge. I use a large glass bowl with a lid for the onion, carrots, and celery. This saves 15-20 minutes on cooking day. The flavors actually meld better when they sit overnight. 💡
Season in Advance
Pat your 3 lb Beef Shoulder Roast dry and season it with 1.5 tsp Kosher Salt and 1 tsp Black Pepper up to 12 hours before cooking. Let it sit uncovered in the fridge. This allows the salt to penetrate deeper, enhancing both flavor and tenderness.
Slow Cooker Method
After searing the beef and sautéing the aromatics, transfer everything to your slow cooker. Add the 2 cups Beef Broth and 1 cup Red Wine, then cook on low for 8-10 hours. I set mine before bed and wake up to a ready-to-eat meal. 🔥
Gravy Prep Ahead
Make your gravy base the night before by mixing the 2 tbsp Tomato Paste with the 2 tbsp All-Purpose Flour and ½ cup Beef Broth. Store this slurry in a small jar in the fridge. On cooking day, just whisk it into your braising liquid during the final 3-5 minutes.
Portion for Freezing
Once cooled, slice the roast and portion into meal-sized containers with gravy and vegetables. These freeze beautifully for up to 3 months. I use quart-sized freezer bags laid flat to save space. Thaw overnight in the fridge before reheating.
Reheat Like a Pro
For best results, reheat portions in a covered skillet over low heat with a splash of water or broth. This prevents drying out. Microwave works too—cover with a damp paper towel and use 50% power in 1-minute intervals until heated through.
Nutrition Facts
Frequently Asked Questions
Can I use a different cut of beef for this?
Chuck roast is ideal, but brisket or bottom round work too. Avoid lean cuts like sirloin—they won’t get as tender. Stick to well-marbled pieces for best results.
How do I know when it’s done?
The meat should pull apart easily with a fork. For precise results, use a meat thermometer—it’s ready at 195-205°F internally. Resist the urge to rush the cooking time.
What if my gravy turns out too thin?
Simmer uncovered for 5-10 minutes to reduce, or mix 1 tbsp cornstarch with 1 tbsp cold water and stir in. Let it cook for 2 minutes to thicken.
Can I make this in an Instant Pot?
Yes! Sear the beef, sauté aromatics, then pressure cook on high for 60 minutes with a 15-minute natural release. The flavor develops faster but stays delicious.

- 4C Bread Crumbs Meatballs Recipe: Crispy Crust and Juicy Centers - September 25, 2026
- 6 Oz Chocolate Chip Cookie Recipe: Perfectly Balanced Crispy Edges and Chewy Hearts - September 25, 2026
- 6-Inch Coffee Cake Recipe: Vanilla Bean Swirls and Buttery Streusel Topping - September 25, 2026