
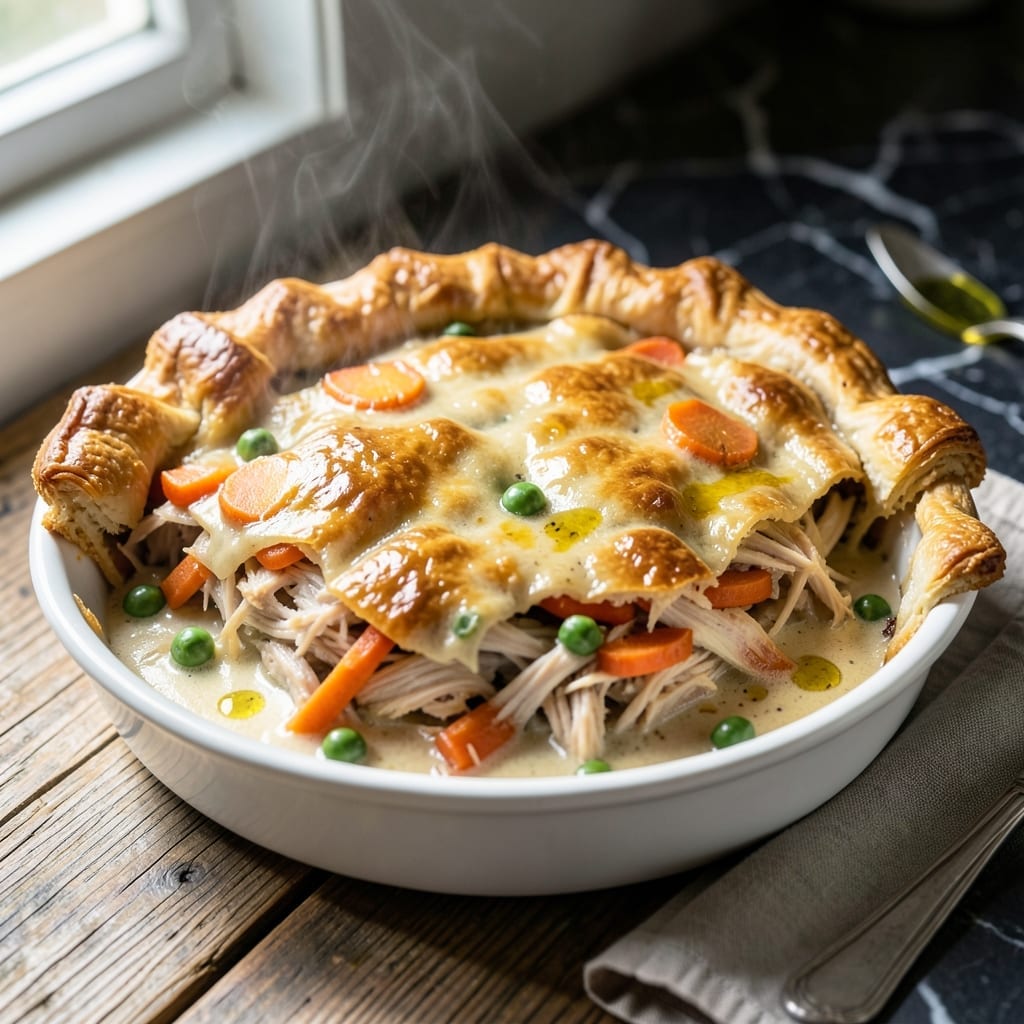
This pot pie delivers on comfort food at its finest—flaky crust encasing a creamy herb filling with tender shredded chicken and vibrant vegetables.
I’ve perfected this version by pre-cooking the chicken for maximum tenderness, then folding it into a velvety sauce thickened with a simple roux. The double crust ensures every bite has that coveted crisp texture.
The filling comes together in one pot, simplifying prep without sacrificing depth. Fresh thyme and rosemary add aromatic warmth, while peas and carrots provide sweetness and color.
Serve warm for the ultimate cozy meal that tastes like home in every bite.
Ingredients for Shredded Chicken Pot Pie
Flaky crust meets creamy filling with chicken and veggies you already have on hand.
| Ingredient | Amount | Notes |
|---|---|---|
| Chicken Breast 🍗 | 1 ½ lb | Boneless, skinless, pre-cooked and shredded |
| All-Purpose Flour 🌾 | ½ cup | For roux and thickening |
| Unsalted Butter 🧈 | ½ cup | Divided for roux and crust |
| Yellow Onion 🧅 | 1 whole | Medium, finely diced |
| Carrots 🥕 | 2 whole | Medium, diced into small cubes |
| Frozen Green Peas 🌱 | 1 cup | No need to thaw |
| Fresh Garlic Cloves 🧄 | 3 cloves | Minced for sauce |
| Chicken Broth 🥣 | 2 cups | Low-sodium preferred |
| Whole Milk 🥛 | 1 cup | For creamy filling |
| Fresh Thyme 🌿 | 1 tbsp | Chopped, stems removed |
| Fresh Rosemary 🌿 | 1 tbsp | Finely chopped |
| Salt 🧂 | 1 tsp | Or to taste |
| Black Pepper 🌶️ | ½ tsp | Freshly ground preferred |
| Pie Crust 🥧 | 2 sheets | Store-bought or homemade, for double crust |
| Large Egg 🥚 | 1 whole | For egg wash on crust |
The chicken is the star here. Boneless, skinless breasts shred beautifully, but thighs work too (more flavor, slightly richer). I grab mine from Costco for bulk savings, but any grocery store will do. For the crust, Pillsbury pie crust is my go-to for convenience, but homemade takes this over the top. Look for unsalted butter—it lets you control the salt in the filling.
No fresh thyme or rosemary? Dried herbs work at one-third the amount. Out of peas? Swap in corn or green beans. The milk can be whole or 2%—avoid skim as it won’t give that creamy texture. If you’re short on time, rotisserie chicken is a great shortcut. Just remove the skin and shred it while warm.
Assemble and bake right away, or prep the filling ahead—it keeps in the fridge for 2 days. Leftovers reheat well, covered in foil at 350°F for 15-20 minutes. The crust stays crisp if you warm it uncovered for the last 5 minutes.
Why You’ll Love This Recipe
- One Pot Magic: Honestly, I love that everything—from the buttery crust to the shredded chicken and carrots—comes together in a single dish.
- Flavor Bomb: The combo of tender chicken, sweet carrots, and that rich, flaky butter crust is ridiculous. My picky nephew even cleans his plate.
- Meal Prep Hero: I make a double batch on Sunday and freeze half for those “no-time-to-cook” nights. (Yes, even on a Tuesday night)
- Budget Friendly: Chicken breast stretches far when shredded, and the onion-carrot base keeps it hearty without breaking the bank.
Step-by-Step Instructions for Shredded Chicken Pot Pie
Here’s how to build that perfect creamy filling and flaky crust with zero stress.
Step 1: Sauté Aromatics and Make the Roux
Melt ¼ cup unsalted butter in a large skillet over medium heat. Add the diced yellow onion and carrots, cooking for 5-6 minutes until they start to soften. You’ll notice the onion turning translucent—that’s your cue.
Stir in the minced fresh garlic cloves, fresh thyme, and fresh rosemary, letting them cook for 30 seconds until fragrant. Don’t let the garlic brown. Sprinkle in the 0.5 cup all-purpose flour and whisk constantly for 1-2 minutes to cook out the raw flour taste.
Step 2: Build the Creamy Filling
Slowly pour in the 2 cups chicken broth and 1 cup whole milk, whisking continuously to prevent lumps. This gradual addition is key to a smooth sauce. Bring the mixture to a gentle simmer and cook for 3-4 minutes until it thickens enough to coat the back of a spoon.
Fold in the 1.5 lb chicken breast and 1 cup frozen green peas. The frozen peas will thaw quickly in the hot filling. Season with 1 tsp salt and 0.5 tsp black pepper. Taste and adjust seasoning—this is your last chance before baking.
Step 3: Assemble the Pot Pie
Transfer the filling to a 9-inch pie dish. It should be slightly mounded in the center. Unroll 1 sheet pie crust and place it over the filling as the bottom layer. Press it gently into the edges of the dish. Spoon the filling evenly over the crust.
Top with the second pie crust, crimping the edges to seal. Cut 4-5 slits in the top crust to allow steam to escape. This prevents a soggy crust. Whisk the large egg with 1 tablespoon water and brush it over the top crust for that golden finish.
Step 4: Bake to Flaky Perfection
Preheat your oven to 375°F. Bake the pot pie on a rimmed baking sheet (to catch any spills) for 35-40 minutes. You’ll know it’s done when the crust is deep golden brown and the filling is bubbling through the slits.
If the crust starts browning too quickly, tent it loosely with foil. Let it rest for 10 minutes after baking—this allows the filling to set slightly. Serve warm, with the filling thick and creamy beneath that perfectly flaky crust.
Pro Tips For Making Shredded Chicken Pot Pie
- Poach the Chicken: Simmer chicken breasts in salted water for 12-15 minutes until just cooked through—overcooking makes them dry and stringy. I learned this the hard way after making chewy pot pie filling too many times.
- Sauté the Veggies: Cook onions and carrots in butter for 5-7 minutes until soft before adding flour. Sounds basic, but it actually changes the outcome by sweetening the base flavor.
- Skip the Overmixing: Stir the flour-butter roux for exactly 1-2 minutes to cook off the raw taste, but resist the urge to keep stirring after adding liquid. My grandmother swore by this, and she was right: overmixing makes the filling gummy.
- Use Cold Butter: Cut unsalted butter into the flour for the crust while it’s still ice-cold. This isn’t the prettiest method, but it’s the tastiest—flaky layers every time.
Make-Ahead Tips for This Dish
Prep Filling Ahead
You can make the creamy filling up to 2 days in advance. Cook and shred the chicken, then complete the sauce as directed. Store it in an airtight container in the fridge. The flavors actually deepen overnight as the herbs meld with the broth. 💡
Assemble Unbaked
Roll out your pie crust and line the dish, but don’t add the top crust yet. Cover tightly with plastic wrap and refrigerate for up to 24 hours. When ready to bake, top with the second crust, brush with egg wash, and bake as usual.
Freeze for Later
Assemble the entire pot pie without baking, then wrap tightly in plastic wrap and foil. Freeze for up to 3 months. Thaw overnight in the fridge before baking. I always label mine with the date to keep track.
Bake from Cold
If baking a refrigerated or thawed pot pie, add 10-15 minutes to the baking time. Cover with foil for the first 20 minutes to prevent over-browning. The filling needs that extra time to heat through completely.
Reheat Leftovers
Store leftovers in the fridge for up to 4 days. Reheat covered with foil at 350°F for 15-20 minutes. For a crispy crust, uncover for the last 5 minutes. Microwaving works in a pinch but makes the crust soggy. ❄️
Portion for Meals
Divide the unbaked filling into individual ramekins, top with small crust rounds, and freeze. These single servings bake in 25-30 minutes at 375°F—perfect for quick lunches. I love having these ready for busy weeknights.
Nutrition Facts
Frequently Asked Questions
Can I use rotisserie chicken instead?
Rotisserie chicken adds great flavor and saves time. Remove skin and shred 1.5 lb just like pre-cooked chicken.
How do I prevent a soggy bottom crust?
Pre-bake the bottom crust for 8-10 minutes before adding filling. Also, ensure filling is thick (not runny) before assembling.
Can I make this gluten-free?
Yes! Use gluten-free 1:1 flour for the roux and a gluten-free pie crust. The filling texture will be identical.
Why did my filling turn out watery?
Most likely the roux didn’t cook long enough or not enough liquid evaporated. Simmer filling uncovered for 2-3 extra minutes next time.

- 4C Bread Crumbs Meatballs Recipe: Crispy Crust and Juicy Centers - September 25, 2026
- 6 Oz Chocolate Chip Cookie Recipe: Perfectly Balanced Crispy Edges and Chewy Hearts - September 25, 2026
- 6-Inch Coffee Cake Recipe: Vanilla Bean Swirls and Buttery Streusel Topping - September 25, 2026