
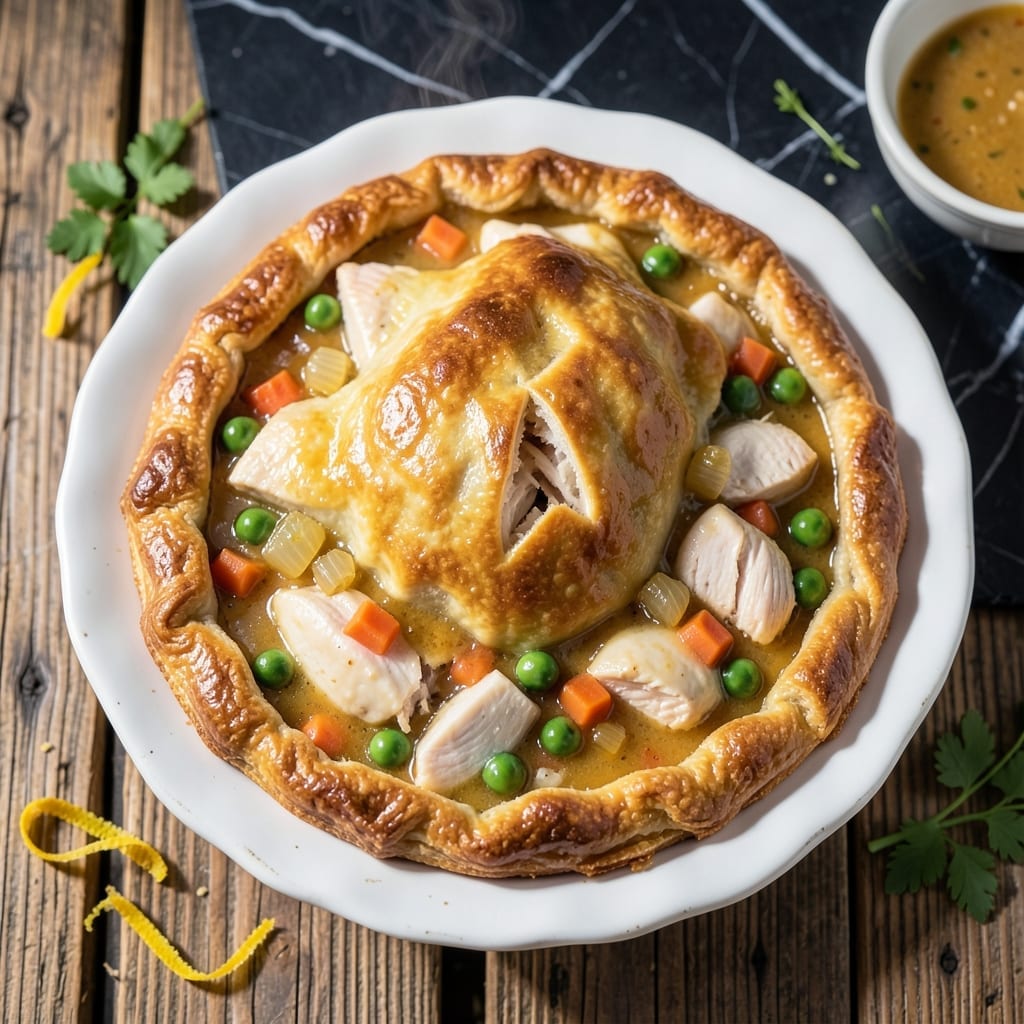
There’s something deeply satisfying about pulling a golden individual chicken pot pie from the oven, knowing each bite will deliver that classic comfort. This recipe brings all the warmth of the traditional dish in a perfectly portioned serving.
The flaky crust encapsulates a creamy filling of tender chicken, vegetables, and herbs, creating a self-contained meal that’s as practical as it is delicious. No need to worry about leftovers or uneven baking—each pie cooks evenly in its own dish.
What makes this version special is the attention to detail in both crust and filling. The buttery pastry stays crisp while the filling remains rich and flavorful, never watery. It’s comfort food at its most refined.
Perfect for a cozy dinner or impressive enough for guests. Here’s how to make this classic with professional results every time.
Ingredients for Single Chicken Pot Pie
Golden crust encases tender chicken and vegetables in a creamy, herb-infused filling for ultimate comfort.
| Ingredient | Amount | Notes |
|---|---|---|
| All-Purpose Flour 🌾 | 2 ½ cups | Plus extra for dusting |
| Unsalted Butter 🧈 | 1 cup | Cold, cut into cubes |
| Ice Water 💧 | ⅓ cup | Chilled for flaky crust |
| Salt 🧂 | 1 tsp | Divided between crust and filling |
| Boneless Skinless Chicken Breast 🍗 | 1 lb | Diced into 1/2-inch pieces |
| Yellow Onion 🧅 | 1 whole | Finely diced for filling |
| Carrots 🥕 | 2 whole | Peeled and diced small |
| Celery Stalks 🥬 | 2 whole | Finely chopped for texture |
| Garlic Cloves 🧄 | 2 cloves | Minced for depth of flavor |
| Fresh Thyme Leaves 🌿 | 1 tbsp | Or 1 tsp dried thyme |
| Fresh Rosemary 🍃 | 1 tsp | Finely chopped for aroma |
| All-Purpose Flour 🌾 | ¼ cup | For thickening the filling |
| Chicken Broth 🍲 | 1 ½ cups | Low-sodium preferred for control |
| Heavy Cream 🥛 | ½ cup | Full-fat for rich filling |
| Frozen Peas 🌱 | ½ cup | Thawed before adding |
| Black Pepper 🌶️ | ½ tsp | Freshly ground for best flavor |
For the crust, King Arthur Flour is the gold standard—high protein content ensures that flaky texture. Plugra European-style butter (available at Whole Foods) has a higher fat content, which translates to better layers. The chicken should be fresh, not frozen—thighs can substitute for breasts if you prefer darker meat. Look for organic, free-range for superior flavor and texture.
No thyme or rosemary? Poultry seasoning at half the amount works in a pinch. Fresh out of heavy cream? Whole milk with a pat of butter gets you close. For the broth, Better Than Bouillon makes a rich paste that’s better than most canned options. The peas can be swapped for diced green beans or corn—whatever you’ve got in the freezer (just thaw first).
The crust dough can rest in the fridge for up to 2 days or freeze for 1 month. Assemble and bake the pies the same day for best texture. Leftovers? They’ll keep 3-4 days in the fridge, but the crust softens—reheat in the oven to crisp it back up.
Why You’ll Love This Recipe
- One Pan Wonder: I love that I can mix the flour, butter, and ice water right in the same pan I’ll bake it in—no extra bowls to wash.
- Buttery Crust Magic: That flaky, golden crust from the butter and flour combo? It’s the kind of comfort that makes me sigh with the first bite.
- Solo or Share: Honestly, it’s just the right size for one, but I’ve stretched it to two servings with a side salad when my partner’s not too hungry.
- Budget Friendly: A single chicken breast and pantry staples mean I’m not breaking the bank for a meal that feels like a hug on a plate.
Step-by-Step Instructions for Single Chicken Pot Pie
Master the technique for restaurant-quality results with these precise, professional steps.
Step 1: Prepare the Flaky Pie Crust
In a large bowl, combine the 2.5 cups All-Purpose Flour with ½ teaspoon Salt. Add the 1 cup Unsalted Butter cut into cubes, then work it into the flour using your fingers or a pastry cutter until the mixture resembles coarse crumbs with pea-sized butter pieces visible.
Gradually drizzle in the ⅓ cup Ice Water, mixing gently with a fork until the dough just comes together. Overworking develops gluten, which makes crust tough. Form into a disk, wrap in plastic, and refrigerate for 1 hour—this chilling prevents shrinking and ensures layers.
Step 2: Create the Rich Chicken and Vegetable Filling
In a large skillet, sauté the diced 1 lb Boneless Skinless Chicken Breast over medium-high heat until lightly browned, about 5-6 minutes. Remove and set aside. In the same skillet, cook the finely diced 1 whole Yellow Onion, 2 whole Carrots, and 2 whole Celery Stalks for 5 minutes until softened.
Add the minced 2 cloves Garlic Cloves, 1 tbsp Fresh Thyme Leaves, and 1 tsp Fresh Rosemary, cooking for 30 seconds until fragrant. Sprinkle the ¼ cup All-Purpose Flour over the vegetables, stirring constantly for 1 minute to cook off the raw flour taste.
Step 3: Build and Thicken the Sauce
Slowly pour in the 1.5 cups Chicken Broth while whisking continuously to prevent lumps. Bring to a simmer and cook for 3-4 minutes until the mixture thickens enough to coat the back of a spoon. This roux-based sauce should be velvety, not gluey.
Stir in the ½ cup Heavy Cream, remaining ½ teaspoon Salt, and ½ teaspoon Black Pepper. Return the chicken to the skillet along with the ½ cup Frozen Peas (thawed). Simmer for 2-3 minutes until the filling is thick and glossy. Taste and adjust seasoning if needed.
Step 4: Assemble and Bake the Individual Pies
Divide the filling evenly among four 10-ounce ramekins or oven-safe bowls, filling each about three-quarters full. Roll out the chilled dough to ⅛-inch thickness and cut circles slightly larger than the ramekins. Place a dough circle over each, pressing gently to seal the edges. Cut small slits in the top to allow steam to escape.
Bake at 375°F for 30-35 minutes until the crust is golden brown and the filling is bubbling. The top should be deeply colored with visible flaky layers, and the edges should pull away slightly from the dish. Let cool for 10 minutes before serving—this gives the filling time to set.
Pro Tips For Making Single Chicken Pot Pie
- Chill the Dough: Pop your flour-butter crust in the fridge for at least 30 minutes before rolling—I learned this the hard way after my first three pies turned into tough, shrunk messes.
- Cube the Chicken: Cut the boneless breast into 1-inch pieces so they cook through in 8-10 minutes without drying out, and you’ll skip the rubbery texture that comes with whole pieces.
- Ice Water Only: Use actual ice water, not just cold tap, when mixing the dough—about 4-5 tablespoons—to keep the butter from melting prematurely and ruining the flakiness.
- Vent the Top: Poke 3-4 small slits in the crust before baking so steam escapes and your pie doesn’t burst open like a volcano, leaving a mess in your oven.
Dietary Considerations for This Recipe
Gluten-Free Adaptation
Swap the 2.5 cups All-Purpose Flour for a 1:1 gluten-free baking blend like King Arthur’s Measure for Measure. Add 1 tsp xanthan gum if your blend doesn’t include it. The crust will be slightly more delicate but still flaky. Chill the dough for 1.5 hours to improve workability. 💪
Dairy-Free Option
Use coconut oil instead of butter for the crust—1 cup solid coconut oil works perfectly. For the filling, replace ½ cup Heavy Cream with full-fat coconut milk. The flavor will have a subtle coconut note, but it complements the chicken beautifully.
Lower-Carb Version
Replace the traditional crust with a cauliflower crust made from 2 cups riced cauliflower, 1 egg, and ½ cup almond flour. Press into ramekins before baking. This cuts carbs significantly while keeping the dish satisfying.
Vegetarian Swap
Substitute 1 lb Boneless Skinless Chicken Breast with 1.5 cups cooked chickpeas or diced mushrooms for a hearty vegetarian version. The chickpeas add protein and texture, while mushrooms provide a meaty bite. Use vegetable broth instead of chicken broth.
Lactose-Free Adjustments
If avoiding lactose, use lactose-free butter for the crust and unsweetened almond milk mixed with 1 tbsp cornstarch to replace the heavy cream. The filling will still be rich and creamy without the dairy.
Allergen-Friendly Tips
For nut allergies, ensure all ingredients are processed in nut-free facilities. For egg allergies, use aquafaba (chickpea brine) as a binder in the crust. Always check labels on broth and other packaged ingredients for hidden allergens. 🌱
Nutrition Facts
Frequently Asked Questions
Can I use store-bought pie crust?
Yes, but it won’t be as flaky as homemade. Roll out 1 sheet of store-bought crust and cut to fit your ramekins. Chill for 15 minutes before baking to prevent shrinking.
For best results, brush with egg wash before baking for a golden finish.
How do I prevent a soggy bottom crust?
Pre-bake the bottom crust for 10 minutes at 375°F before adding the filling. Also, ensure your filling is thick and not watery before assembling.
Can I make these ahead of time?
Assemble the pies and refrigerate for up to 24 hours before baking. Add 5-10 minutes to the baking time if baking straight from the fridge.
They’re best served fresh, but leftovers reheat well in the oven.
What size ramekins should I use?
Use 10-ounce ramekins for a generous single serving. Fill them about three-quarters full to avoid spillage during baking.

- 6 Oz Chocolate Chip Cookie Recipe: Perfectly Balanced Crispy Edges and Chewy Hearts - September 25, 2026
- 6-Inch Coffee Cake Recipe: Vanilla Bean Swirls and Buttery Streusel Topping - September 25, 2026
- 1 Hour Soup Recipe: Velvety Richness Without the Wait - September 25, 2026