
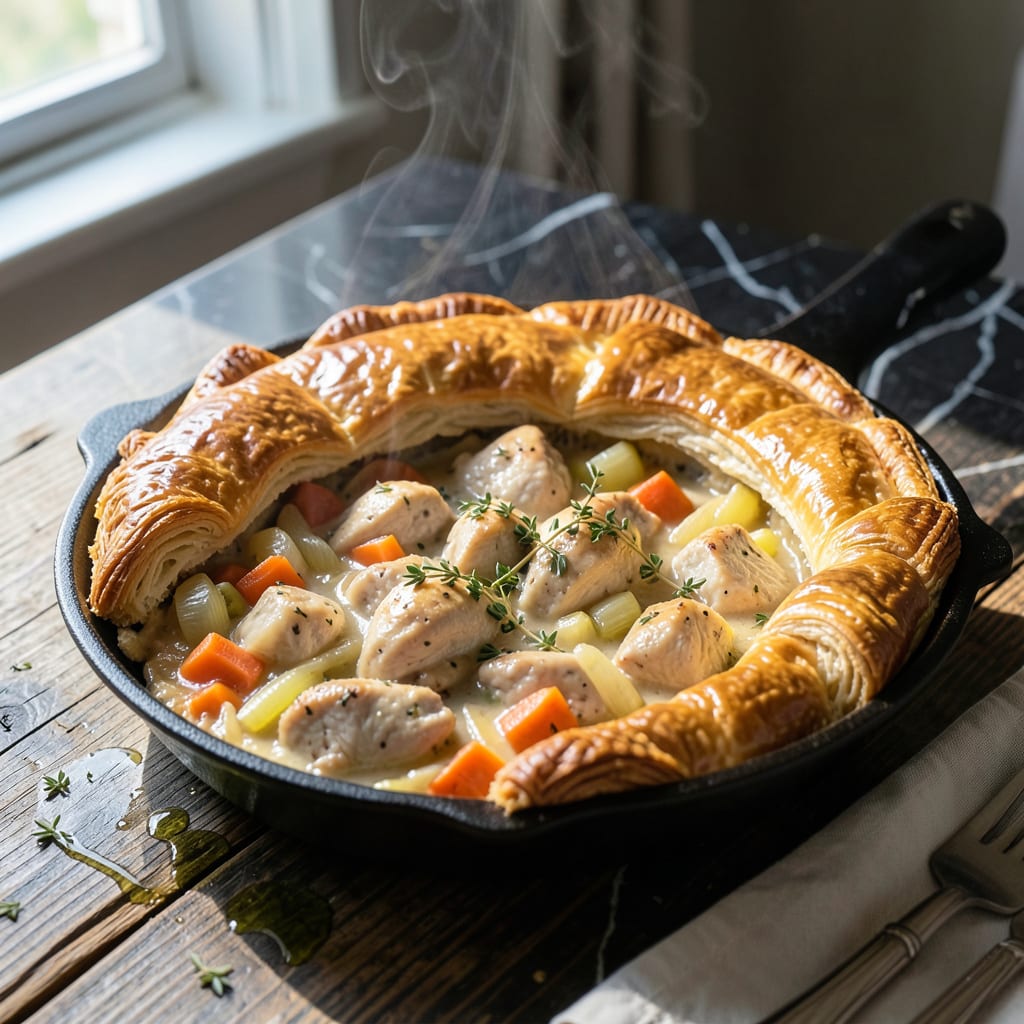
This one-pan skillet pot pie delivers homestyle comfort without the fuss of a traditional pie crust. The secret lies in a golden biscuit topping that bakes right on top of the creamy filling.
With tender chicken, hearty vegetables, and a rich sauce all cooked in a single skillet, this dish brings warmth to any table. The biscuits emerge perfectly golden and ready to soak up every savory bite.
Ingredients for Skillet Pot Pie
Homestyle comfort in a skillet with tender chicken and flaky biscuits on top.
| Ingredient | Amount | Notes |
|---|---|---|
| Boneless Skinless Chicken Breasts 🍗 | 1 ½ lb | Cut into bite-sized pieces |
| All-Purpose Flour 🌾 | ½ cup | For roux and biscuit topping |
| Unsalted Butter 🧈 | ½ cup | Divided for filling and biscuits |
| Yellow Onion 🧅 | 1 whole | Medium, finely diced |
| Carrots 🥕 | 2 whole | Medium, peeled and diced |
| Celery Stalks 🌿 | 2 whole | Diced for flavor base |
| Garlic Cloves 🧄 | 3 cloves | Minced for depth of flavor |
| Chicken Broth 🥣 | 2 cups | Low-sodium preferred |
| Whole Milk 🥛 | 1 cup | For creamy filling |
| Frozen Peas 🌱 | 1 cup | No need to thaw |
| Fresh Thyme Leaves 🍃 | 1 tbsp | Or 1 tsp dried thyme |
| Salt 🧂 | 1 tsp | Adjust to taste |
| Black Pepper 🌶️ | ½ tsp | Freshly ground |
| Baking Powder 🧂 | 2 tsp | For fluffy biscuits |
| Buttermilk 🥛 | ¾ cup | For biscuit topping |
[recipeingredientscaler]
The chicken sets the tone—boneless, skinless breasts stay moist and cook evenly. Look for air-chilled options at Whole Foods or Trader Joe’s for better texture. The vegetables (onion, carrot, celery) form the classic mirepoix base—fresh is best, but frozen works in a pinch. For the biscuits, cold butter is key for that flaky, golden top.
No buttermilk? Whole milk plus 1 tbsp vinegar does the trick. Swap thyme for rosemary if that’s your taste. The peas can be fresh, but frozen hold their shape better. Chicken broth can be homemade or high-quality store-bought—Better Than Bouillon is a solid choice. For a richer filling, substitute half the milk with heavy cream.
Leftovers keep 3-4 days in the fridge, though the biscuits soften. Reheat covered to retain moisture. Freeze the filling separately for up to 3 months, but skip freezing assembled—biscuits lose their texture.
Why You’ll Love This Recipe
- One Pan Wonder: I love that everything—chicken, veggies, even the crust—cooks in a single skillet. Less mess, more flavor.
- Buttery Comfort: The flaky crust made with butter and flour soaks up the juices from the chicken and carrots. It’s cozy in every bite.
- Weeknight Hero: This dish goes from prep to table in under an hour, and my kids devour it. Between us, it’s my secret for busy evenings.
- Leftovers for Days: It tastes even better the next day, and the portions stretch easily. I’ll be real: I always make extra on purpose.
Step-by-Step Instructions for Skillet Pot Pie
This one-pan method delivers rich, creamy filling topped with fluffy biscuits—comfort food at its best.
Step 1: Cook Chicken and Vegetables
Heat a large oven-safe skillet over medium-high heat. Add the boneless skinless chicken breasts cut into bite-sized pieces and cook for 5-6 minutes until lightly browned. Remove and set aside.
In the same skillet, melt 2 tablespoons of the unsalted butter. Add the yellow onion, carrots, and celery stalks. Cook for 5 minutes until the vegetables begin to soften. Stir in the garlic cloves and cook for 30 seconds until fragrant.
Step 2: Create the Creamy Filling
Sprinkle the all-purpose flour over the vegetables and stir to coat. Gradually whisk in the chicken broth and whole milk, scraping up any browned bits from the bottom of the skillet. Bring to a simmer and cook for 3-4 minutes until the mixture thickens.
Return the chicken to the skillet along with the frozen peas, fresh thyme leaves, salt, and black pepper. Stir to combine and remove from heat. The filling should be thick and bubbly, coating the back of a spoon.
Step 3: Prepare and Add the Biscuit Topping
In a bowl, combine the remaining all-purpose flour, baking powder, and a pinch of salt. Cut in the remaining unsalted butter until the mixture resembles coarse crumbs. Stir in the buttermilk until just combined—do not overmix.
Drop spoonfuls of the biscuit dough evenly over the filling in the skillet. You should have about 6-8 biscuits depending on size. The dough will spread slightly as it bakes.
Step 4: Bake Until Golden
Place the skillet in a preheated 400°F oven. Bake for 15-20 minutes until the biscuits are golden brown and the filling is bubbling at the edges. Check at the 15-minute mark—if the biscuits are browning too quickly, tent with foil.
Remove from the oven and let cool for 5 minutes before serving. The biscuits should be fluffy and light, with a golden crust on top. Serve warm directly from the skillet for the ultimate comfort experience.
Pro Tips For Making Skillet Pot Pie
- Cube the Chicken Small: Cut the boneless skinless chicken breasts into ½-inch pieces—this guarantees they cook through in the skillet without turning dry or chewy. I learned this the hard way after pulling out rubbery chunks from my first few attempts.
- Bloom the Flour: After melting the butter, cook the flour for a full 2 minutes before adding liquid. This removes the raw taste and builds a deeper, nuttier base for your filling.
- Skip the Raw Carrots: Par-cook the carrots in the microwave for 3 minutes with a splash of water before adding them to the skillet. Sounds weird, but it works—they’ll be tender by the time the pie finishes baking.
- Rest Before Serving: Let the skillet pot pie sit for 5-10 minutes after baking. This lets the filling thicken up, so you’re not serving a runny mess—yes, even if you’re impatient like me.
Storing and Reheating This Dish
Refrigerator Storage
Let your skillet pot pie cool for no more than 2 hours before storing. Transfer leftovers to airtight containers—I use glass Pyrex with snap-on lids. It keeps 3-4 days in the fridge at 40°F or below. The biscuits will soften, but the flavors deepen overnight. ❄️
Freezer Storage
Freeze the filling separately for up to 3 months in quart-sized freezer bags. Leave 1 inch of headspace for expansion and squeeze out excess air. Avoid freezing the assembled dish—the biscuits lose their flaky texture when thawed.
Oven Reheating
Preheat your oven to 350°F. Cover the skillet or dish with aluminum foil and heat for 15-20 minutes. This method revives the biscuits best, keeping them slightly crisp. Add a splash of milk if the filling seems too thick.
Microwave Reheating
For quick lunches, microwave individual portions covered with a damp paper towel. Heat on 70% power for 2-3 minutes, stir, then continue in 30-second intervals until reaching 165°F. The biscuits won’t be as crisp, but it’s fast and convenient. 🔥
Reviving the Biscuits
If your biscuits have softened too much, pop the dish under the broiler for 1-2 minutes to crisp the tops. Watch closely to avoid burning. Alternatively, place in a toaster oven at 375°F for 5 minutes for a quick refresh.
Nutrition Facts
Frequently Asked Questions
Can I use store-bought biscuits instead?
Yes, you can use refrigerated biscuit dough as a shortcut. Arrange them on top of the hot filling and bake as directed. They won’t taste as homemade but will still turn out flaky and golden.
What if my filling is too thin?
Simmer it uncovered for 3-5 minutes to thicken. If it’s still thin, mix 1 tablespoon of cornstarch with 1 tablespoon cold water, then stir it into the filling. Cook for 1-2 minutes until thickened.
Can I make this ahead of time?
Prepare the filling and refrigerate it for up to 2 days. When ready to bake, reheat the filling, then add fresh biscuit dough on top. This ensures the biscuits stay fluffy.
What skillet works best?
Use a 10-12 inch oven-safe skillet, preferably cast iron or stainless steel. Avoid nonstick skillets with plastic handles, as they can’t go in the oven at 400°F.

- 4C Bread Crumbs Meatballs Recipe: Crispy Crust and Juicy Centers - September 25, 2026
- 6 Oz Chocolate Chip Cookie Recipe: Perfectly Balanced Crispy Edges and Chewy Hearts - September 25, 2026
- 6-Inch Coffee Cake Recipe: Vanilla Bean Swirls and Buttery Streusel Topping - September 25, 2026