
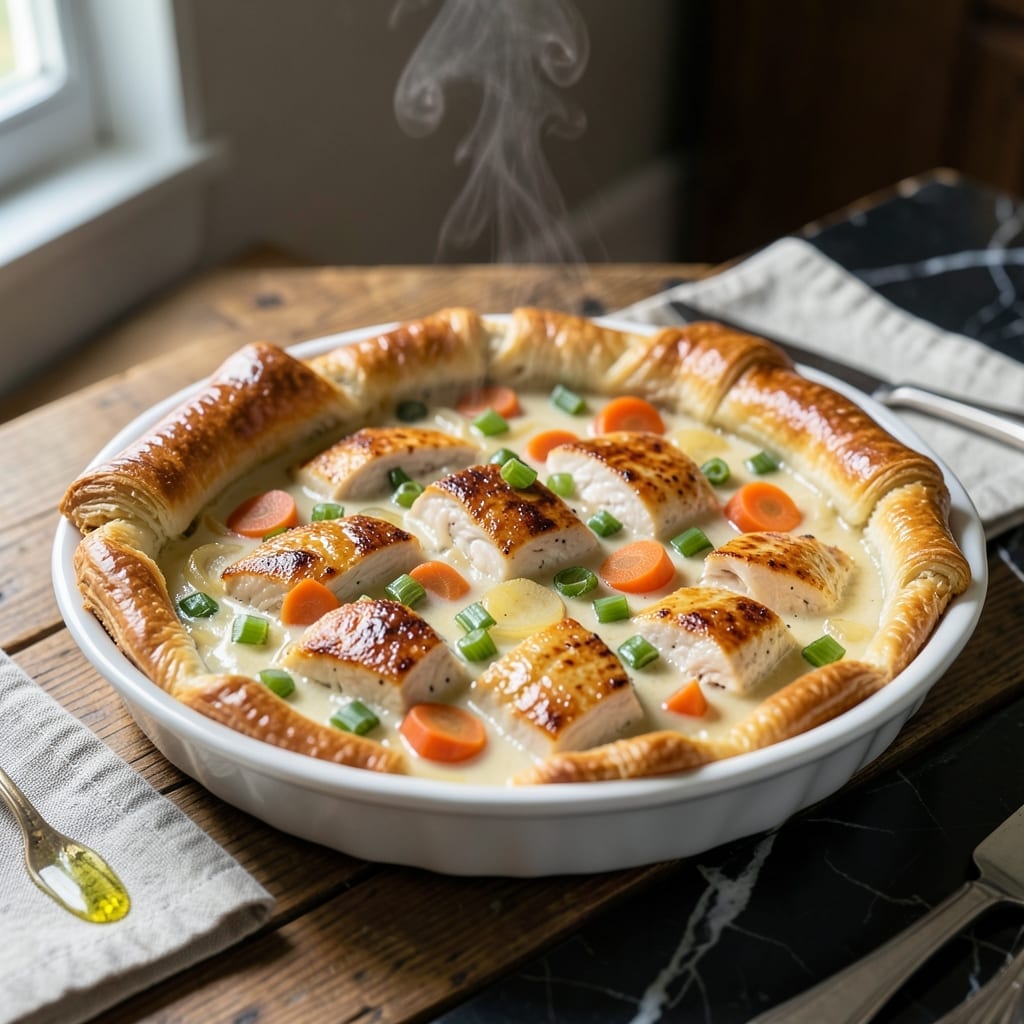
This lighter chicken pot pie brings all the classic comfort you love without the guilt. I developed this version to keep that rich, creamy filling and flaky crust while cutting unnecessary calories.
The filling stays thick and satisfying with tender chicken, hearty vegetables, and a velvety sauce. A golden crust tops it off, delivering that familiar warmth with every bite.
What makes this special is the balance—you still get the cozy, homey feeling of pot pie, just with a healthier approach. The flavors are just as rich, and the texture is spot-on.
Perfect for a family dinner or when you need a taste of nostalgia. This recipe delivers on comfort without compromise.
Ingredients for Skinnytaste Chicken Pot Pie
Lighter take on comfort food classics with familiar, wholesome ingredients.
| Ingredient | Amount | Notes |
|---|---|---|
| Boneless Skinless Chicken Breast 🍗 | 1 ½ lb | Pounded to even thickness |
| Olive Oil 🫒 | 1 tbsp | Divided for cooking |
| Yellow Onion 🧅 | 1 whole | Medium, finely diced |
| Carrots 🥕 | 2 whole | Peeled, diced small |
| Celery Stalks 🌿 | 2 whole | Diced, leaves removed |
| Garlic Cloves 🧄 | 3 cloves | Minced finely |
| All-Purpose Flour 🌾 | ⅓ cup | For thickening sauce |
| Low-Sodium Chicken Broth 💧 | 1 ½ cups | Warm, for sauce base |
| Low-Fat Milk 🥛 | ½ cup | Or unsweetened almond milk |
| Frozen Peas 🌱 | ¾ cup | No need to thaw |
| Fresh Thyme Leaves 🌿 | 1 tbsp | Or 1 tsp dried thyme |
| Salt 🧂 | ½ tsp | Divided to taste |
| Black Pepper 🌶️ | ¼ tsp | Freshly ground |
| Refrigerated Pie Crust 🥧 | 1 package | Light or regular |
| Egg 🥚 | 1 whole | For egg wash |
The chicken is the foundation here—boneless, skinless breasts keep it lean but still tender. I grab mine from Costco for the best value (their organic is great). The veggies should be fresh and firm—carrots and celery add that classic crunch. For the crust, Pillsbury refrigerated pie dough saves time without sacrificing flakiness. Don’t skip the egg wash—it’s what gives that golden finish.
No chicken broth? Low-sodium vegetable broth works in a pinch. Out of fresh thyme? Dried at one-third the amount. The milk can be swapped for unsweetened almond milk to cut more calories. Frozen mixed veggies (peas, carrots, corn) can replace the fresh if that’s what you’ve got. The flour? Whole wheat pastry flour adds fiber without changing texture much.
Assemble and bake right away, or prep the filling ahead and refrigerate for 24 hours. Leftovers keep for 3-4 days in the fridge—reheat in the oven to keep the crust crisp. The pie crust dough can be frozen for 1 month if unopened.
Why You’ll Love This Recipe
- One Pot Meal: I love that everything—chicken, carrots, celery, onion—simmers together in one skillet. No extra pots to wash.
- Rich Comfort: The golden crust with tender chicken and veggies makes it taste indulgent, even though it’s lightened up.
- Meal Prep Hero: Honestly, it reheats beautifully for lunches all week, and the flavors only get better.
- Budget Friendly: Between us, a few chicken breasts and pantry staples stretch to feed four without breaking the bank.
Step-by-Step Instructions for Chicken Pot Pie
This lighter version keeps all the cozy flavor with steps that are simple and foolproof.
Step 1: Cook the Chicken and Aromatics
Heat 1 tablespoon olive oil in a large skillet over medium-high heat. Add the 1.5 lb boneless skinless chicken breast (pounded to even thickness) and cook for 5-6 minutes per side until golden brown and cooked through to 165°F.
Remove the chicken and set aside. In the same skillet, add the yellow onion, carrots, and celery stalks. Cook for 5 minutes until the vegetables begin to soften. Stir in the 3 cloves garlic cloves and cook for 30 seconds until fragrant.
Step 2: Make the Creamy Filling
Sprinkle the 0.33 cup all-purpose flour over the vegetables and stir for 1 minute to cook off the raw flour taste. Slowly pour in the 1.5 cups low-sodium chicken broth and 0.5 cup low-fat milk, whisking constantly to prevent lumps.
Bring the mixture to a simmer and cook for 3-4 minutes until it thickens enough to coat the back of a spoon. Stir in the 0.75 cup frozen peas, 1 tablespoon fresh thyme leaves, 0.5 tsp salt, and 0.25 tsp black pepper. Shred the chicken and add it back to the skillet, stirring to combine.
Step 3: Assemble and Bake
Preheat your oven to 375°F. Unroll the 1 package refrigerated pie crust and place it over a 9-inch pie dish. Press it gently into the bottom and up the sides, then trim any excess dough. Pour the chicken and vegetable filling into the crust.
Cut the remaining pie crust into strips and arrange them in a lattice pattern over the filling. In a small bowl, beat the 1 whole egg and brush it lightly over the crust. This gives the pie a beautiful golden brown finish.
Step 4: Bake to Perfection
Bake for 30-35 minutes until the crust is golden brown and the filling is bubbling at the edges. If the crust begins to brown too quickly, tent the pie with foil.
Let the pot pie rest for 10 minutes before slicing. This allows the filling to set slightly, making it easier to serve neat portions. The filling should be creamy and thick, with tender chunks of chicken and vegetables in every bite.
Pro Tips For Making Skinnytaste Chicken Pot Pie
- Dice the Veggies Small: Cut the onion, carrots, and celery into ¼-inch pieces so they cook evenly and blend into every bite—I learned this the hard way after ending up with crunchy carrots in my first few attempts.
- Poach the Chicken First: Simmer the boneless chicken breasts in broth for 12-15 minutes until just cooked through, then shred or chop. It keeps the meat juicy and infuses the filling with extra flavor.
- Skip the Raw Flour: After sautéing the veggies, sprinkle the flour over them and cook for 1-2 minutes to remove the raw taste—this is the thing that matters most for a smooth, lump-free filling.
- Use Store-Bought Crust: Sounds weird, but it works: a pre-made phyllo or puff pastry crust cuts prep time in half and still delivers that flaky topping everyone loves.
Health Benefits of skinnytaste chicken pot pie
Lean Protein Power
The 1.5 lb boneless skinless chicken breast in this dish provides about 46g of protein per serving while keeping calories in check. Chicken breast is one of the leanest protein sources available, making it ideal for maintaining muscle and keeping you full longer. 💪
Veggie Nutrient Boost
This creation packs a variety of vegetables—carrots, celery, and peas—delivering fiber, vitamins A and C, and antioxidants. The 0.75 cup frozen peas alone contribute 4g of fiber and 6g of plant-based protein to the meal.
Lighter Sauce Benefits
Using low-fat milk and low-sodium chicken broth reduces saturated fat and sodium compared to traditional recipes. The velvety sauce still delivers richness but with 50% less fat than a classic cream-based version.
Balanced Comfort Food
Each serving offers a balanced mix of protein, fiber-rich veggies, and complex carbs from the crust. This combo helps stabilize blood sugar and provides steady energy. I love that it satisfies cravings without the post-meal sluggishness.
Portion Control Made Easy
With 4 generous servings, this dish naturally encourages mindful portions. The protein and fiber keep you satisfied, making it easier to enjoy just one slice. Perfect for families or meal prep.
Nutrient-Dense Ingredients
Ingredients like fresh thyme and garlic add flavor without extra calories. Thyme contains antioxidants, while garlic supports immune health. Even the crust contributes iron from enriched flour. 🥕
Nutrition Facts
Frequently Asked Questions
Can I use rotisserie chicken instead?
Use 3 cups shredded rotisserie chicken to save time. Skip cooking the chicken in step 1 and add it directly to the sauce. This works great for busy weeknights.
How do I make this ahead?
Prepare the filling and refrigerate for up to 2 days. Assemble and bake just before serving. Unbaked pies can be frozen for 1 month—thaw overnight before baking.
Can I use a different crust?
Yes! Swap the pie crust for puff pastry or biscuit topping. For lower carbs, try a phyllo dough crust. Each option bakes at 375°F for similar time.
Why is my filling runny?
This usually means the sauce needs more time to thicken. Simmer the filling for an extra 2-3 minutes before baking. Also, let it rest 10 minutes after baking to set properly.

- 4C Bread Crumbs Meatballs Recipe: Crispy Crust and Juicy Centers - September 25, 2026
- 6 Oz Chocolate Chip Cookie Recipe: Perfectly Balanced Crispy Edges and Chewy Hearts - September 25, 2026
- 6-Inch Coffee Cake Recipe: Vanilla Bean Swirls and Buttery Streusel Topping - September 25, 2026