
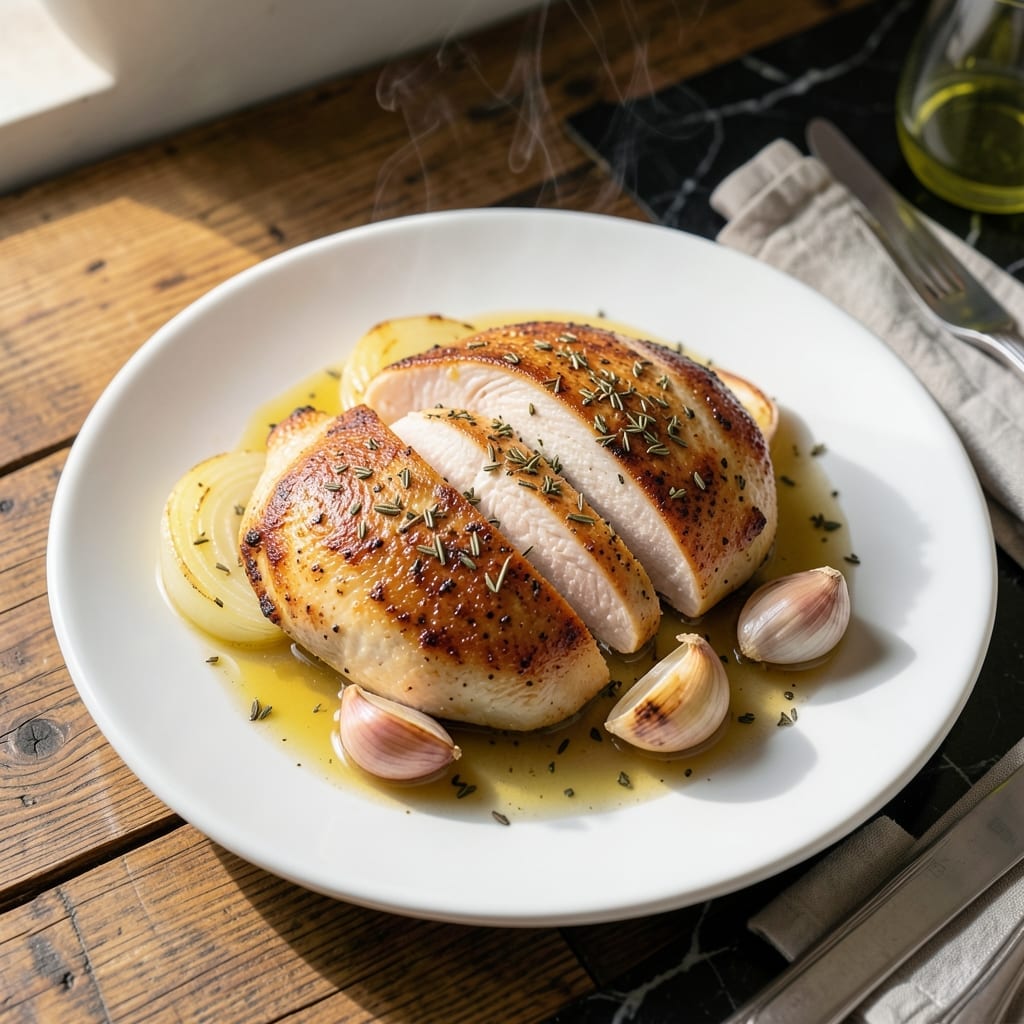
I’ve perfected cooking split chicken breast in the Instant Pot to deliver juicy, tender results every time. This method locks in moisture while cutting cooking time to a fraction of traditional stovetop methods.
The Instant Pot’s pressure cooking function transforms tougher cuts into fall-apart tender meat in under 15 minutes. No need for constant monitoring or complex techniques—just set it and forget it.
What you get is evenly cooked chicken with a natural juiciness that’s hard to achieve through other methods. The meat stays succulent, never dry, and absorbs any seasoning beautifully.
Perfect for weeknight dinners, meal prep, or whenever you need a reliable, hands-off protein. This technique works for any split chicken breast variation.
Ingredients for Split Chicken Breast Instant Pot
Simple list of flavor-packed ingredients for fall-off-the-bone results in your pressure cooker.
| Ingredient | Amount | Notes |
|---|---|---|
| Split Chicken Breast 🍗 | 2 lb | Bone-in, skin-on preferred |
| Chicken Broth 🥣 | 1 cup | Low-sodium for seasoning control |
| Olive Oil 🫒 | 1 tbsp | Extra-virgin for richness |
| Garlic Cloves 🧄 | 4 cloves | Smashed for robust flavor |
| Yellow Onion 🧅 | 1 whole | Medium, quartered for depth |
| Dried Thyme 🌿 | 1 tsp | Or 1 tbsp fresh thyme |
| Dried Rosemary 🌿 | 1 tsp | Crushed to release aroma |
| Bay Leaf 🍃 | 1 whole | Dried, for subtle earthiness |
| Kosher Salt 🧂 | 1 tsp | Diamond Crystal preferred |
| Black Pepper 🌶️ | ½ tsp | Freshly ground for best results |
| Lemon Juice 🍋 | 1 tbsp | Freshly squeezed for brightness |
| Unsalted Butter 🧈 | 1 tbsp | Optional for finishing sauce |
The chicken is the star here. Bone-in, skin-on split breasts stay juiciest—look for plump pieces with pale pink flesh at the store. Costco has great bulk packs, but any supermarket butcher section works. If you can only find boneless, reduce cook time by 2 minutes. The skin adds flavor, but you can remove it after cooking if you prefer (though I never do).
No fresh herbs? Dried at one-third the amount works perfectly—just rub them between your fingers to wake up the flavors. Out of chicken broth? Water plus a bouillon cube gets you close. The onion and garlic add a solid base, but in a pinch, 1 tsp each of onion powder and garlic powder works. For extra richness, swap the olive oil for duck fat (if you’ve got it).
Cooked chicken keeps 4-5 days in the fridge, or freeze for 3 months. Shred it for sandwiches, slice for salads, or leave whole for plating. The broth left in the pot? Strain and save—it’s liquid gold for soups or gravies.
Why You’ll Love This Recipe
- Set and Forget: I toss everything in the Instant Pot, press start, and walk away—no babysitting required.
- Garlic-Infused Perfection: The garlic and onion simmering in broth make the chicken so tender and flavorful it falls off the bone.
- Weeknight Hero: Between us, this is my go-to for busy Tuesdays when I need dinner fast but still crave something hearty.
- Leftovers for Days: One batch gives me shredded chicken for tacos, soups, or salads all week—no waste, just easy meals.
Step-by-Step Instructions for Split Chicken Breast Instant Pot
Here’s the method I use to get fall-off-the-bone tenderness with minimal effort.
Step 1: Sear the Split Chicken Breast for Maximum Flavor
Set your Instant Pot to the Sauté function. Add the 1 tbsp Olive Oil and let it heat until it shimmers. Pat the 2 lb Split Chicken Breast dry with paper towels to ensure a good sear, then season both sides with the 1 tsp Kosher Salt and 0.5 tsp Black Pepper.
Working in batches if necessary, place the chicken skin-side down in the pot. Sear for 4-5 minutes until the skin turns a deep golden brown and releases easily from the bottom. Flip and sear the other side for 2-3 minutes. Remove the chicken and set aside.
Step 2: Sauté Aromatics to Build Depth
In the same pot, add the quartered 1 whole Yellow Onion and 4 cloves Garlic Cloves. Sauté for 2-3 minutes until the onion softens and the garlic becomes fragrant. Stir in the 1 tsp Dried Thyme, 1 tsp Dried Rosemary, and 1 whole Bay Leaf, cooking for an additional 30 seconds to toast the spices.
This step infuses the oil with aromatic flavors that will penetrate the chicken during pressure cooking. Be careful not to let the garlic burn—it should turn just slightly light golden at the edges.
Step 3: Deglaze and Pressure Cook to Perfection
Pour in the 1 cup Chicken Broth and use a wooden spoon to scrape up any browned bits from the bottom of the pot. This deglazing step ensures no residue is left to trigger the Instant Pot’s burn notice. Return the seared chicken to the pot, arranging it in a single layer if possible.
Secure the lid, set the valve to Sealing, and cook on High Pressure for 8 minutes. Once the cooking time is complete, allow the pressure to release naturally for 10 minutes, then quick-release any remaining pressure. The chicken is done when it reaches an internal temperature of 165°F.
Step 4: Finish with Brightness and Serve
Carefully remove the chicken from the pot and transfer it to a serving dish. Stir the 1 tbsp Lemon Juice and 1 tbsp Unsalted Butter into the remaining liquid in the pot to create a light, flavorful sauce. Taste and adjust seasoning if needed.
Spoon the sauce over the chicken before serving. The lemon juice cuts through the richness, while the butter adds a silky finish. Let the chicken rest for 5 minutes before serving to allow the juices to redistribute, ensuring each bite is moist and flavorful.
Pro Tips For Making Split Chicken Breast Instant Pot
- Sear the Skin First: I learned this the hard way—skipping the quick sear in olive oil before pressure cooking leaves the chicken breast pale and lacking depth. Just 3-4 minutes per side on the sauté function makes a real difference in flavor.
- Use Room Temp Broth: After ruining a batch with cold broth, I now let it sit out for 10 minutes before adding. Cold liquid can trigger the Instant Pot’s burn notice, especially with the chicken’s natural juices.
- Don’t Overcrowd the Pot: Sounds obvious, but resist the urge to cram in extra pieces. The chicken needs space for even cooking—stacking or squeezing in too many leads to uneven doneness.
- Add Aromatics Under the Rack: Toss the garlic and onion under the trivet instead of on top. This keeps them from burning during pressure cooking while still infusing the broth with flavor.
Common Mistakes When Making Perfect Results
Overfilling the Pot
Never exceed the Instant Pot’s ⅔ max fill line with liquid and food combined. For this recipe, 2 lb split chicken breast and 1 cup chicken broth stay well within limits. Overfilling risks uneven cooking or potential clogging of the pressure release valve. 💡
Skipping the Sear
Searing the chicken skin-side down for 4-5 minutes builds a flavor foundation. I know it’s tempting to skip this step, but the Maillard reaction creates depth you can’t achieve through pressure cooking alone. The skin also helps lock in moisture.
Insufficient Deglazing
Always scrape up every browned bit with a wooden spoon after adding 1 cup chicken broth. Even small pieces can trigger the burn notice on your Instant Pot. I use a flat-edge wooden spoon to ensure I get everything from the bottom and sides.
Incorrect Pressure Release
Let the pressure release naturally for the full 10 minutes. Quick-releasing too soon can result in tough, dry meat. The natural release allows the chicken to finish cooking gently in the residual heat. This step is non-negotiable for perfect texture.
Using Cold Ingredients
Always start with room-temperature chicken. Taking the 2 lb split chicken breast out of the fridge 30 minutes before cooking ensures even cooking. Cold meat can seize up, leading to uneven doneness and potential dryness in some areas.
Forgetting to Rest
Let the chicken rest for 5 minutes after removing it from the pot. This allows the juices to redistribute throughout the meat. Cutting too soon causes those precious juices to spill onto the cutting board instead of staying in the chicken. 🔥
Nutrition Facts
Frequently Asked Questions
Can I use boneless chicken instead?
Yes, but reduce the pressure cooking time to 6 minutes since boneless cooks faster. The texture will be slightly less moist without the bone, so avoid overcooking.
Why sear the chicken first?
Searing develops rich flavor through the Maillard reaction and renders fat from the skin. It creates a golden crust that pressure cooking alone can’t achieve. The process takes just 4-5 minutes per side.
What if my Instant Pot shows a burn notice?
This usually means food stuck to the bottom. Quick-release the pressure, open the lid, and scrape the pot thoroughly. Add 1/4 cup more liquid, then restart the cooking process.
How do I know when it’s done?
The chicken is finished when it reaches an internal temperature of 165°F. Use a meat thermometer to check the thickest part. The juices should run clear, not pink.

- 6 Oz Chocolate Chip Cookie Recipe: Perfectly Balanced Crispy Edges and Chewy Hearts - September 25, 2026
- 6-Inch Coffee Cake Recipe: Vanilla Bean Swirls and Buttery Streusel Topping - September 25, 2026
- 1 Hour Soup Recipe: Velvety Richness Without the Wait - September 25, 2026