
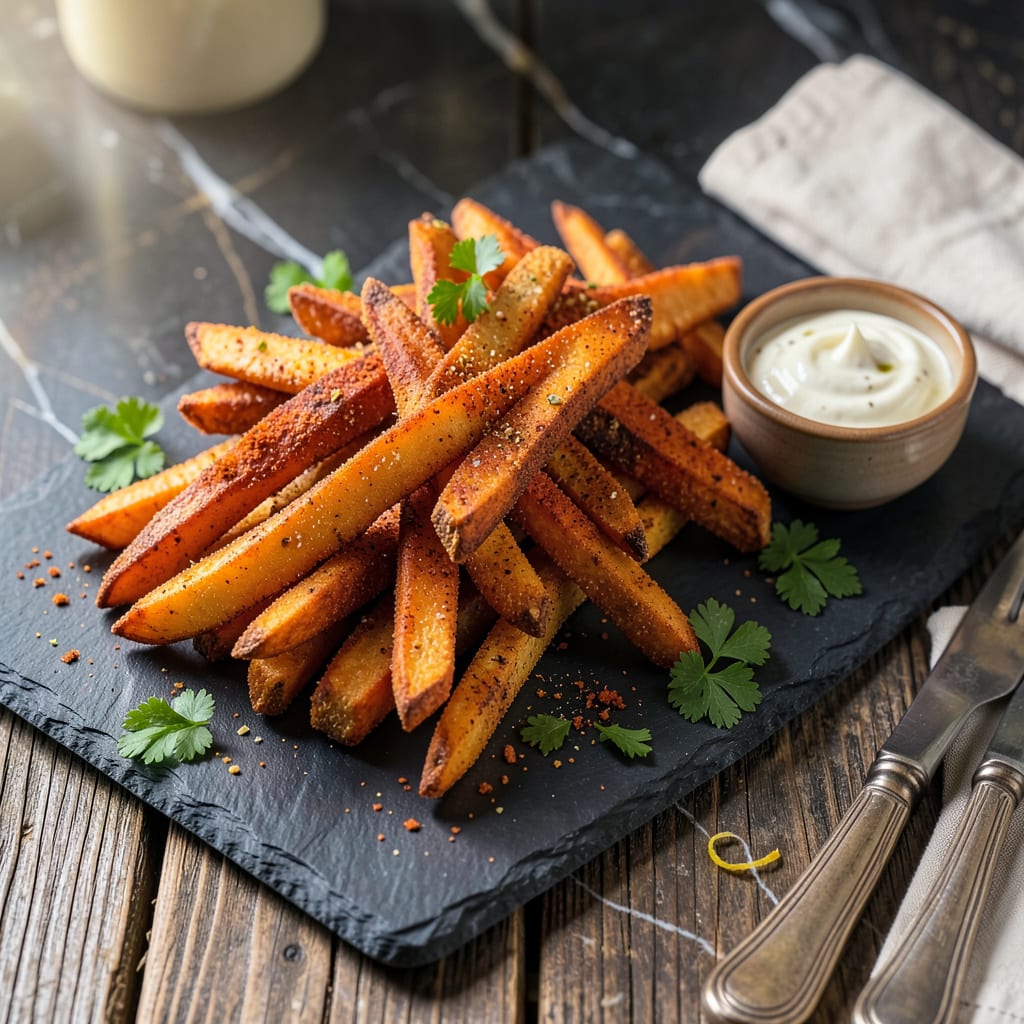
The perfect sweet potato fry delivers a satisfying contrast: crispy edges giving way to creamy centers. This recipe achieves that balance through precise cutting and cooking techniques. After testing multiple methods, I’ve found the ideal approach for consistent results every time.
What sets these fries apart is the two-step cooking process that ensures maximum crispiness without drying out the interior. The seasoning blend enhances rather than overpowers the natural sweetness of the potatoes. Whether serving as a side or snack, this method produces restaurant-quality fries with minimal effort.
Ingredients for Sweet Potato Fries
These carefully selected ingredients transform simple sweet potatoes into restaurant-quality fries with optimal texture contrast.
| Ingredient | Amount | Notes |
|---|---|---|
| Sweet Potatoes, medium 🍠 | 2 lb | Uniform thickness for even cooking |
| Extra-Virgin Olive Oil 🫒 | 3 tbsp | Divided for tossing and baking |
| Cornstarch 🌾 | 2 tbsp | For ultra-crispy texture |
| Smoked Paprika 🌶️ | 1 tsp | Adds depth without heat |
| Garlic Powder 🧄 | 1 tsp | Freshly ground preferred |
| Onion Powder 🧅 | 1 tsp | Balances sweetness naturally |
| Fine Sea Salt 🧂 | 1 tsp | Plus extra for finishing |
| Freshly Ground Black Pepper 🌶️ | ½ tsp | Coarse grind recommended |
| Cayenne Pepper 🔥 | ¼ tsp | Optional for subtle heat |
| Cold Water 💧 | 4 cups | For soaking potatoes |
| Avocado Oil Spray 🥑 | 1 can | High-heat for final crisp |
The sweet potatoes are the foundation—select firm, medium-sized tubers with smooth skin (avoid soft spots or bruising). Organic varieties often yield superior flavor, though conventional works perfectly. Jewel or Garnet yams provide ideal sweetness and moisture content. For the cornstarch, Argo or Bob’s Red Mill brands offer consistent results. The two-step soaking process (cold water followed by thorough drying) is non-negotiable for achieving the promised crispy-creamy duality mentioned in the introduction.
For dietary flexibility, the avocado oil spray can be replaced with refined coconut oil spray (neutral flavor, high smoke point). Smoked paprika alternatives include regular paprika plus 1/8 tsp liquid smoke, though the depth differs. Those avoiding nightshades may substitute ground cumin for the paprika. The cayenne is entirely optional—omit for sensitive palates or increase to 1/2 tsp for pronounced heat. All spices should be freshly opened within 6 months for maximum potency.
Prepared fries maintain optimal texture for 2-3 hours at room temperature, though they’re best served immediately. Refrigeration compromises crispness—reheat in a 400°F oven for 5-7 minutes to revive. Uncooked sweet potatoes keep 1-2 weeks in a cool, dark pantry. The seasoning blend can be pre-mixed and stored in an airtight container for up to 3 months, preserving flavor integrity for consistent results.
Why You’ll Love This Recipe
- No Knife Skills Needed: Honestly, the hardest part is cutting the sweet potatoes—and even that’s just rough chunks, not fancy julienne. Toss with cornstarch, oil, and spices, then let the oven do the work. I’ve made these half-asleep on a Sunday morning.
- That Smoky-Sweet Crunch: Here’s what sold me—the cornstarch makes the edges ridiculously crispy while the inside stays creamy, and the smoked paprika adds this deep, almost barbecue-like warmth. My kid licks the spice off the ones that fall on her plate. (Yes, even the garlic powder.)
- Meal Prep’s Secret Weapon: I double-batch these every weekend: reheat in the air fryer for 3 minutes, and they’re better than fresh. Pack them with burgers, toss into grain bowls, or eat cold straight from the fridge when you’re pretending to be “too busy” for lunch.
- Cheaper Than Takeout: Two medium sweet potatoes cost less than a side of fries at a restaurant, and this makes enough for four. I’ll be real: the first time I calculated the savings, I immediately bought a 5-pound bag. Leftovers? They disappear into omelets or get blended into soup. Zero waste.
Step-by-Step Instructions for Sweet Potato Fries
Mastering the balance between crispy exterior and creamy interior requires precise technique and timing.
Step 1: Prepare and Soak the Sweet Potatoes
Begin by scrubbing the sweet potatoes thoroughly under cold running water to remove any dirt. There’s no need to peel them—the skin adds texture and nutrients. Using a sharp chef’s knife, cut the sweet potatoes into ¼-inch thick sticks, ensuring uniform size for even cooking.
Immediately transfer the cut sweet potatoes to a large bowl and cover with the 4 cups cold water. This soaking process removes excess starch, which is crucial for achieving maximum crispiness. Let them soak for 30 minutes—you’ll notice the water becomes cloudy as the starch releases.
Step 2: Dry and Coat for Optimal Texture
After soaking, drain the sweet potatoes in a colander and rinse briefly under cold water. Spread them in a single layer on clean kitchen towels and pat completely dry. Any remaining moisture will prevent proper crisping, so take your time with this step.
In a large mixing bowl, combine the 2 tbsp cornstarch, 1 tsp smoked paprika, 1 tsp garlic powder, 1 tsp onion powder, 1 tsp fine sea salt, 0.5 tsp freshly ground black pepper, and 0.25 tsp cayenne pepper. Add the dried sweet potato sticks and toss gently until each piece is evenly coated with the spice mixture.
Step 3: First Bake for Structural Integrity
Preheat your oven to 400°F and line a large baking sheet with parchment paper. Drizzle 1 tbsp extra-virgin olive oil over the seasoned sweet potatoes and toss to coat evenly. Arrange the fries in a single layer on the prepared baking sheet, ensuring they don’t touch each other.
Bake for 15 minutes, then carefully flip each fry using tongs. This initial baking period develops the internal structure while beginning the crisping process. The fries should start to look slightly translucent at the edges but won’t be fully cooked at this stage.
Step 4: High-Heat Finish for Ultimate Crispiness
Increase the oven temperature to 425°F. Lightly spray the partially cooked fries with avocado oil spray, which has a high smoke point perfect for this final crisping stage. Return the baking sheet to the oven and bake for an additional 12-15 minutes, flipping halfway through.
Watch for the edges to become deep golden brown and slightly caramelized. The fries are done when they’re crispy on the outside but still yield slightly to pressure—a sign of that perfect creamy interior. The exact timing depends on your oven, so start checking at the 12-minute mark.
Step 5: Rest and Serve Immediately
Transfer the crispy sweet potato fries to a wire rack set over a baking sheet. This prevents steam from accumulating underneath, which would make them soggy. Let them rest for 2-3 minutes—just enough time to allow the structure to set while still serving them piping hot.
Sprinkle with additional fine sea salt if desired and serve immediately. The contrast between the crispy, spiced exterior and the creamy, sweet interior is most pronounced when served fresh from the oven. These fries pair exceptionally well with cool dipping sauces to balance their warmth and spice.
Troubleshooting Great sweet potato fries
Soggy Fries Fix
If your fries turn out soft instead of crispy, the most common culprit is excess moisture. After soaking, I triple-check that they’re completely dry by pressing between paper towels. Another trick: spread them on the baking sheet and let them air-dry for 10 minutes before baking. This extra step makes all the difference. 💡
Overcrowding the pan also causes sogginess. Leave at least ½ inch between fries for proper air circulation. If needed, use two baking sheets and rotate them halfway through cooking. I learned this the hard way after my first few soggy batches!
Uneven Browning
When some fries brown perfectly while others stay pale, it’s usually due to inconsistent cutting. Use a mandoline slicer or take extra time to cut ¼-inch uniform sticks. I recommend measuring your first few cuts to establish a reference point.
Another cause is uneven oven heat. Rotate your baking sheet 180 degrees when flipping the fries. For stubborn hot spots, try baking on the middle rack and avoid using convection unless your oven has excellent heat distribution.
Burnt Edges
Dark brown or blackened edges typically mean the oven temperature is too high. Always use an oven thermometer to verify your oven’s accuracy—many run 25-50°F hotter than their setting. I keep a ThermoWorks Dot in my oven for this exact reason.
If you’re using convection, reduce the temperature by 25°F and monitor closely. The high-heat finish should be just that—a finish, not the primary cooking method. Watch carefully during those final 12-15 minutes at 425°F.
Sticking Problems
Fries that stick to the pan usually need better preparation. Always use parchment paper (not wax paper) and lightly spray it with avocado oil before arranging the fries. I’ve found that Reynolds Parchment works best for even browning without sticking.
If you’re using a dark-colored baking sheet, reduce the oven temperature by 10°F as these absorb more heat. Let the fries cool for 1-2 minutes on the sheet before transferring—they’ll release more easily once they’ve set slightly.
Seasoning Issues
If the seasoning seems too strong or weak, it’s likely uneven distribution. Toss the fries in the spice mixture in two batches for better coverage. I use a large stainless steel bowl and my hands to ensure every fry gets coated evenly.
For more intense flavor, add ½ tsp more smoked paprika or a pinch of ground cumin. If you’ve accidentally over-seasoned, a light sprinkle of cornstarch before the final bake can help balance the flavors without diluting them. 🌶️
Cold Centers
When fries look done but have raw centers, they need more time at the initial 400°F stage. Extend the first bake by 5-7 minutes before increasing the heat. The two-step process is crucial—rushing the high-heat phase leads to this exact problem.
Cut a test fry to check doneness. It should yield slightly to pressure but not feel hard. Remember that sweet potatoes continue cooking slightly after removal from the oven, so pull them just before they reach perfect doneness. This takes practice to master!
Nutrition Facts
Frequently Asked Questions
Why soak the sweet potatoes before baking?
Soaking removes excess starch from the surface, which is the secret to achieving maximum crispiness. Without this step, the released starch would create a gummy texture during baking. The 30-minute soak in cold water makes all the difference in final texture.
Can I make these in an air fryer instead?
Use the same preparation method, then cook at 375°F for 12-15 minutes, shaking the basket halfway. The air fryer’s circulation creates excellent crispiness with less oil. You may need to work in batches to avoid overcrowding.
What’s the best way to cut uniform fries?
For consistent cooking, aim for ¼-inch thick sticks. Use a sharp chef’s knife and cut the sweet potato into planks first, then stack and slice into sticks. A mandoline with a ¼-inch setting makes this process foolproof.
How do I keep them crispy after baking?
Transfer to a wire rack immediately after baking to prevent steam buildup. Serve within 10 minutes for peak crispiness. If needed, revive in a 400°F oven for 3-5 minutes before serving. Avoid covering or stacking the fries.

- 8 Bean Soup Recipe Crock Pot: Hearty Vegetable Medley in One Pot - September 25, 2026
- 4C Bread Crumbs Meatballs Recipe: Crispy Crust and Juicy Centers - September 25, 2026
- 6 Oz Chocolate Chip Cookie Recipe: Perfectly Balanced Crispy Edges and Chewy Hearts - September 25, 2026