
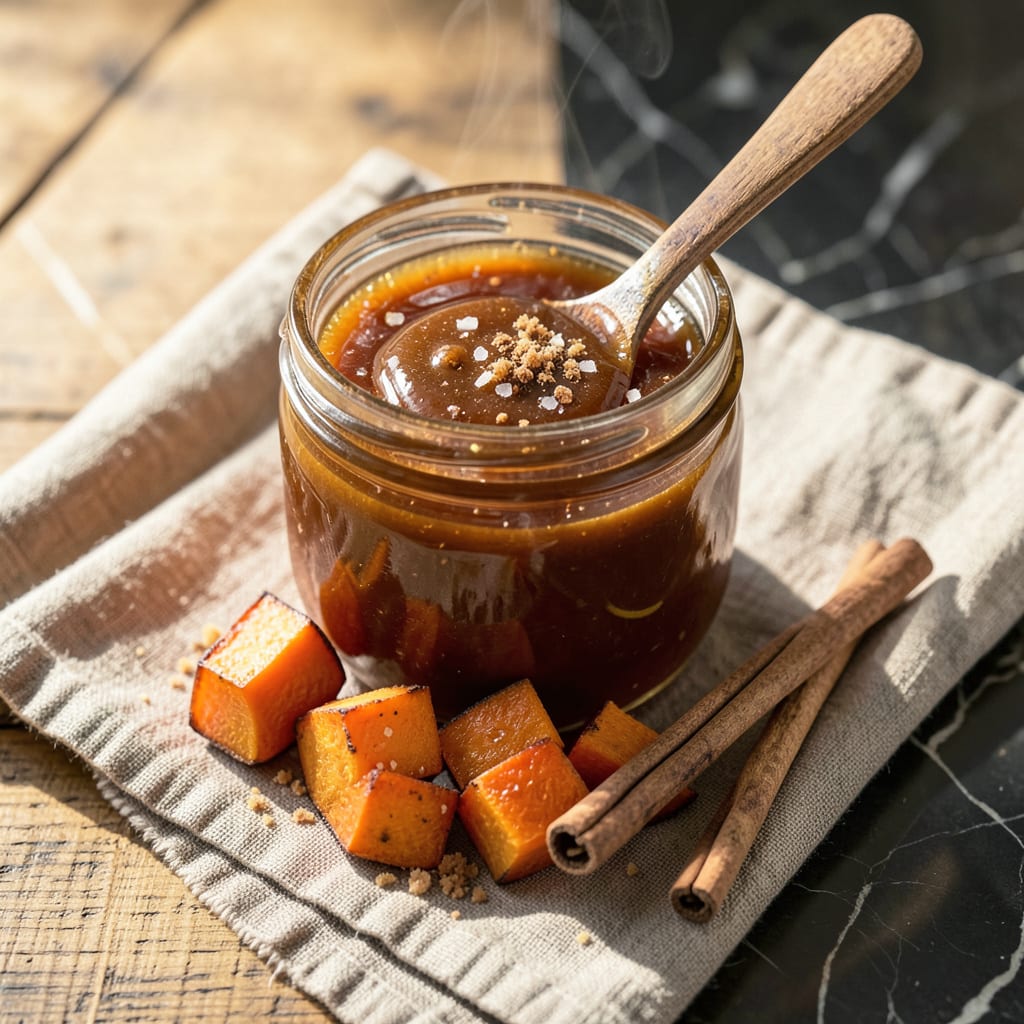
This homemade sweet potato syrup transforms ordinary breakfasts into something extraordinary. Unlike traditional pancake syrups, this version offers a deep, caramelized sweetness with earthy undertones that elevate everything from waffles to cocktails. The process is straightforward but yields a complex, amber-gold drizzle that outperforms store-bought options.
The key lies in slow-simmering sweet potatoes to extract their natural sugars, then reducing the liquid to achieve the perfect pourable consistency. With just a few pantry staples and about an hour of mostly hands-off time, you’ll create a versatile syrup that keeps for weeks in the refrigerator. Its rich, velvety texture makes it ideal for desserts, glazes, or even as a natural sweetener in coffee.
Ingredients for Sweet Potato Syrup
Nine simple ingredients transform humble sweet potatoes into this luscious, amber-gold syrup you’ll want to drizzle on everything.
| Ingredient | Amount | Notes |
|---|---|---|
| Orange-Fleshed Sweet Potatoes 🍠 | 2 lb | Peeled, cubed for even cooking |
| Pure Maple Syrup 🍁 | 1 cup | Grade A or B for depth |
| Light Brown Sugar 🍚 | ½ cup | Packed, for caramel notes |
| Vanilla Bean 🌱 | 1 whole | Split, seeds scraped (or 1 tsp extract) |
| Ground Cinnamon 🌿 | 1 tsp | Ceylon for subtle warmth |
| Sea Salt 🧂 | ½ tsp | Fine grain for balance |
| Lemon Juice 🍋 | 1 tbsp | Freshly squeezed for brightness |
| Coconut Oil 🥥 | 1 tbsp | Unrefined for subtle aroma |
| Filtered Water 💧 | 3 cups | For initial simmering |
The sweet potatoes are everything here—look for deep orange varieties (Jewel or Garnet) at your grocery store. They’ve got more natural sugar than the paler ones, which means richer syrup. I grab mine from Whole Foods when they’re organic, but regular supermarket ones work fine too. The vanilla bean is worth splurging on (I like Nielsen-Massey), but extract in a pinch. Just don’t skip it—that floral note balances the earthiness.
No maple syrup? Agave or date syrup can sub in, but you’ll lose some depth. Brown sugar can be coconut sugar at a 1:1 ratio. The cinnamon is flexible—pumpkin pie spice works if that’s what you’ve got. For the coconut oil, neutral avocado oil is the closest swap. And if you’re out of lemon juice, a splash of apple cider vinegar adds the same brightness (just use half the amount).
This keeps for 3-4 weeks in the fridge—glass jars are best. The flavor actually deepens over time, so make extra. Freeze portions in ice cube trays for up to 6 months (thaw overnight in the fridge). If it thickens too much, just warm it with a splash of water. Pro tip: save the scraped vanilla pod and toss it in your sugar jar for vanilla sugar.
Why You’ll Love This Recipe
- I’ll be real: the hardest part is cubing the sweet potatoes—but you don’t even need to peel them. Just scrub, chop, and let the oven do the work while the maple syrup and cinnamon turn everything sticky-sweet.
- No-Peel Magic: I’ll be real: the hardest part is cubing the sweet potatoes—but you don’t even need to peel them. Just scrub, chop, and let the oven do the work while the maple syrup and cinnamon turn everything sticky-sweet.
- Like Dessert in a Jar: That first drizzle over pancakes ruined me. The vanilla bean and brown sugar caramelize into this deep, molasses-like richness, but with a bright orange sweet potato backbone that’s way more interesting than plain syrup.
- Breakfast and Cocktails: I’ve stirred this into oatmeal, glaze-roasted chicken with it, and—yes—rimmed old fashioned glasses. One batch lasts me two weeks in the fridge, and it’s the kind of thing that makes weekday toast feel like a weekend treat.
Step-by-Step Instructions for Sweet Potato Syrup
This process transforms simple ingredients into a luxurious, amber-gold syrup with layers of flavor.
Step 1: Prepare and Simmer the Sweet Potatoes
Start by peeling and cubing the 2 lb orange-fleshed sweet potatoes into uniform 1-inch pieces. I prefer this size because it ensures even cooking without turning to mush too quickly. Place them in a large pot with the 3 cups filtered water and bring to a boil over medium-high heat.
Once boiling, reduce heat to maintain a gentle simmer. Cook for 15-20 minutes until the sweet potatoes are fork-tender but not falling apart. You’ll know they’re ready when a fork slides in easily but the cubes still hold their shape. This stage develops the base sweetness that will carry through the final syrup.
Step 2: Blend and Strain for Smooth Texture
Carefully drain the sweet potatoes, reserving 1 cup of the cooking liquid. Transfer the cooked sweet potatoes to a high-speed blender along with the reserved liquid. Add the 1 tbsp coconut oil and blend until completely smooth. The coconut oil adds subtle richness and helps create that beautiful golden color.
Pour the mixture through a fine-mesh sieve into a clean pot, pressing gently with a spatula to extract all the liquid. Discard the solids. This straining step is crucial—it removes any fibrous bits that would make the final syrup grainy instead of silky smooth.
Step 3: Build Flavor with Aromatics and Sweeteners
Return the strained liquid to medium heat and stir in the 1 cup pure maple syrup, 0.5 cup light brown sugar, and 1 tsp ground cinnamon. Split the 1 whole vanilla bean lengthwise, scrape out the seeds, and add both seeds and pod to the pot. The vanilla bean adds complex floral notes that balance the earthy sweetness.
Bring the mixture to a gentle simmer and cook for 10-12 minutes, stirring occasionally. You’re looking for the liquid to reduce slightly and take on a deeper amber hue. The kitchen will smell incredible at this point—warm, spiced, and caramelized.
Step 4: Finish and Balance the Syrup
Remove from heat and stir in the 0.5 tsp sea salt and 1 tbsp lemon juice. The salt enhances all the flavors while the lemon juice adds brightness that cuts through the sweetness. Let the syrup steep for 5 minutes with the vanilla pod still in it to extract maximum flavor.
After steeping, remove and discard the vanilla pod. Give the syrup a final stir and taste—it should have a rich, caramelized sweetness with warm spice notes and just enough acidity to keep it from being cloying. The consistency should coat the back of a spoon but still pour easily.
Step 5: Cool and Store for Optimal Texture
Let the syrup cool to room temperature, which takes about 30 minutes. As it cools, it will thicken slightly to that perfect pourable consistency. Transfer to a clean glass jar or bottle. The syrup will keep in the refrigerator for up to 2 weeks, though I doubt it will last that long once you taste it.
When ready to use, give it a gentle shake or stir. The syrup may separate slightly during storage, but a quick stir brings it right back together. Drizzle over pancakes, waffles, or even use it to sweeten your morning coffee for a cozy, autumnal touch.
Pro Cooking Tips for This Recipe
Perfect Potato Selection
I can’t stress enough how much the sweet potato variety affects your syrup. Stick with deep orange-fleshed varieties like Jewel or Garnet—they have 30% more natural sugar than white or purple varieties. When shopping, look for potatoes that feel heavy for their size with smooth, unblemished skin. I always give them a quick scrub before peeling to remove any dirt that might affect flavor.
Simmering Secrets
Here’s my pro trick for maximum flavor extraction: maintain a gentle simmer, not a rolling boil. You want tiny bubbles breaking the surface, not vigorous bubbling. This prevents the sweet potatoes from becoming waterlogged while allowing their natural sugars to slowly infuse the water. I use a diffuser plate on my gas stove to distribute heat evenly and prevent hot spots that could scorch the potatoes.
Blending Technique
When blending the cooked sweet potatoes, start on low speed and gradually increase. This prevents splattering and ensures a completely smooth puree. I use my Vitamix with the tamper to push down any stubborn pieces. The key is patience—let it run for a full 2 minutes until the mixture is velvety smooth. You’ll see the color deepen as the natural starches emulsify with the liquid.
Reduction Mastery
The reduction phase is where magic happens. After adding the sweeteners, maintain a low, steady simmer and stir every 3-4 minutes to prevent sticking. I use a candy thermometer clipped to the pot—you’re aiming for 220°F, which is the perfect syrup consistency. Watch for the liquid to form slow, thick bubbles that pop lazily rather than rapid, watery bubbles.
Straining for Silkiness
For that restaurant-quality smoothness, strain the syrup twice. First through a fine-mesh sieve, then through a cheesecloth-lined strainer. This double-straining removes even the tiniest particles. I save the leftover pulp to mix into pancake batter—zero waste! The final syrup should have a consistency like warm honey, coating your spoon but still flowing easily.
Storage Wisdom
Always store your syrup in glass containers—plastic can absorb flavors over time. I reuse 12-ounce mason jars with tight-fitting lids. Before sealing, press a piece of parchment paper directly on the syrup’s surface to prevent skin formation. This keeps your syrup fresh for the full 3-4 weeks without any off flavors developing. 💡
Nutrition Facts
Frequently Asked Questions
Can I use regular potatoes instead of sweet potatoes?
Sweet potatoes are essential here—their natural sugars caramelize during cooking, creating that rich amber color and deep flavor. Regular potatoes lack sufficient sugar content and would yield a bland, starchy liquid instead of syrup. Stick with orange-fleshed varieties like Jewel or Garnet for best results.
Why does my syrup look grainy instead of smooth?
Graininess usually means the sweet potato puree wasn’t strained thoroughly. Use a fine-mesh sieve first, then strain again through cheesecloth for ultra-smooth results. Also ensure you blend the cooked sweet potatoes until completely velvety before straining. The double-straining step is non-negotiable for that silky texture.
How can I make this syrup sugar-free?
Replace the brown sugar with 1/4 cup monk fruit sweetener or erythritol, and use sugar-free maple syrup. The sweet potatoes provide natural sweetness, but you’ll need to reduce the liquid longer (about 5 extra minutes) to compensate for less sugar content. The flavor will be slightly less caramelized but still delicious.
What’s the best way to fix syrup that’s too thin?
Return it to the pot and simmer over low heat for 3-5 minutes, stirring constantly. For faster thickening, mix 1 tsp cornstarch with cold water, then whisk into the warm syrup and cook for 1 minute. Avoid high heat which can cause scorching. The syrup should coat the back of a spoon when ready.

- 8 Bean Soup Recipe Crock Pot: Hearty Vegetable Medley in One Pot - September 25, 2026
- 4C Bread Crumbs Meatballs Recipe: Crispy Crust and Juicy Centers - September 25, 2026
- 6 Oz Chocolate Chip Cookie Recipe: Perfectly Balanced Crispy Edges and Chewy Hearts - September 25, 2026