
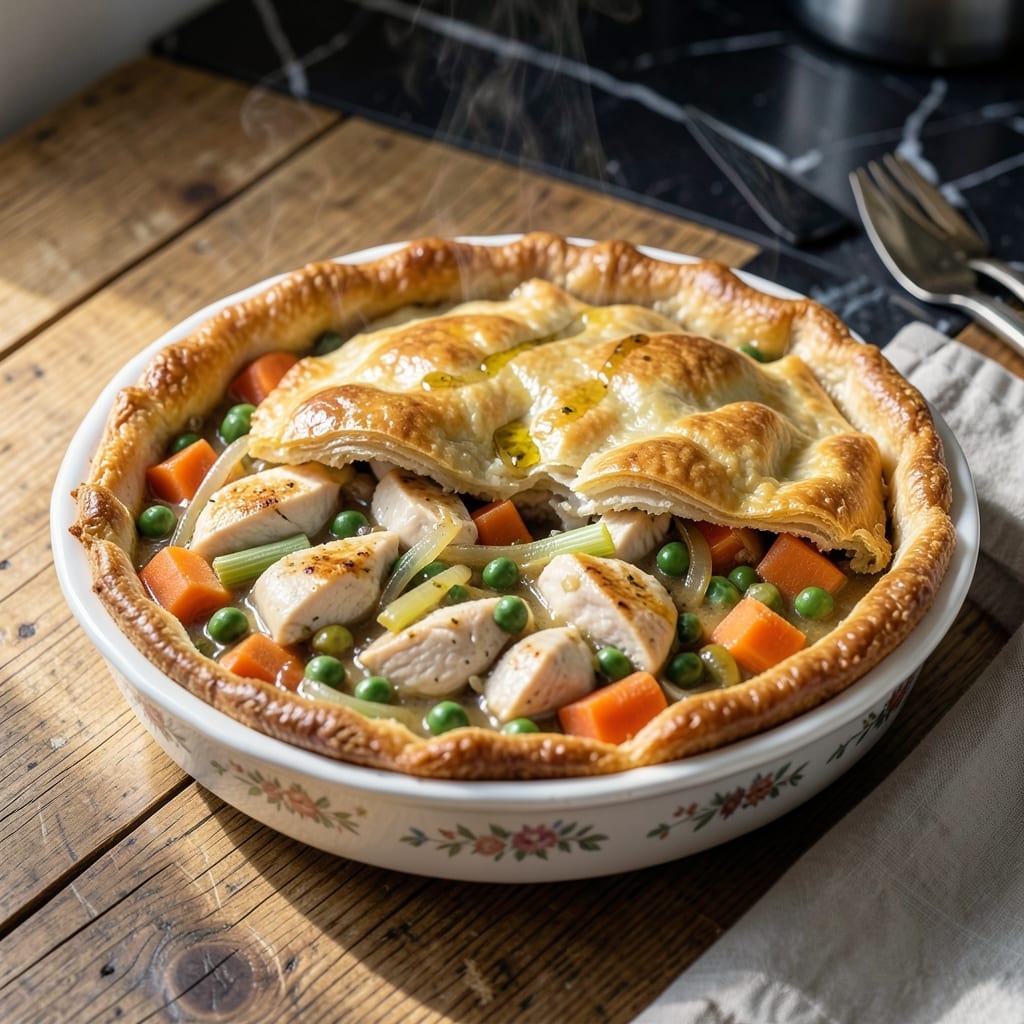
There’s a reason pot pie remains a classic comfort food—its buttery crust and hearty filling satisfy every time. This version delivers the perfect balance of flaky pastry and rich, savory filling that’s both homey and impressive.
The secret lies in building layers of flavor. A well-seasoned filling with tender vegetables and succulent protein pairs beautifully with a golden, buttery crust. Each bite offers that ideal contrast of textures we all crave.
What sets this apart is the attention to detail. The crust stays crisp while the filling remains thick and flavorful, never watery. It’s the kind of dish that makes weeknight dinners feel special.
Serve it fresh from the oven for maximum impact. The aroma alone will have everyone gathered around the table in anticipation.
Ingredients for Tasty Pot Pie
Pantry staples and fridge basics make this hearty dish come alive.
| Ingredient | Amount | Notes |
|---|---|---|
| Pie Crust 🥧 | 2 sheets | Store-bought or homemade, thawed |
| Chicken Breast 🍗 | 1 ½ lb | Boneless, skinless, cubed |
| Carrots 🥕 | 2 whole | Peeled and diced |
| Frozen Peas 🌱 | 1 cup | No need to thaw |
| Yellow Onion 🧅 | 1 whole | Medium, finely diced |
| Celery Stalks 🌿 | 2 whole | Diced for texture |
| Garlic Cloves 🧄 | 3 cloves | Minced for depth |
| Butter 🧈 | ½ cup | Unsalted, for sautéing and richness |
| All-Purpose Flour 🌾 | ⅓ cup | For thickening the filling |
| Chicken Broth 🥣 | 1 ½ cups | Low-sodium for control |
| Heavy Cream 🥛 | ½ cup | For creamy filling |
| Salt 🧂 | 1 tsp | Kosher or sea salt |
| Black Pepper 🌶️ | ½ tsp | Freshly ground preferred |
| Dried Thyme 🍃 | 1 tsp | For earthy aroma |
| Large Egg 🥚 | 1 whole | For egg wash on crust |
The crust is non-negotiable here. Pillsbury pie crust from the dairy aisle works in a pinch, but if you’ve got time, homemade with cold butter is unbeatable—flaky layers every time. For the chicken, thighs stay juicier than breasts, but either works. Grab pre-cut veggies from the salad bar if you’re short on time (no shame). Just avoid pre-shredded carrots—they lose texture.
No chicken? Turkey or rotisserie chicken swaps in easily. Vegetarian? Mushrooms or chickpeas add heartiness. Short on cream? Whole milk plus a splash of cornstarch thickens it up. For herbs, fresh thyme is great, but dried at half the amount works too. Chicken broth can be veggie broth if that’s what you’ve got open.
The filling thickens as it cools. Leftovers keep 3-4 days in the fridge, reheat covered. Freeze unbaked pies for 2 months—just add 10 minutes to bake time. Pro tip: slice before freezing for easy portions.
Why You’ll Love This Recipe
- One Pan Wonder: I just dump everything into the crust, fold it shut, and the oven does the rest—no fancy techniques.
- Creamy & Crisp: The chicken and peas soak up the rich filling while the crust stays flaky on top.
- Feeds a Crowd: Between us, I’ve served this for Sunday dinner and weeknight rush with equal success.
- Leftovers for Days: Honestly, it tastes even better the next day, and it freezes like a dream.
Step-by-Step Instructions for Buttery Pot Pie
This method ensures a flaky crust and rich filling that comes together beautifully.
Step 1: Sauté the Aromatics and Chicken
Heat a large skillet over medium heat and melt the 0.5 cup Butter. Add the diced yellow onion, carrots, and celery stalks, cooking for 5-6 minutes until softened. You’ll know they’re ready when the onions turn translucent and the carrots start to soften slightly.
Stir in the minced 3 cloves garlic cloves and cook for 30 seconds until fragrant—don’t let it brown. Add the cubed 1.5 lb Chicken Breast and cook for 6-7 minutes until the pieces are no longer pink and are just cooked through.
Step 2: Create the Creamy Filling Base
Sprinkle the 0.33 cup All-Purpose Flour over the chicken and vegetables, stirring to coat everything evenly. Cook for 1-2 minutes to remove the raw flour taste. This step is crucial—it thickens the filling and prevents a pasty texture.
Slowly pour in the 1.5 cups Chicken Broth, stirring constantly to avoid lumps. Add the 1 cup Frozen Peas, 1 tsp Salt, 0.5 tsp Black Pepper, and 1 tsp Dried Thyme. Bring to a simmer and cook for 5 minutes until the mixture thickens and coats the back of a spoon.
Reduce the heat to low and stir in the 0.5 cup Heavy Cream. Let it simmer for another 2-3 minutes until the filling is rich and velvety. Taste and adjust seasoning if needed.
Step 3: Assemble and Seal the Pot Pie
Preheat your oven to 375°F. Transfer the chicken and vegetable filling to a 9-inch pie dish or similar baking dish. The filling should be slightly domed in the center—this helps the crust bake evenly.
Unfold the 2 sheets Pie Crust and place one sheet over the filling. Trim any excess dough and crimp the edges to seal. Cut a few small slits in the top crust to allow steam to escape. This prevents the crust from getting soggy underneath.
Step 4: Bake to Golden Perfection
Whisk the 1 whole Large Egg with a splash of water to create an egg wash. Brush it evenly over the top crust—this gives it that gorgeous golden-brown finish. Place the pie dish on a baking sheet to catch any drips.
Bake for 30-35 minutes until the crust is deep golden brown and the filling is bubbling beneath. If the crust browns too quickly, tent it loosely with foil. Let it rest for 10 minutes before serving to allow the filling to set slightly.
Pro Tips For Making Tasty Pot Pie
- Pre-cook the Chicken: Poach the chicken breast in salted water for 12-15 minutes before dicing—this keeps it moist and prevents dry, stringy meat in the filling.
- Thaw the Peas: Rinse frozen peas under cold water for 30 seconds to thaw slightly before adding, so they cook evenly without turning mushy.
- Vent the Crust: Cut 3-4 small slits in the top crust before baking to let steam escape—I learned this the hard way after my first pot pie exploded in the oven.
- Sweat the Onions: Cook the yellow onions in butter for at least 5 minutes until soft and translucent; raw onions will make the filling taste harsh.
Essential Equipment for This Recipe
Pie Dish Essentials
A 9-inch glass pie dish is my top choice—it distributes heat evenly and lets you monitor the bottom crust. I swear by Pyrex for its durability. Avoid metal pans unless they’re dark-colored, which can cause over-browning. 💡
Skillet Selection
Use a 12-inch skillet with high sides for the filling. I prefer stainless steel like All-Clad for even heat and easy deglazing. A heavy-bottomed pan prevents hot spots that can burn your butter. Nonstick works too but won’t develop as much fond.
Rolling Tools
For homemade crust, a French rolling pin gives you better control than handled versions. Dust your surface with ¼ cup flour to prevent sticking. A pastry mat with measurements helps achieve an even ⅛-inch thickness. 📏
Crust Cutting
A sharp paring knife or pastry wheel makes clean edges when trimming excess dough. I use OXO’s Good Grips paring knife—it’s affordable and stays sharp. For decorative edges, a fork works perfectly for crimping.
Baking Setup
Always place your pie dish on a baking sheet to catch drips. A half-sheet pan from Nordic Ware fits most home ovens. This prevents messy oven cleanup and makes transferring the hot dish easier.
Finishing Touches
A pastry brush is essential for that egg wash. I keep a dedicated silicone brush just for baking. For venting, a small pairing knife or fork works to cut steam slits in the top crust.
Nutrition Facts
Frequently Asked Questions
Can I use frozen vegetables instead of fresh?
Yes! Use 1.5 cups of mixed frozen veggies. There’s no need to thaw them first—just add them straight to the filling.
How do I prevent a soggy bottom crust?
Pre-bake the bottom crust for 8-10 minutes before adding filling. Also, ensure your filling is thick and not watery before assembling the pie.
Can I make this ahead of time?
Assemble the pie without baking, then refrigerate for up to 24 hours. Add 5-10 minutes to the baking time if chilled.
What can I substitute for heavy cream?
Whole milk with 1 tablespoon cornstarch works well. For a richer option, use half-and-half or evaporated milk in the same amount.

- 4C Bread Crumbs Meatballs Recipe: Crispy Crust and Juicy Centers - September 25, 2026
- 6 Oz Chocolate Chip Cookie Recipe: Perfectly Balanced Crispy Edges and Chewy Hearts - September 25, 2026
- 6-Inch Coffee Cake Recipe: Vanilla Bean Swirls and Buttery Streusel Topping - September 25, 2026