
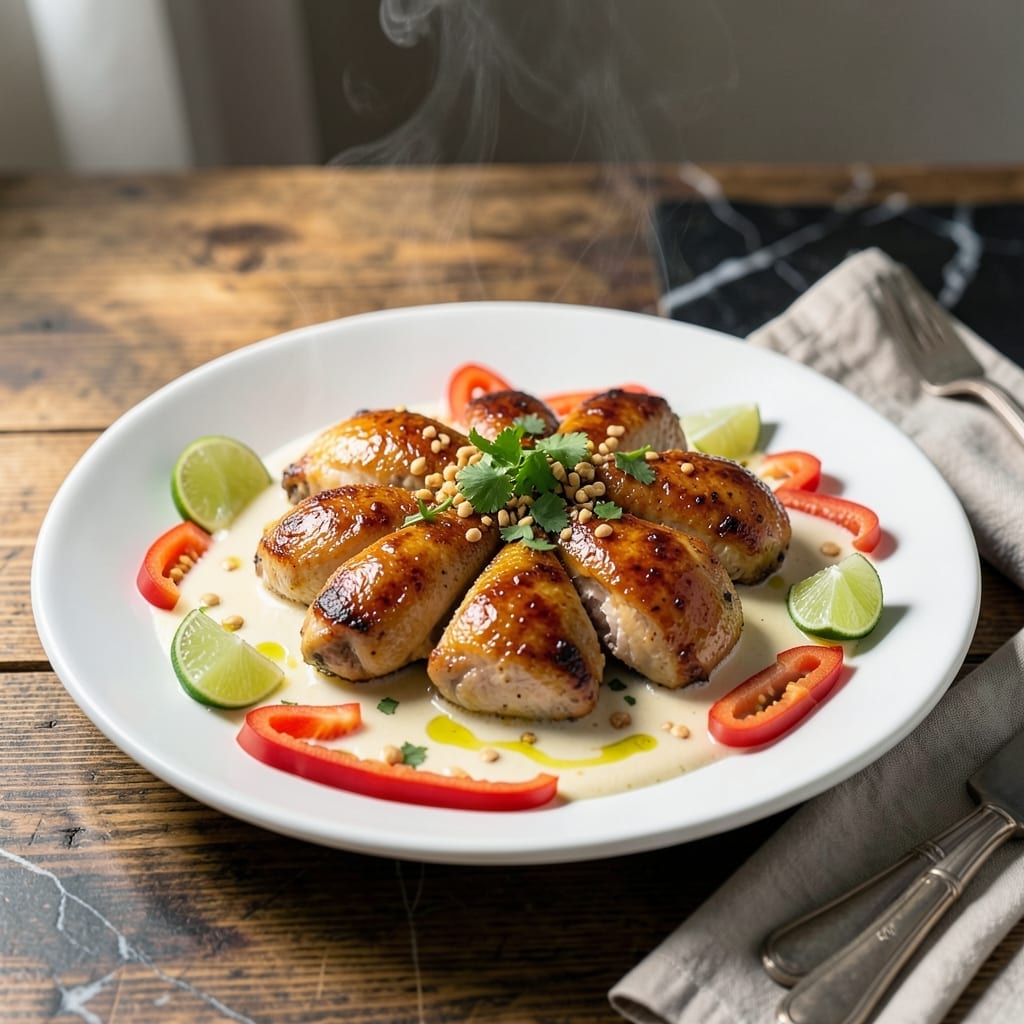
This Instant Pot Thai chicken delivers restaurant-quality coconut curry in 20 minutes. The pressure cooker infuses every bite with aromatic flavors that normally take hours to develop.
I’ve refined this method to balance the richness of coconut milk with bright lime and fresh herbs. The chicken stays tender while absorbing the complex Thai-inspired spices and sauces.
You’ll end up with a creamy, fragrant curry that’s packed with vegetables and ready to serve over steamed rice. The flavors are bold yet perfectly balanced, with no compromise on authenticity.
This dish proves that weeknight dinners can be both quick and deeply satisfying. Here’s how to make it at home.
Ingredients for Thai Chicken Instant Pot
Pantry staples plus fresh herbs and veggies. Nothing exotic, just bold Thai flavors.
| Ingredient | Amount | Notes |
|---|---|---|
| Boneless Skinless Chicken Thighs 🍗 | 1 ½ lb | Cut into bite-sized pieces |
| Coconut Milk 🥥 | 1 can | Full-fat for creaminess |
| Red Curry Paste 🌶️ | 3 tbsp | Thai-style, check for shrimp-free |
| Fish Sauce 🐟 | 2 tbsp | Or soy sauce for vegetarian |
| Brown Sugar 🍚 | 1 tbsp | Light or dark variety |
| Lime Juice 🍋 | 2 tbsp | Freshly squeezed preferred |
| Fresh Ginger 🌿 | 1 tbsp | Minced or grated finely |
| Garlic Cloves 🧄 | 4 cloves | Minced for maximum flavor |
| Red Bell Pepper 🌶️ | 1 whole | Sliced into thin strips |
| Carrot 🥕 | 1 whole | Peeled and sliced thin |
| Fresh Basil Leaves 🌿 | ½ cup | Thai basil if available |
| Fresh Cilantro 🌿 | ¼ cup | Chopped for garnish |
| Chicken Broth 🍲 | ½ cup | Low-sodium preferred |
| Cornstarch 🌾 | 1 tbsp | For thickening curry |
| Olive Oil 🫒 | 1 tbsp | For sautéing aromatics |
The chicken thighs are key here—boneless, skinless stay tender under pressure. Costco has great bulk packs, or grab a family pack from the supermarket. For the curry paste, Maesri or Thai Kitchen are solid grocery store options. Coconut milk needs to be full-fat (light won’t give that creamy texture). I always keep a few cans in the pantry for curries like this.
No fish sauce? Soy sauce or tamari work fine (skip the salt if using these). Fresh ginger and garlic are non-negotiable for that authentic Thai punch—powdered just doesn’t cut it. For veggies, snap peas or zucchini can stand in for the bell pepper. The basil can be regular if you can’t find Thai, but the flavor changes slightly (still delicious though).
Leftovers keep 4-5 days in the fridge, but the flavors meld even better overnight. Freezes for 3 months—portion before freezing for easy grab-and-go meals. Reheat gently to keep the coconut milk from separating.
Why You’ll Love This Recipe
- Set and Forget: I dump everything in the Instant Pot—chicken, coconut milk, curry paste—and walk away while it works its magic.
- Creamy Heat: The red curry paste and coconut milk blend into this rich, slightly sweet sauce that coats the chicken just right.
- Meal Prep Hero: I make a double batch and it reheats beautifully for lunches all week. Yes, even the rice soaks up the flavor better the next day.
- Budget Stretcher: Boneless thighs stay juicy and cost half what breasts do, and a single can of coconut milk feeds my family of four.
Step-by-Step Instructions for Thai Chicken Instant Pot Coconut Curry
Here’s the method. Straightforward, tested, works every time.
Step 1: Sauté the Aromatics
Set your Instant Pot to Sauté mode and add the 1 tbsp Olive Oil. Once hot, add the 1 tbsp Fresh Ginger and 4 cloves Garlic Cloves, stirring constantly for 30 seconds until fragrant. Be careful not to let them burn.
Next, add the 3 tbsp Red Curry Paste and cook for another 1 minute, stirring frequently. This step deepens the curry flavor and removes any raw taste from the paste. You’ll notice the paste darken slightly and the aroma intensify.
Step 2: Build the Curry Base
Pour in the 1 can Coconut Milk, 2 tbsp Fish Sauce, 1 tbsp Brown Sugar, and 0.5 cup Chicken Broth. Stir well to combine, scraping up any browned bits from the bottom of the pot. These bits add incredible depth to the sauce.
Add the 1.5 lb Boneless Skinless Chicken Thighs, 1 whole Red Bell Pepper (sliced into thin strips), and 1 whole Carrot (peeled and sliced thin). Stir everything together, ensuring the chicken is submerged in the liquid as much as possible.
Step 3: Pressure Cook to Perfection
Secure the lid on your Instant Pot and set the valve to Sealing. Cook on High Pressure for 8 minutes. The pot will take about 10 minutes to come to pressure before the cooking time begins.
Once the cooking time is complete, let the pressure release naturally for 5 minutes, then carefully switch the valve to Venting to release any remaining pressure. This natural release helps prevent the chicken from becoming tough.
Step 4: Thicken and Finish the Curry
In a small bowl, mix the 1 tbsp Cornstarch with 2 tablespoons of cold water until smooth. Set the Instant Pot back to Sauté mode and stir in the cornstarch mixture. Cook for 2-3 minutes, stirring constantly, until the sauce thickens enough to coat the back of a spoon.
Turn off the Instant Pot and stir in the 2 tbsp Lime Juice. Taste and adjust seasoning if needed. The lime juice should brighten the flavors, so don’t skip it.
Step 5: Garnish and Serve
Stir in the 0.5 cup Fresh Basil Leaves and let them wilt in the hot curry for about 1 minute. This adds a fresh, aromatic finish to the dish.
Ladle the curry into bowls and garnish with the 0.25 cup Fresh Cilantro. Serve immediately over steamed rice or with crusty bread to soak up the delicious sauce. The basil and cilantro add a pop of color and freshness that balances the rich, creamy curry perfectly.
Pro Tips For Making Thai Chicken Instant Pot
- Sear the Thighs: Brown the chicken thighs in the Instant Pot first using the sauté function—about 3-4 minutes per side. This builds a deep flavor base that simmers into the coconut milk.
- Bloom the Paste: Cook the red curry paste in the pot for 1-2 minutes after the chicken is removed to wake up its aromatics before adding liquids. I learned this the hard way—raw paste tastes harsh.
- Skip the Overcrowding: Don’t dump all the chicken in at once if your pot is small. Work in batches to sear properly, or the meat will steam instead of brown.
- Use Full-Fat Coconut Milk: The light stuff separates and lacks richness. Full-fat coconut milk gives that creamy, velvety sauce that clings to the chicken. Sounds obvious, but it actually changes the outcome.
Essential Equipment for thai chicken instant pot
Instant Pot Must-Haves
Your 6-quart Instant Pot is the star here—I use my Duo Crisp model for its reliable pressure control. Any 7-in-1 or 9-in-1 model works perfectly for this recipe. Ensure your sealing ring is clean and properly seated before starting. 💡
Wooden Spoon
A wooden spoon is essential for scraping the bottom during sautéing. It won’t scratch your pot’s non-stick coating like metal utensils might. I keep one dedicated to my Instant Pot to avoid cross-contamination with other dishes.
Measuring Tools
Precise measurements matter in Thai cooking. I rely on my OXO Good Grips measuring spoons and cups for the curry paste, fish sauce, and cornstarch. A small bowl for mixing the cornstarch slurry is also helpful.
Cutting Board & Knife
A sharp 8-inch chef’s knife makes quick work of the chicken, veggies, and herbs. I use a bamboo cutting board to prep all ingredients before starting the Instant Pot—this keeps the process smooth and organized.
Citrus Juicer
For the lime juice, a hand-held citrus reamer ensures you get every last drop. Fresh lime juice makes a noticeable difference in brightness compared to bottled. I always have a few extra limes on hand for garnish.
Serving Essentials
Have serving bowls and steamed rice ready before the curry finishes. The flavors meld best when served immediately, so I set the table while the Instant Pot does its magic. ✨
Nutrition Facts
Frequently Asked Questions
Can I use chicken breast instead of thighs?
Yes, but reduce pressure time to 6 minutes to prevent dryness. Thighs stay juicier, but breasts work in a pinch.
What if my sauce is too thin?
Mix 1 tbsp cornstarch with 2 tbsp cold water and stir in while on Sauté mode. It thickens in 2-3 minutes.
Can I add other vegetables?
Try zucchini or snap peas. Add them with the peppers to ensure even cooking.
How do I store leftovers?
Keep in an airtight container for 4-5 days in the fridge or freeze for 3 months.

- 4C Bread Crumbs Meatballs Recipe: Crispy Crust and Juicy Centers - September 25, 2026
- 6 Oz Chocolate Chip Cookie Recipe: Perfectly Balanced Crispy Edges and Chewy Hearts - September 25, 2026
- 6-Inch Coffee Cake Recipe: Vanilla Bean Swirls and Buttery Streusel Topping - September 25, 2026