
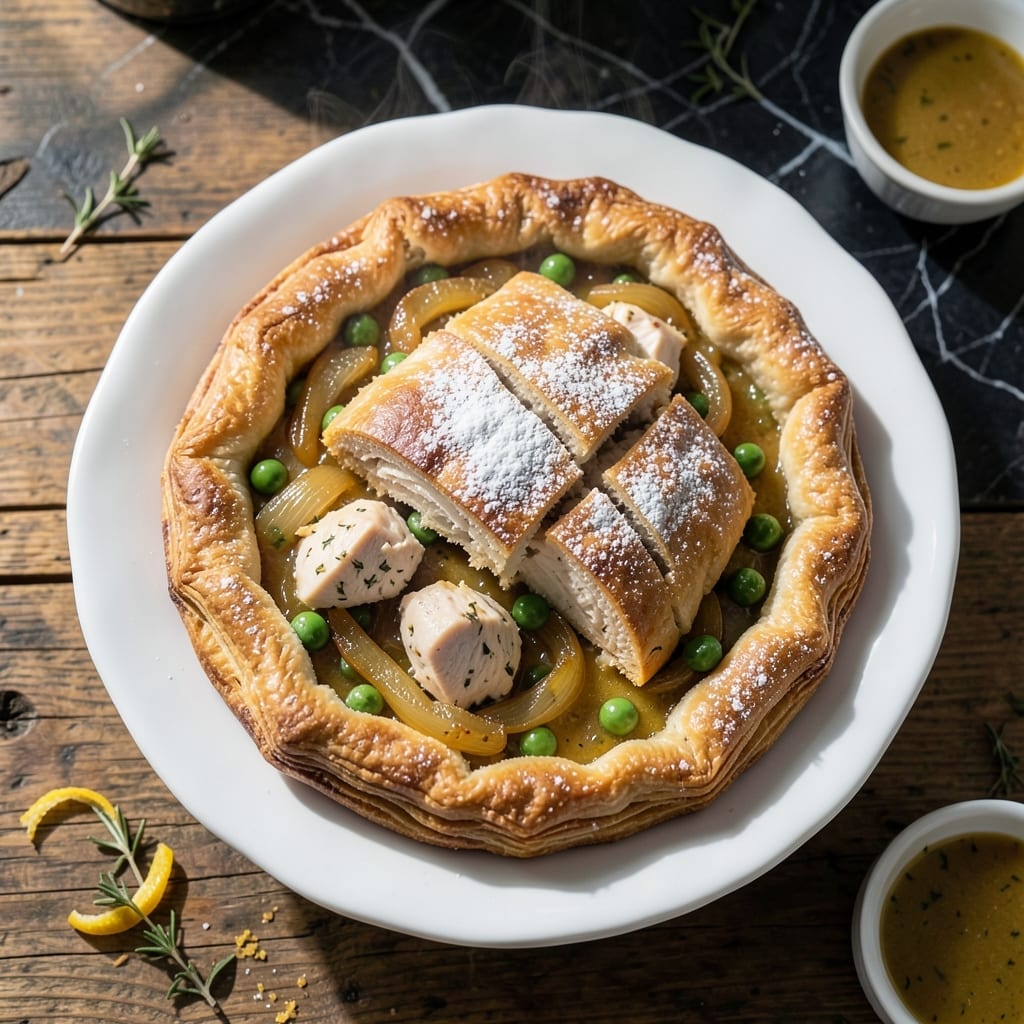
There’s a reason chicken pot pie remains a timeless comfort classic. This version delivers a flaky, buttery crust enveloping a rich, creamy filling packed with tender chicken and fresh vegetables.
The filling comes together with a simple roux-based sauce that thickens beautifully as it bakes. I use a mix of carrots, peas, and potatoes for texture, but the real magic happens with a splash of cream for extra richness.
Baking at 375°F ensures the crust turns golden brown while the filling bubbles to perfection. The aroma alone will have everyone gathering in the kitchen, waiting for that first warm bite.
Serve it straight from the oven with a side of green salad for the ultimate comfort meal. This is home cooking at its finest.
Ingredients for The Kitchen Chicken Pot Pie
Flaky crust meets creamy filling with these classic comfort ingredients.
| Ingredient | Amount | Notes |
|---|---|---|
| All-Purpose Flour 🌾 | 3 cups | Divided for crust and filling |
| Unsalted Butter 🧈 | 1 ½ cups | Cold, cubed for crust |
| Ice Water 💧 | ½ cup | For pie crust dough |
| Salt 🧂 | 1 ½ tsp | Divided for crust and filling |
| Boneless Chicken Breast 🍗 | 1 ½ lb | Diced into bite-sized pieces |
| Yellow Onion 🧅 | 1 whole | Medium, finely diced |
| Carrots 🥕 | 2 whole | Medium, peeled and diced |
| Russet Potatoes 🥔 | 2 whole | Medium, peeled and diced |
| Frozen Green Peas 🌱 | 1 cup | No need to thaw |
| Garlic Cloves 🧄 | 3 cloves | Minced for filling |
| Chicken Broth 🥣 | 2 cups | Low-sodium preferred |
| Heavy Cream 🥛 | ½ cup | Full-fat for richness |
| Fresh Thyme 🌿 | 2 tsp | Chopped, or 1 tsp dried |
| Black Pepper 🌶️ | ½ tsp | Freshly ground preferred |
The butter makes the crust here. Land O’Lakes or Kerrygold unsalted are my go-tos, but any good brand works—just keep it cold. For the flour, King Arthur all-purpose is my standard (the good stuff, not the pre-sifted kind). The chicken? Boneless, skinless breasts stay tender, but thighs work if you prefer. Grab them fresh from the meat counter if you can.
No fresh thyme? Dried at half the amount works fine. Swap the peas for corn or green beans if that’s what’s in the freezer. Heavy cream can be half-and-half in a pinch—just thicken the filling a bit longer. For a richer taste, whole milk with a splash of cream gets you close. The potatoes? Russets hold their shape, but Yukon Golds add a nice buttery flavor (worth the extra minute).
The crust dough can chill overnight—actually improves the texture. Baked pie keeps 3-4 days in the fridge, reheats beautifully. Freeze portions for up to 3 months (thaw in the fridge before reheating).
Why You’ll Love This Recipe
- I’ll be real: I always double the batch so I can stash one pie for those no-time-to-cook nights.
- One Bowl Wonder: I love that the flaky crust comes together in the same bowl I use for the filling—less cleanup, more flavor.
- Buttery Crust Perfection: That all-purpose flour and cold butter combo creates the most tender, golden layers I’ve ever pulled from my oven.
- Feeds the Freezer: I’ll be real: I always double the batch so I can stash one pie for those no-time-to-cook nights.
Step-by-Step Instructions for Chicken Pot Pie
Here’s the method I use for foolproof results every single time.
Step 1: Prepare the Flaky Pie Crust
In a large bowl, combine 3 cups all-purpose flour and 1.5 tsp salt. Add 1.5 cups cold unsalted butter that’s been cubed into small pieces. I work the butter into the flour with my fingers until the mixture looks like coarse crumbs with some pea-sized butter pieces visible.
Gradually drizzle in 0.5 cup ice water while gently mixing with a fork. Add just enough water so the dough starts to come together. This should take about 2-3 tablespoons at a time. The dough will look shaggy, but that’s perfect—it ensures a flaky texture.
Divide the dough into two portions, flatten into discs, wrap in plastic, and refrigerate for 1 hour. This chilling step is crucial—it relaxes the gluten and prevents the crust from shrinking during baking.
Step 2: Cook the Chicken and Vegetable Filling
In a large pot, sauté 1 whole yellow onion (finely diced) in a bit of the reserved butter fat until soft and translucent, about 5 minutes. Add 2 carrots and 2 russet potatoes (both peeled and diced) and cook for another 5 minutes until they begin to soften.
Stir in 3 cloves garlic cloves (minced) and 2 tsp fresh thyme, cooking for 30 seconds until fragrant. Add 1.5 lb boneless chicken breast (diced into bite-sized pieces) and cook until the chicken is no longer pink, about 6-8 minutes.
Sprinkle the remaining salt and 0.5 tsp black pepper over the mixture, then pour in 2 cups chicken broth and 0.5 cup heavy cream. Simmer for 10 minutes until the sauce thickens slightly. Stir in 1 cup frozen green peas and remove from heat.
Step 3: Assemble and Bake the Pot Pie
On a lightly floured surface, roll out one disc of dough to fit a 9-inch pie dish. Transfer the filling into the crust-lined dish. Roll out the second disc of dough and place it over the filling. Trim and crimp the edges to seal.
Cut a few small slits in the top crust to allow steam to escape during baking. I like to brush the top with a bit of beaten egg (optional) for extra shine, but it’s delicious without it too. Place the pie on a baking sheet to catch any drips.
Bake at 375°F for 45-50 minutes, until the crust is golden brown and the filling is bubbling. If the edges start browning too quickly, cover them with foil.
Step 4: Rest and Serve
Let the pie rest for 10-15 minutes after removing it from the oven. This allows the filling to set slightly, making it easier to slice. The crust should be crisp and flaky, with a rich, creamy filling packed with tender chicken and vegetables.
Serve warm with a side of fresh greens or a simple salad. Each serving should have a perfect balance of buttery crust and hearty filling, with the peas adding a pop of color and sweetness.
Pro Tips For Making The Kitchen Chicken Pot Pie
- Chill the Dough: After mixing the flour, butter, and ice water, let the dough rest in the fridge for at least 30 minutes—this keeps the butter from melting too soon and guarantees a flaky crust.
- Cut Even Chicken: Slice the boneless chicken breast into uniform, bite-sized pieces so they cook at the same rate and no one gets a dry, overdone bite.
- Don’t Overmix: Once you add the ice water to the flour and butter, stop mixing as soon as the dough comes together—overworking it makes the crust tough, not tender.
- Use Cold Butter: Keep your unsalted butter ice-cold when cutting it into the flour; it creates those perfect little pockets that turn into flaky layers when baked.
Health Benefits of This Dish
Protein Powerhouse
This dish packs a serious protein punch with 1.5 lb of boneless chicken breast, delivering about 50g of protein per serving. Protein is essential for muscle repair and growth, keeping you full and energized. I love how hearty it feels without being heavy. 💪
Vitamin-Rich Vegetables
The mix of carrots, potatoes, and peas brings a spectrum of vitamins to your plate. Carrots provide vitamin A for eye health, while peas add vitamin K and fiber. Potatoes contribute potassium and vitamin C, making this a balanced meal.
Healthy Fats
The unsalted butter in the crust and heavy cream in the filling provide healthy fats that help your body absorb fat-soluble vitamins like A, D, E, and K. These fats also add richness and satisfaction to the dish, making it more enjoyable.
Comfort Without Guilt
While it’s undeniably indulgent, this creation offers nutrients that support overall health. The chicken broth adds hydration and minerals, while the thyme and garlic provide antioxidants. It’s comfort food that nourishes your body too. 💛
Energy Boost
The combination of protein, healthy fats, and complex carbs from the all-purpose flour crust gives you sustained energy. This meal is perfect for fueling a busy day or recovering after a workout. I always feel satisfied and energized after enjoying a slice.
Nutrition Facts
Frequently Asked Questions
Can I make the crust ahead of time?
Yes! The dough can be prepared and chilled for up to 2 days or frozen for 1 month. Just thaw overnight in the fridge before using. This actually improves the texture.
What if my filling is too runny?
Simmer it for an extra 5-10 minutes to thicken. If it’s still loose, mix 1 tablespoon cornstarch with 1 tablespoon cold water and stir into the filling before baking.
Can I use store-bought crust?
Use 2 store-bought pie crusts to save time. Thaw if frozen, then roll and assemble as directed. The filling is so flavorful, it’ll still shine.
How do I prevent a soggy bottom crust?
Blind-bake the bottom crust for 10 minutes before adding the filling. Also, ensure your filling is slightly cooled before assembling to avoid steam.

- 6 Oz Chocolate Chip Cookie Recipe: Perfectly Balanced Crispy Edges and Chewy Hearts - September 25, 2026
- 6-Inch Coffee Cake Recipe: Vanilla Bean Swirls and Buttery Streusel Topping - September 25, 2026
- 1 Hour Soup Recipe: Velvety Richness Without the Wait - September 25, 2026