
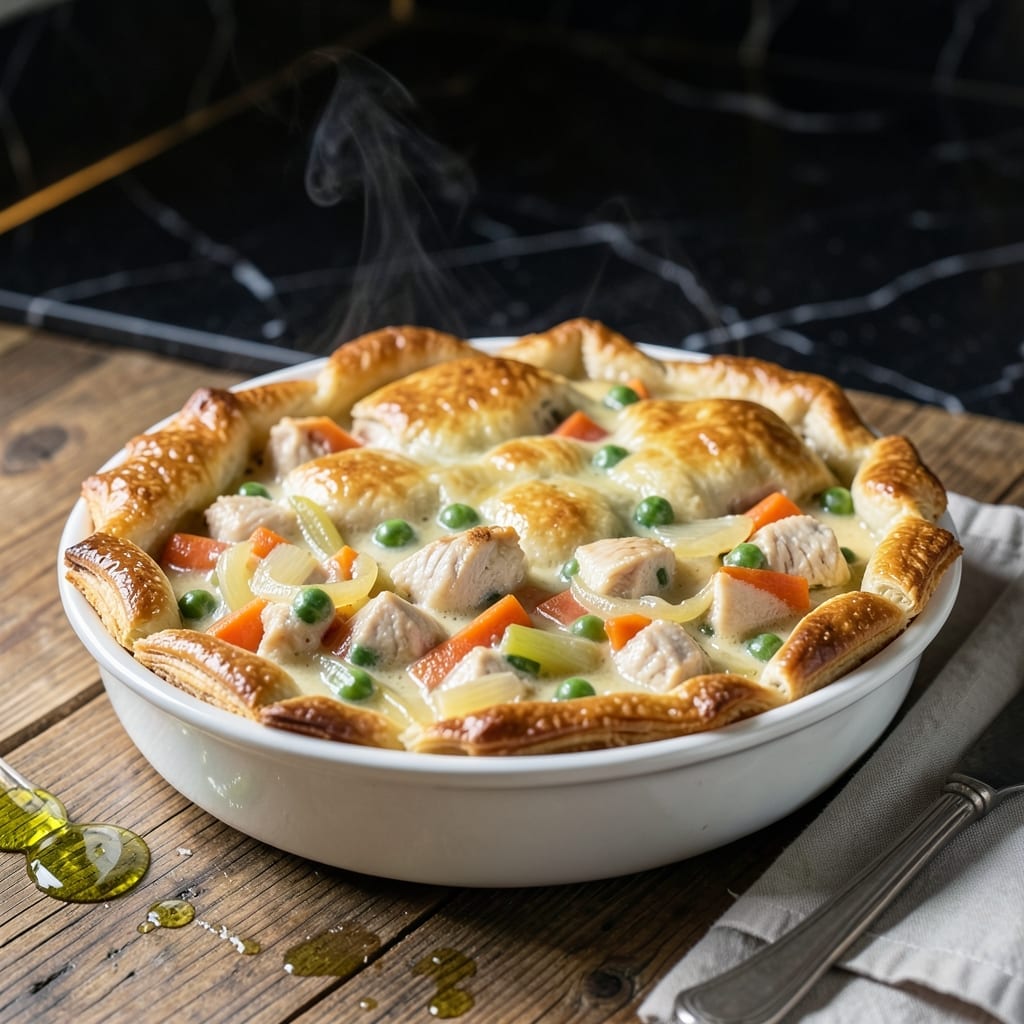
There’s nothing quite like a homemade pot pie to bring warmth and comfort to the dinner table. This recipe delivers tender chicken and vegetables wrapped in a flaky crust that’s golden and crisp.
I’ve refined this method over time to ensure the filling is rich and creamy while the crust stays perfectly layered. The secret is in the balance—just enough sauce to coat without making the pastry soggy.
What you’ll get is a dish that feels like a hug in food form. The aroma alone as it bakes will have everyone gathering in the kitchen.
Serve it fresh from the oven for the ultimate homemade experience. Here’s how to make it.
Ingredients for The Kitchen Pot Pie
Homemade warmth starts with these tender ingredients for a golden, flaky finish.
| Ingredient | Amount | Notes |
|---|---|---|
| Chicken Breast 🍗 | 1 ½ lb | Boneless, skinless, cubed |
| Carrots 🥕 | 2 whole | Peeled, diced |
| Celery Stalks 🥬 | 2 whole | Diced, including leaves |
| Yellow Onion 🧅 | 1 whole | Medium, finely diced |
| Frozen Peas 🌱 | 1 cup | No need to thaw |
| Unsalted Butter 🧈 | ½ cup | For roux and crust |
| All-Purpose Flour 🌾 | ½ cup | For roux and thickening |
| Chicken Broth 💧 | 2 cups | Low-sodium preferred |
| Heavy Cream 🥛 | ¾ cup | Full-fat for creaminess |
| Pie Crust 🥧 | 2 sheets | Store-bought or homemade |
| Garlic Cloves 🧄 | 2 cloves | Minced for depth |
| Fresh Thyme 🌿 | 1 tbsp | Chopped, or 1 tsp dried |
| Salt 🧂 | 1 tsp | Kosher or sea salt |
| Black Pepper 🌶️ | ½ tsp | Freshly ground preferred |
| Large Egg 🥚 | 1 whole | For egg wash on crust |
The chicken should be fresh and high-quality—Costco or Whole Foods have reliable options. For the crust, look for all-butter pie dough in the refrigerated section (I like Pillsbury in a pinch). Fresh thyme can be found at most grocery stores, but dried works at one-third the amount. The vegetables should be firm and bright, not wilted or soft.
No chicken? Turkey breast is an easy swap. Swap the peas for green beans or corn if preferred. Heavy cream can be replaced with half-and-half for a lighter version. If you don’t have fresh thyme, dried oregano works well. For a vegetarian twist, use mushrooms or tofu and vegetable broth instead of chicken.
Store raw chicken in the coldest part of the fridge and use within 2 days. The pie crust can be kept in the fridge for up to 1 week or frozen for 3 months. Leftovers keep well for 4 days in an airtight container—reheat in the oven to crisp the crust.
Why You’ll Love This Recipe
- One Pot Magic: I toss everything—chicken, carrots, celery, onion—into a single skillet, then top with puff pastry. Minimal cleanup, maximum flavor.
- That Golden Crust: The buttery pastry bakes to a perfect flaky top, while the creamy chicken and veggie filling stays rich and satisfying.
- Freezer to Table: I make a double batch, freeze one, and have dinner ready for those crazy nights. Honestly, it reheats like a dream.
- Stretches the Budget: Chicken breast and frozen peas keep costs low, but it tastes like a restaurant meal. My wallet and my family both approve.
Step-by-Step Instructions for Homemade Pot Pie
Follow this method precisely for a golden, flaky crust and rich, creamy filling that defines comfort food.
Step 1: Sauté Vegetables and Chicken for Depth
Heat 2 tablespoons of the unsalted butter in a large skillet over medium-high heat. Add the diced carrots, celery stalks, and yellow onion. Cook for 5-6 minutes until the vegetables begin to soften and the onion turns translucent.
Add the cubed chicken breast and cook for 6-7 minutes until it’s no longer pink. Stir in the minced garlic cloves and chopped fresh thyme, cooking for 1 minute until fragrant. Season with salt and black pepper to build the flavor base.
Step 2: Create a Rich Roux for the Filling
Reduce heat to medium and add the remaining unsalted butter to the skillet. Once melted, whisk in the all-purpose flour to form a smooth paste. Cook for 1-2 minutes, stirring constantly, until the mixture turns a light golden brown.
Gradually pour in the chicken broth, whisking continuously to prevent lumps. Stir in the heavy cream and add the frozen peas—no need to thaw them first. Simmer for 3-4 minutes until the filling thickens to a creamy consistency that coats the back of a spoon.
Step 3: Assemble and Seal the Pot Pie
Preheat your oven to 375°F. Line a 9-inch pie dish with 1 sheet of pie crust, pressing it gently into the bottom and sides. Pour the chicken and vegetable filling into the crust, spreading it evenly.
Top with the second sheet of pie crust, sealing the edges by crimping with a fork. Cut 3-4 slits in the top crust to allow steam to escape. This prevents the filling from becoming soggy.
Step 4: Bake to Golden Perfection
Whisk the large egg with 1 tablespoon of water to create an egg wash. Brush it evenly over the top crust for a glossy, golden-brown finish.
Bake for 35-40 minutes until the crust is deep golden brown and the filling is bubbling underneath. If the edges begin to brown too quickly, cover them with foil. Let it rest for 10 minutes before serving to set the filling.
Pro Tips For Making The Kitchen Pot Pie
- Sear the Chicken First: Brown the diced chicken breast in the pot before adding veggies—this locks in flavor and keeps the meat from turning rubbery in the filling.
- Cut Veggies Evenly: Dice the carrots, celery, and onion into uniform ¼-inch pieces so they cook at the same rate and every bite has balanced texture.
- Thicken Before Baking: Simmer the filling until it coats the back of a spoon—runny filling soaks the crust and makes a sad, soggy pie.
- Use Frozen Peas Last: Stir in the frozen peas at the very end, just before assembling, so they stay bright green and don’t turn to mushy gray blobs.
Common Mistakes When Making the kitchen pot pie
Soggy Crust
Avoid a wet bottom by pre-baking the crust for 8-10 minutes before adding filling. I also recommend brushing the bottom crust with a thin layer of beaten egg white to create a moisture barrier. This simple step makes all the difference. 💡
Thin Filling
If your sauce isn’t thick enough, it’ll soak the crust. Cook the roux until it’s a deep golden brown and simmer the filling for the full 3-4 minutes. You want it to coat the back of a spoon before adding it to the crust.
Overworking the Dough
Store-bought crust can get tough if handled too much. Press it gently into the dish without stretching. For homemade, chill the dough for at least 30 minutes before rolling to prevent shrinking during baking.
Skipping the Egg Wash
Don’t skip the egg wash—it’s what gives that beautiful golden-brown finish. Use 1 large egg whisked with 1 tablespoon water and brush it evenly over the top crust just before baking. This also helps the crust crisp up nicely.
Overfilling the Pie
Resist the urge to overfill. The pie dish should be about ¾ full to prevent spillage. If you have extra filling, bake it separately in a ramekin for a mini pot pie treat. 🥧
Not Venting the Crust
Always cut 3-4 slits in the top crust to allow steam to escape. Without this, the filling can become watery and the crust may puff up unevenly. I use a sharp knife to make clean cuts.
Nutrition Facts
Frequently Asked Questions
Can I make this ahead of time?
Yes! Assemble the pie and refrigerate for up to 1 day before baking. Add 5-10 minutes to the baking time if cold.
What if my crust burns before it’s done?
Cover the edges with foil if they brown too quickly. Bake until the center reaches 165°F and filling bubbles.
Can I use puff pastry instead of pie crust?
Puff pastry creates an extra-flaky top. Just follow the same assembly and baking instructions.
How do I know when it’s fully cooked?
The crust should be golden brown and filling bubbly. Check the center temperature with a thermometer for 165°F.

- 4C Bread Crumbs Meatballs Recipe: Crispy Crust and Juicy Centers - September 25, 2026
- 6 Oz Chocolate Chip Cookie Recipe: Perfectly Balanced Crispy Edges and Chewy Hearts - September 25, 2026
- 6-Inch Coffee Cake Recipe: Vanilla Bean Swirls and Buttery Streusel Topping - September 25, 2026