
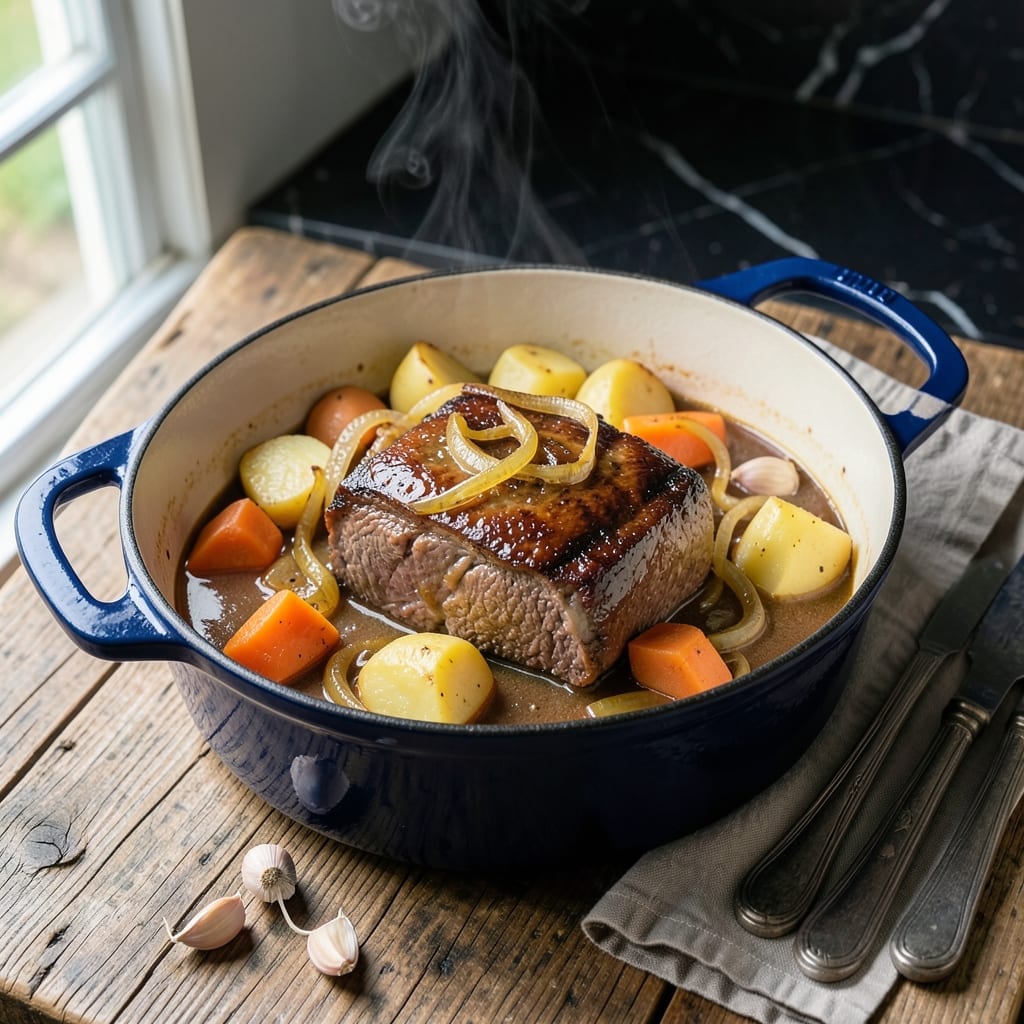
This Dutch oven pot roast delivers tender meat and rich, thick gravy that coats every bite. I’ve perfected the technique over years of weekend cooking, ensuring a meal that feels like a hug on a plate.
The secret lies in the slow braising process, where tough cuts transform into fall-apart tender beef. Searing first locks in flavor, while carrots and potatoes soak up the savory broth as they cook.
You’ll end up with a dish that’s hearty, comforting, and packed with depth. The gravy, naturally thickened by the vegetables and long cooking time, ties everything together beautifully.
Serve it straight from the pot for a meal that’s as satisfying to make as it is to eat.
Ingredients for Thick Pot Roast
Pantry staples plus a few fresh picks. Hearty, comforting, and ready for the Dutch oven.
| Ingredient | Amount | Notes |
|---|---|---|
| Chuck Roast 🥩 | 3 lb | Boneless, well-marbled preferred |
| Carrots 🥕 | 4 whole | Large, peeled and cut into chunks |
| Yukon Gold Potatoes 🥔 | 1 ½ lb | Peeled and quartered |
| Yellow Onion 🧅 | 1 whole | Large, roughly chopped |
| Garlic Cloves 🧄 | 4 cloves | Minced or smashed |
| Beef Broth 🥣 | 2 cups | Low-sodium preferred |
| Red Wine 🍷 | 1 cup | Dry variety like Cabernet |
| Tomato Paste 🍅 | 2 tbsp | For depth of flavor |
| Worcestershire Sauce 💧 | 2 tbsp | Adds umami richness |
| Fresh Thyme 🌿 | 3 slices | Sprigs, leaves stripped |
| Fresh Rosemary 🌿 | 2 slices | Sprigs, leaves stripped |
| Bay Leaves 🍃 | 2 whole | Dried, for aromatic depth |
| Olive Oil 🫒 | 2 tbsp | For searing the roast |
| Kosher Salt 🧂 | 2 tsp | Plus more to taste |
| Black Pepper 🌶️ | 1 tsp | Freshly ground preferred |
The beef is the star—chuck roast with good marbling is what you want. It’s the cut that turns buttery after hours of braising. I grab mine from Costco or Whole Foods when they’ve got grass-fed on sale. Don’t trim all the fat off; it melts into the gravy. Carrots and potatoes should be sturdy enough to hold up (Yukon Golds are perfect).
No red wine? Beef broth with a splash of balsamic works in a pinch. Swap Yukon Golds for russets if that’s what you’ve got (they’ll hold shape a little better). Fresh herbs are ideal, but dried thyme and rosemary at one-third the amount get the job done. The Worcestershire is worth it—don’t skip unless you’re avoiding gluten (then use coconut aminos).
This actually tastes better the next day. Keeps 4-5 days in the fridge, freezes for 3 months. I always make extra gravy—it’s the best part, honestly (worth the extra minute).
Why You’ll Love This Recipe
- Set It and Forget: I toss everything in one pot, cover it, and let the oven do the work.
- Garlic-Infused Comfort: The chuck roast soaks up the garlic and onion until it’s fall-apart tender with every bite.
- Feeds the Whole Crew: One thick pot roast and a pile of potatoes and carrots stretch to satisfy a hungry family.
- Leftovers for Days: Honestly, it tastes even better the next day in sandwiches or over mashed potatoes.
Step-by-Step Instructions for Dutch Oven Braised Chuck Roast
Here’s how I get fall-apart tender meat and rich, flavorful veggies every time.
Step 1: Sear the Chuck Roast Until Deeply Browned
Heat 2 tbsp olive oil in a Dutch oven over medium-high heat until shimmering. Pat the 3 lb chuck roast dry with paper towels and season generously with 2 tsp kosher salt and 1 tsp black pepper. This ensures a good crust and prevents steaming.
Place the roast in the pot and sear for 4-5 minutes per side until deeply browned. Don’t move it around—let it develop a rich, dark crust. You’ll know it’s ready to flip when it releases easily from the bottom. Transfer the roast to a plate and set aside.
Step 2: Sauté the Aromatics and Build the Braising Liquid
In the same pot, add the yellow onion, 4 whole carrots, and 4 cloves garlic. Sauté for 3-4 minutes until the onions soften and start to caramelize. Stir in 2 tbsp tomato paste and cook for 1 minute to deepen its flavor.
Pour in 1 cup red wine and 2 tbsp Worcestershire sauce, scraping up any browned bits from the bottom. Let it simmer for 2 minutes to reduce slightly. Add 2 cups beef broth, 3 slices fresh thyme, 2 slices fresh rosemary, and 2 bay leaves.
Step 3: Braise the Roast with Vegetables
Return the seared chuck roast to the Dutch oven, along with any accumulated juices. Add the 1.5 lb Yukon Gold potatoes around the meat, nestling them into the liquid. The potatoes should be mostly submerged to cook evenly.
Bring the liquid to a simmer, then cover the pot and transfer it to a 325°F oven. Braise for 2.5 to 3 hours, checking occasionally. The roast is done when it’s fork-tender and the carrots and potatoes are soft enough to pierce easily with a knife.
Step 4: Rest and Serve the Pot Roast
Carefully remove the Dutch oven from the oven and transfer the chuck roast to a cutting board. Tent it loosely with foil and let it rest for 15-20 minutes. This allows the juices to redistribute, so every bite stays moist and flavorful.
Skim any excess fat from the surface of the braising liquid, if desired. Serve the roast sliced or shredded, with the carrots, potatoes, and plenty of the rich, aromatic braising liquid spooned over the top. The veggies will have soaked up all the deep, savory flavors.
Pro Tips For Making Thick Pot Roast
- Sear the Chuck Hard: Get your Dutch oven screaming hot before adding the chuck roast—about 4-5 minutes on medium-high. I learned this the hard way after too many pale, flavorless roasts that lacked that deep crust.
- Cut Potatoes Big: Halve or quarter those Yukon Golds instead of cubing them. Smaller pieces turn to mush in the long cook, but big chunks hold their shape and soak up the braising liquid beautifully.
- Skip the Pre-Boil: Resist the urge to parboil your carrots or potatoes first. After burning a few batches, I finally figured out they absorb more flavor and stay firmer when they cook directly in the pot with the meat.
- Use a Meat Thermometer: Pull the roast at 195-200°F internal temp, not when it “looks done.” Sounds weird, but it works: the collagen breaks down perfectly at this range, and the meat stays moist even when sliced thick.
Pro Cooking Tips for Great thick pot roast
Perfect Searing Technique
Pat the 3 lb chuck roast completely dry with paper towels—this is non-negotiable for a good sear. Heat 2 tbsp olive oil in your Dutch oven until it shimmers but doesn’t smoke. The roast should sizzle loudly when it hits the pan.
Don’t Overcrowd the Pan
Sear the roast in batches if needed, but for a single 3 lb chuck, there should be plenty of room. Let it cook undisturbed for 4-5 minutes per side until it develops a deep, mahogany crust. Resist the urge to peek—this is where the flavor builds. 🔥
Layer Flavors in Stages
After removing the roast, sauté the onion, carrots, and garlic in the same pot. The browned bits (fond) left behind are packed with flavor. Deglaze with 1 cup red wine to lift every last bit into your braising liquid.
Low and Slow Wins
Braising at 325°F for 2.5-3 hours ensures the connective tissue breaks down without drying out the meat. Check the liquid level halfway through—if it’s low, add ½ cup beef broth to keep everything submerged.
Rest for Maximum Juiciness
Let the roast rest for 15-20 minutes before slicing. This step lets the juices redistribute, so you don’t end up with a dry first slice. I tent mine with foil to keep it warm.
Thicken the Gravy Naturally
If your braising liquid is thin, simmer it uncovered on the stovetop for 5-10 minutes while the meat rests. The potatoes will release starch, helping to thicken it further. No cornstarch needed!
Nutrition Facts
Frequently Asked Questions
What cut works best for tender results?
Chuck roast is ideal due to its marbling and connective tissue. These break down during the 2.5-3 hour braise, creating melt-in-your-mouth texture. Avoid lean cuts like eye of round.
Can I make this on the stovetop instead?
Yes! After searing, cover and simmer on low heat for the same 2.5-3 hours. Check occasionally to ensure liquid doesn’t evaporate too quickly.
How do I fix bland gravy?
Simmer the liquid uncovered for 5-10 minutes to concentrate flavors. Stir in a splash of Worcestershire sauce or a pinch of salt to boost depth.
Is it safe to leave it cooking while I’m out?
For safety, never leave the oven unattended for long periods. If needed, use a slow cooker on low for 8 hours instead. Always ensure your oven is in good working condition.

- 4C Bread Crumbs Meatballs Recipe: Crispy Crust and Juicy Centers - September 25, 2026
- 6 Oz Chocolate Chip Cookie Recipe: Perfectly Balanced Crispy Edges and Chewy Hearts - September 25, 2026
- 6-Inch Coffee Cake Recipe: Vanilla Bean Swirls and Buttery Streusel Topping - September 25, 2026