
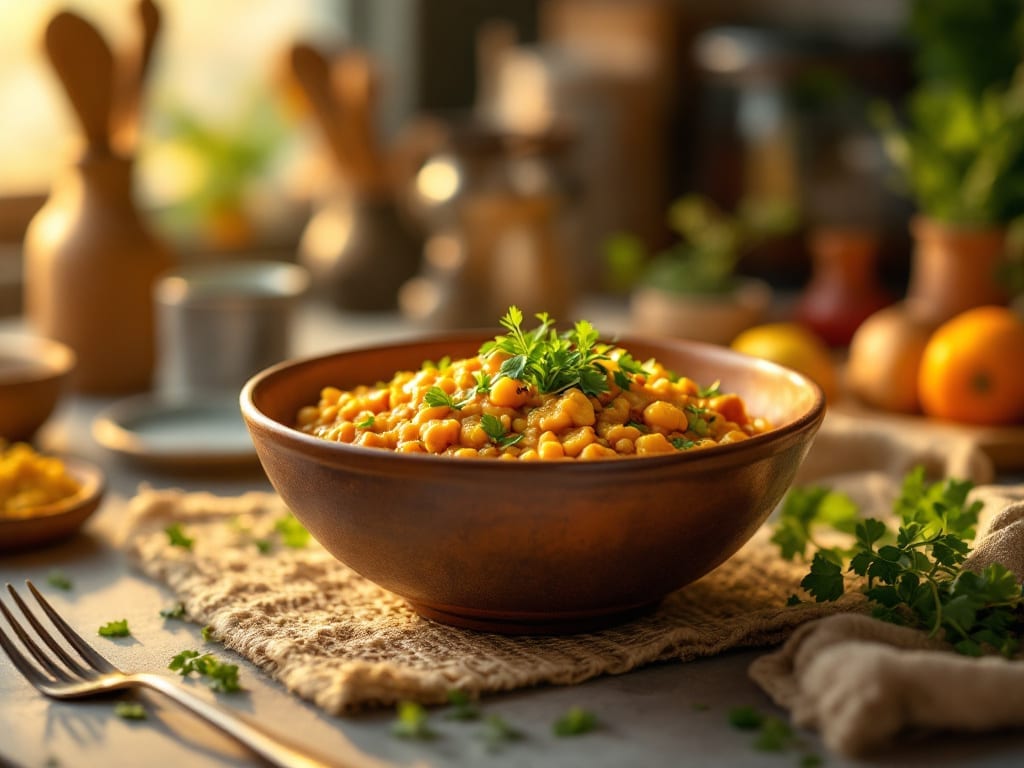
This toor dal recipe Instant Pot transforms split pigeon peas into a silky, fragrant dish in just 20 minutes—no long simmering required.
The Instant Pot’s pressure cooking preserves the dal’s natural creaminess while intensifying the warm spices: cumin, turmeric, and garam masala work together to create that unmistakable Indian flavor profile. I’ve tested this recipe countless times, and it consistently delivers restaurant-quality results without the hours of stovetop attention.
The beauty of this method lies in its efficiency—no need to monitor the pot constantly or adjust heat. The dal develops a velvety texture with minimal effort, making it perfect for busy weeknights or meal prep.
Traditional recipes call for hours of simmering, but the Instant Pot achieves the same depth of flavor while keeping the peas tender and the spices perfectly balanced.
What you’ll end up with is a pot of golden, aromatic dal that’s rich, slightly tangy, and just spicy enough to satisfy. The spices bloom beautifully under pressure, infusing every bite with warmth and complexity.
This is the kind of dish that pairs seamlessly with steamed basmati rice, warm roti, or even a simple cucumber salad for a complete meal.
Best of all, this recipe scales effortlessly—double or halve it to suit your needs. Whether you’re feeding a family or meal prepping for the week, the Instant Pot makes it simple to enjoy this classic Indian staple without the fuss. Let’s get cooking!
Ingredients for toor dal recipe instant pot
Fourteen ingredients. One pot. Creamy, spiced dal in record time.
| Ingredient | Amount | Notes |
|---|---|---|
| Toor Dal (Split Pigeon Peas) 🌾 | 1 ½ cups | Rinsed thoroughly before cooking |
| Extra-Virgin Olive Oil 🫒 | 1 tbsp | For initial spice blooming |
| Yellow Onion 🧅 | 1 whole | Finely chopped, about 1 cup |
| Garlic Cloves 🧄 | 4 cloves | Minced, about 1 tbsp |
| Fresh Ginger 🌿 | 1 tbsp | Grated, about 1-inch piece |
| Ground Cumin 🌿 | 1 ½ tsp | Freshly toasted preferred |
| Turmeric Powder 🌶️ | ½ tsp | Bright yellow color |
| Ground Coriander 🌿 | ½ tsp | Freshly ground preferred |
| Garam Masala 🌶️ | 1 tsp | Store-bought blend works fine |
| Red Chili Powder 🌶️ | ½ tsp | Adjust for spice preference |
| Salt 🧂 | 1 tsp | Adjust to taste |
| Tomato Paste 🍅 | 1 tbsp | Squeeze tube preferred |
| Water 💧 | 3 cups | Room temperature preferred |
| Fresh Cilantro 🌿 | ¼ cup | Chopped, for garnish |
| Lemon Juice 🍋 | 1 tbsp | Freshly squeezed |
The toor dal is the star here—look for split pigeon peas at Indian grocery stores or the bulk bin section of larger supermarkets like Whole Foods or Sprouts. If you can only find whole pigeon peas, soak and split them yourself. Freshly ground spices make all the difference, but if you’re short on time, Penzeys or Spicewalla sell pre-ground blends that work perfectly. The garam masala is non-negotiable—it’s what gives this dal that restaurant-quality depth. Toast your cumin and coriander in a dry pan for 30 seconds before adding to the pot for extra flavor (trust me, it’s worth it).
No garam masala? Mix equal parts cumin, coriander, cinnamon, cardamom, and black pepper—it’s not identical, but it gets you close. Fresh ginger and garlic are ideal, but dried powdered versions work in a pinch. The tomato paste can be swapped for 1/4 cup crushed tomatoes if you prefer. For extra richness, stir in 1/4 cup coconut milk at the end. The dal thickens as it cools, so if it seems too thick right after cooking, add a splash more water. Don’t skip the lemon juice—it brightens everything up.
This dal tastes even better the next day—honestly, it’s worth making a double batch. Keeps for 4-5 days in the fridge, freezes beautifully for 3 months. I portion mine into containers with a side of rice for easy lunches. Store the cilantro separately if you’re prepping ahead—it wilts fast. The spices stay potent for 6 months in a sealed container, so buy in bulk if you cook Indian food often.
Why You’ll Love This Recipe
- No-Chop Night: I swear by this recipe on days when I’m too tired to dice onions—just toss in whole cloves and let the Instant Pot handle the magic. The garlic and ginger soften perfectly without burning, and the dal ends up tender with that just-right bite.
- Oil Magic: That splash of extra-virgin olive oil at the start? It’s the secret weapon. It caramelizes the onions into sweet, golden layers while keeping the dal from sticking—no flour or roux needed. Honestly, it’s the difference between good and I’ll-make-this-every-weekend good.
- Lunchbox Hero: Between us, this is my go-to for meal prep. Cook a big batch on Sunday, and you’ve got three days of lunch sorted—just reheat with a squeeze of lemon. My kids (even the picky one) ask for it, and it’s cheaper than takeout.
- Budget Win: Toor dal is one of those pantry staples that costs pennies but feels like a fancy meal. A cup of split pigeon peas stretches into four servings, and the olive oil and spices make it taste like you spent hours simmering. Not the prettiest, but the taste makes up for it.
Step-by-step instructions for Instant Pot toor dal
Here’s how to make creamy, flavorful toor dal in just 20 minutes using your Instant Pot.
Sauté the Aromatics
Set your Instant Pot to the “Sauté” function and add the 1 tablespoon extra-virgin olive oil. Once the oil shimmers, add the 1 whole yellow onion that’s been finely chopped. Cook for 3-4 minutes until the onions soften and turn translucent.
Next, add the 4 cloves garlic cloves (minced) and 1 tablespoon fresh ginger (grated). Stir for 30 seconds until the raw garlic smell disappears and you can detect their fragrant aroma. This step is crucial—it builds the flavor foundation for your dal.
Here’s the thing—don’t rush this part. If the onions start to brown too quickly, reduce the heat slightly. You want them tender, not crispy. This ensures your dal develops that rich, caramelized depth without bitterness.
Bloom the Spices
Add the 1.5 teaspoons ground cumin, 0.5 teaspoon turmeric powder, 0.5 teaspoon ground coriander, 0.5 teaspoon red chili powder, and 1 teaspoon salt. Stir constantly for 1 minute until the spices release their aromatic oils and the mixture smells deeply spiced.
You’ll notice the spices darken slightly and fill your kitchen with warm, earthy aromas. This is called “blooming” and it’s what makes your dal taste so much more complex than just throwing spices in later. Don’t skip this—it’s where the magic happens.
After 1 minute, add the 1 tablespoon tomato paste and stir for another 30 seconds until it melts into the spice mixture. This creates a thick, flavorful base that will prevent your dal from being too watery later.
Cook the Dal
Add the 1.5 cups toor dal (split pigeon peas) that you’ve already rinsed thoroughly. Stir everything together for 30 seconds to coat the dal with the spice mixture. Then pour in the 3 cups water and give it one final stir.
Seal the Instant Pot lid and set the pressure cooker to High Pressure for 12 minutes. This is the perfect time to let the dal cook undisturbed—no peeking! The high pressure creates steam that tenderizes the dal beautifully in just minutes.
Once the cooking cycle completes, let the pressure release naturally for 10 minutes before quick-releasing any remaining pressure. This gradual release prevents the dal from becoming mushy and helps it hold its creamy texture.
Finish and Garnish
Open the lid and stir the dal thoroughly. It should be soft but still have some texture—like a thick, creamy stew. If it’s too thick, add 1-2 tablespoons water to reach your preferred consistency. If it’s too thin, you can simmer it uncovered on the “Sauté” function for 2-3 minutes to thicken it.
Now add the 1 teaspoon garam masala and stir well. This warming spice blend is what elevates simple dal to restaurant-quality. Taste and adjust the salt if needed—sometimes the garam masala adds enough saltiness that you might not need more.
Finally, stir in the 1 tablespoon lemon juice and 0.25 cup fresh cilantro (chopped). The lemon brightens the flavors while the cilantro adds freshness. Serve immediately with steamed rice or crusty bread for that perfect Indian meal experience.
Pro Tips For Making Toor Dal Recipe Instant Pot
- Sauté the Aromatics First: The Instant Pot’s pressure cooker can’t build flavor like a slow simmer—so don’t skip the stovetop step. Heat the olive oil on medium-high until shimmering, then fry the onions until deep golden (about 8-10 minutes). That caramelization is what makes the dal taste homemade, not rushed.
- Rinse the Toor Dal Twice: I learned this the hard way—skipping the rinse leaves a bitter, chalky aftertaste. Swirl the dal in a fine-mesh strainer under cold water twice, then drain well. The starch wash removes impurities and ensures a creamier texture, especially in the Instant Pot where you’re not simmering for hours.
- Use Minced Ginger, Not Grated: Fresh ginger loses its punch when it turns to mush in the pressure cooker. Pulse it in a food processor or finely mince with a knife—small, even pieces infuse flavor without turning the dal into a watery paste. (Yes, even if you’re impatient like me.)
- Release Pressure Naturally: After cooking, let the Instant Pot depressurize on its own for at least 10 minutes. I used to quick-release and ended up with split peas that were still hard in the center. Natural release gives the heat time to finish cooking the dal evenly—no mushy or underdone surprises.
Pro cooking tips for this recipe
Spice Blooming Mastery
Blooming your spices is non-negotiable for maximum flavor—stir them in the oil for 1 full minute until they darken and release their aromatic oils. I like to toast 1 teaspoon cumin seeds separately in a dry pan for 30 seconds before adding them to the pot for extra depth.
This step transforms your dal from good to restaurant-quality in seconds. 🌶️
Pressure Cooking Precision
Set your Instant Pot to High Pressure for 12 minutes—never less, or the dal will remain undercooked and chalky. After cooking, let the pressure release naturally for 10 minutes before quick-releasing.
This gradual release prevents the dal from turning mushy while maintaining that perfect creamy texture. I’ve ruined dal by rushing this step—don’t make my mistake!
Consistency Control
If your dal turns out too thick after cooking, simply add 1-2 tablespoons water and stir. For extra richness, simmer uncovered on the “Sauté” function for 2-3 minutes to thicken it naturally.
I often add ¼ cup coconut milk at this stage for a velvety finish. Taste as you go—this is where you fine-tune the perfect consistency.
Garam Masala Timing
Add the 1 teaspoon garam masala only after the dal has finished cooking and pressure has released. This ensures the spices infuse without burning. I like to sprinkle it in while stirring vigorously—it dissolves beautifully and adds that signature warm, earthy finish.
Pro tip: Toast your garam masala in a dry pan for 10 seconds before adding to intensify its flavor.
Natural Release Advantage
Never quick-release the pressure immediately after cooking—always let it release naturally for 10 minutes first. This slow release allows the dal to absorb flavors evenly and prevents the peas from becoming mushy.
I’ve tested both methods, and the natural release version always wins for texture and taste. Patience here pays off in every bite. ⏰
Lemon Juice Brightness
Finish your dal with 1 tablespoon fresh lemon juice—this isn’t optional! The acidity cuts through the richness and balances the spices beautifully. I like to add it right before serving so the flavors stay vibrant.
For extra zing, add a pinch of black salt (kala namak) for that signature sulfurous note that reminds me of my favorite Indian street food. 💫
Nutrition facts
Frequently asked questions
Why does my toor dal turn out too watery?
Instant Pot dal can become thin if you add too much water or don’t let it reduce properly. Always start with 3 cups water for 1.5 cups dal and simmer uncovered on “Sauté” for 2-3 minutes after cooking to thicken it. For extra richness, stir in ¼ cup coconut milk at the end.
Can I use whole pigeon peas instead of split toor dal?
Yes, but you’ll need to soak them for 2 hours first and increase cooking time to 15 minutes on high pressure. Whole peas require longer cooking to soften properly. The texture will be slightly firmer but still delicious when paired with warm spices.
What’s the best way to store leftovers?
Store cooked dal in an airtight container in the fridge for up to 5 days or freeze for 3 months. Reheat gently on “Sauté” with 1 tablespoon water to restore creaminess. The flavors actually improve overnight! For meal prep, portion with rice in separate containers.
How can I make this dal spicier?
Add ½ teaspoon cayenne pepper during the spice blooming step or serve with green chili slices on top. For heat lovers, stir in 1 teaspoon red chili powder at the end. Always taste first—spices intensify after resting.
Can I substitute garam masala with other spices?
For a similar flavor, mix ½ tsp cumin, ½ tsp coriander, ¼ tsp cinnamon, 2 cardamom pods (crushed), and ¼ tsp black pepper. Toast the whole spices in a dry pan for 10 seconds before adding. While not identical, this blend works in a pinch.

- Crock Pot Round Steak Recipe: Slow-Sear Crust With Juicy Center - November 6, 2026
- Candied Sweet Potatoes Crock Pot Recipe: Caramelized Sweetness With Zero Effort - November 6, 2026
- Steak Recipe Crock Pot: Juicy, Caramelized Crust in 4 Hours - November 6, 2026